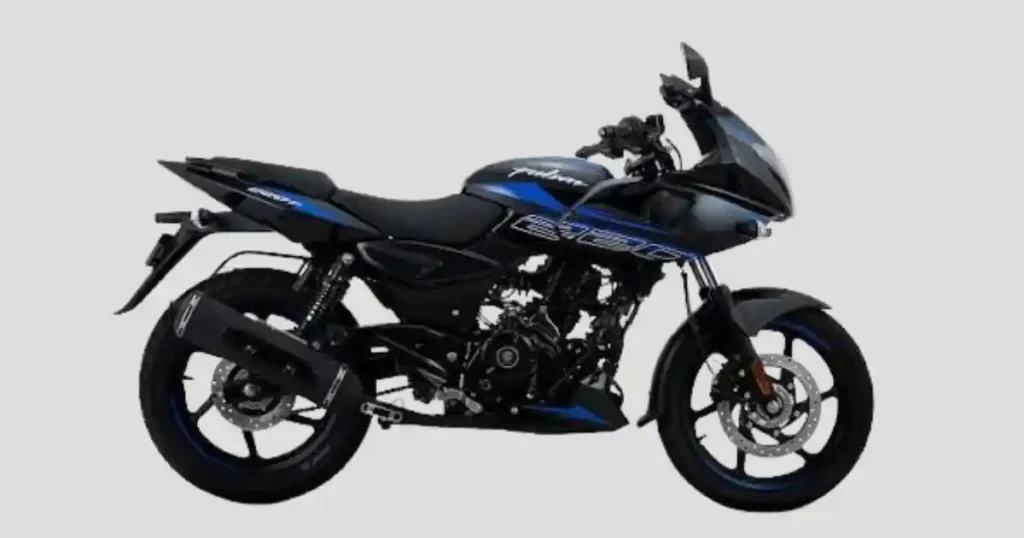
Standing in a driveway in Portland, Oregon, pressing a starter button that answers with silence, is a special kind of frustration. I’ve felt that exact moment more than once while helping riders sort out a Pulsar 220 not starting before a morning ride. The good news is that most of these failures fall into just a few predictable categories, and you don’t need a full workshop to find them. A bike that won’t crank points toward one set of parts, while a bike that cranks but won’t fire points toward a completely different set.
This guide walks through both paths in the order I actually use them, starting with the simplest checks and moving toward deeper mechanical causes only when they’re truly needed. By the time you finish reading, you’ll know exactly where to look first, what tools make the job easier, and when it’s smarter to hand the bike over to a professional.
Why Is My Pulsar 220 Not Starting?
The first clue is what happens the moment you press the starter. Listen closely, since a silent bike, a clicking relay, and a normal cranking engine each point toward a different problem entirely. The Pulsar 220 has existed in carbureted and later fuel-injected versions, so matching your diagnosis to your exact model year matters more than most riders expect. Skipping that step is the single most common reason a rider ends up replacing the wrong part twice.
Pulsar 220 Does Not Crank
No starter sound at all is one pattern. A single click is another. Rapid clicking, very slow cranking, or a dashboard that lights up while the engine refuses to turn are all versions of the same core problem, a starting circuit that isn’t delivering enough power to the starter motor.
Pulsar 220 Cranks but Does Not Start
Here the starter turns the engine normally, but the engine never fires no matter how long you crank it. This points toward fuel, spark, ignition, or compression rather than the electrical starting circuit itself.
Pulsar 220 Starts and Then Stops
Some bikes start for a few seconds and die, others die right at idle or once the throttle closes, and some quit specifically once the engine warms up. Fuel delivery, ignition, and airflow are the usual suspects behind this pattern.
Pulsar 220 Starts Sometimes
An intermittent no-start is often the hardest to diagnose, since the fault can hide during testing. A weak battery, a loose connection, a failing starter relay, the ignition switch, a side stand or clutch switch, fuel delivery, or a general electrical fault can all cause this exact symptom.
Pulsar 220 Not Starting Troubleshooting Flow
Don’t start by pulling the motorcycle apart. Work from the easy checks toward the harder ones, and let each result guide the next step rather than jumping straight to a parts order.
Step 1: Check the Basic Controls
Confirm the ignition is ON, the engine kill switch sits in RUN, the transmission is in neutral, the clutch is pulled in, the side stand is up, and the fuel tap is in the correct position on carbureted versions. These sound obvious, but they solve more no-start calls than any other single step.
Step 2: Does the Starter Turn the Engine?
If the answer is no, focus on the battery, starter, and control circuit. If the answer is yes, shift your attention to fuel, spark, compression, and engine management instead.
Step 3: Check Battery Condition
Dashboard brightness, horn strength, battery terminals, resting voltage, and cranking voltage all tell part of the story. A digital multimeter like this one makes this step far more accurate than guessing from dashboard brightness alone.
Step 4: Check Fuel
Fuel level, the fuel tap position on carbureted models, fuel flow, fuel-pump operation on FI versions, and fuel quality all deserve a look before you assume the ignition system is at fault.
Step 5: Check Spark and Ignition
The spark plug, plug cap, ignition coil, wiring, and overall spark quality come next in the sequence.
Step 6: Move to Mechanical Diagnosis
Compression, valve condition, timing, and engine internals sit at the end of the list, since they’re the least likely cause and the most involved to check. General motorcycle diagnostic guidance recommends separating no-crank from crank-no-start conditions and checking the simple causes first before deeper mechanical work begins.
Pulsar 220 No-Start Symptoms Table
This table gives readers a quick diagnostic starting point. It isn’t a substitute for model-specific service data, but it helps narrow the system before you start testing individual parts.
| Symptom | First area to check | Possible cause |
|---|---|---|
| Nothing happens | Battery and switches | Battery, fuse, switch |
| Rapid clicking | Battery | Low charge or poor connection |
| One click | Starter circuit | Relay, starter, or cable |
| Slow cranking | Battery or starter | Weak battery or starter load |
| Normal cranking | Fuel or spark | Fuel or ignition issue |
| Starts then dies | Fuel, idle, or ignition | Delivery or control problem |
| Starts with a jump | Battery or charging | Weak battery or charging fault |
| No spark | Ignition | Plug, coil, or wiring |
Check the Pulsar 220 Battery First
A weak battery can make a motorcycle look far more broken than it really is. Before chasing sensors or tearing into the carburetor, make sure the electrical supply is actually healthy, since this single check resolves more complaints than any other step in this guide.
Signs of a Weak Battery
A slow starter, a clicking relay, a dim instrument panel, a weak horn, a starter that cuts out mid crank, or a battery that repeatedly goes flat are all warning signs worth taking seriously.
Inspect Battery Terminals
Check the positive terminal, the negative terminal, corrosion buildup, loose bolts, the ground cable, and any damaged wiring nearby. This five minute check catches a surprising number of no-start complaints.
Test Battery Voltage
A resting-voltage check, followed by a cranking-voltage check, tells you far more than a single reading alone. Compare both results with the correct battery specification for your model, since a voltage reading by itself doesn’t prove full battery health. RevZilla recommends checking both resting voltage and voltage while cranking, and it notes that a cranking voltage below about 9.6 volts is a useful warning sign for a conventional motorcycle battery, though the exact test procedure and specification should always come from your battery or bike documentation. Keeping an affordable multimeter such as this one in your toolbox turns this test into a two minute job instead of a guessing game.
Battery Versus Charging System
The battery stores electrical energy, while the charging system replenishes it once the engine runs. Repeated dead batteries call for charging-system diagnosis rather than another new battery, and the regulator, rectifier, and stator on applicable versions all deserve attention here.
Pulsar 220 Starter Motor and Relay Problems
If the battery checks out healthy but the engine still refuses to turn, it’s time to move toward the starting circuit itself. This is where riders most often waste money replacing the wrong component.
Starter Relay Symptoms
A single click, repeated clicking, a starter that stays completely silent, or intermittent operation all point toward the relay rather than the starter motor itself.
Starter Motor Symptoms
Slow cranking despite a healthy battery, no response at all, an unusual grinding noise, or intermittent starting all suggest the starter motor deserves a closer look.
Check Starter Connections
The battery cable, starter cable, ground connection, and relay terminals should all be checked for corrosion and looseness before you assume the starter itself has failed.
When a Starter Needs Professional Testing
Once the battery passes testing, the cables are sound, and the relay clicks but the starter still doesn’t spin, or the starter draws excessive current, or you hear mechanical noise, it’s time for a shop visit rather than more guesswork.
Check the Pulsar 220 Kill Switch, Clutch, and Side Stand
Sometimes the motorcycle is doing exactly what it was designed to do. It simply believes the starting conditions haven’t been met yet, and no amount of battery testing will fix that.
Engine Kill Switch
Confirm the switch sits fully in the RUN position, check its physical operation, and look for contamination or damage inside the housing.
Neutral Switch
Confirm the neutral indicator lights up, try starting while in neutral, and note whether the indicator behaves normally through every gear.
Clutch Switch
Pull the clutch fully and check starting behavior with it engaged. If starting only happens intermittently, the switch itself is worth inspecting closely.
Side-Stand Switch
Check the stand position, look for damaged wiring nearby, and pay attention to whether the symptom only appears once the bike is in gear. Bajaj’s Pulsar 220 BS IV manual specifies starting in neutral and also describes a clutch switch that allows starting in gear once the clutch lever is pressed in fully.
Pulsar 220 Fuel Problems
The correct fuel diagnosis depends heavily on whether your particular Pulsar 220 uses a carburetor or fuel injection, so confirm which version you’re working on before going further. Guessing at this step wastes time on parts that don’t even exist on your specific bike.
Carbureted Pulsar 220
Check the fuel tap position, the ON or RES selection, fuel flow into the carburetor, the condition of the carburetor bowl, choke operation, the pilot circuit, and any clogged jets.
Fuel-Injected Pulsar 220
Fuel-pump operation, the fuel-pump fuse, fuel pressure, injector operation, ECU-related faults, and wiring or connector condition all belong on this list, since any one of them alone can produce an identical no-start symptom.
Old or Contaminated Fuel
A motorcycle stored for a long period often develops stale fuel, water contamination, poor fuel quality, or carburetor deposits that block normal flow.
Fuel-Starvation Symptoms
An engine that fires briefly, runs only with the throttle held open, dies at idle, runs out of power, or starts only after sitting for a while is showing classic fuel-starvation behavior. General motorcycle guidance recommends checking fuel quantity and quality before moving into detailed fuel-system diagnosis.
Pulsar 220 Spark Plug and Ignition Problems
A good battery and a full tank mean very little if the ignition system can’t produce a usable spark at the right moment in the combustion cycle.
Spark Plug Inspection
Fouling, carbon deposits, a wet plug, a damaged electrode, an incorrect gap, or a worn plug all reduce spark quality enough to cause a no-start.
Spark Plug Cap and Wire
A loose connection, damaged insulation, moisture, or corrosion along the plug cap and wire can interrupt spark delivery even when the plug itself is healthy.
Ignition Coil
Coil condition, power supply, ground connection, wiring, and intermittent failure all belong on the ignition coil checklist.
How to Approach Spark Testing
Follow the exact service procedure for your model, use appropriate insulated equipment, and keep your hands away from high-voltage ignition components while the engine is cranking. For the BS VI Pulsar 220, Bajaj lists a Bosch fuel-injection system paired with two Champion RG6HCC spark plugs set to a specified 0.8 to 0.9 millimeter gap. Older 220 versions can differ significantly, so always confirm the exact model-year manual before assuming a specification applies to your bike.
Pulsar 220 Choke Problems
The choke becomes especially relevant when diagnosing older carbureted Pulsar 220 versions, since fuel injection removes this variable entirely from the equation.
When the Engine Is Cold
The choke may be needed briefly, throttle use should stay minimal, and the choke should return to its normal position once the engine has warmed enough to idle on its own.
If It Only Starts With Choke
A dirty pilot circuit, general carburetor cleanliness, an incorrect air-fuel mixture, a vacuum leak, or a poor idle adjustment are the usual reasons a bike refuses to run without the choke engaged.
If It Floods
Repeated starting attempts, a strong fuel smell, a visibly wet spark plug, or excess fuel entering the engine all point toward flooding rather than a lack of fuel. The Pulsar 220 BS IV manual instructs riders to use the choke for a cold engine and return it to OFF once the engine is warm enough to idle normally on its own.
Pulsar 220 Fuel Injection Problems
For later FI versions, the diagnosis shifts because fuel delivery is controlled electronically rather than mechanically, which changes both the tools and the sequence you need to follow.
Fuel-Pump Priming
Turn the key to ON and listen for pump operation where applicable. No audible sound doesn’t automatically prove the pump has failed, so check the electrical supply first before condemning the pump itself.
Injector and Fuel Pressure
The injector’s electrical connection, fuel pressure, pump output, and overall fuel-system condition all deserve a look on FI versions.
FI Warning Indicator
Check the warning light, scan for stored codes where your model supports it, and record any codes before clearing them.
ECU and Wiring
Power supply, ground connections, connectors, damaged wiring, and sensor signals round out the FI diagnosis.
Pulsar 220 Sensor and Electrical Faults
Don’t replace every sensor that shows up in a search result. Diagnose the actual signal and circuit first, since a sensor is rarely guilty on its own, and a wiring fault can mimic a failed sensor almost perfectly.
Crankshaft Position Sensor
This sensor provides the engine-speed signal, supports ignition timing, and enables starting synchronization, so a failure here can cause a genuine crank-no-start condition.
Throttle Position Sensor
Throttle-position information affects both starting and running quality, so wiring and connector checks belong here before a replacement part gets ordered.
Engine Temperature Sensor
Cold-start fueling depends on accurate temperature data, and incorrect readings here often show up as hard starting rather than a total failure to start.
Side-Stand and Clutch Signals
These safety interlocks can cause intermittent no-start symptoms whenever their wiring develops a fault.
Diagnostic Scan
Read stored codes, check the relevant live data, compare each code against the actual symptom, and test wiring before you spend money on an expensive replacement part.
Pulsar 220 Fuse and Relay Checks
Electrical faults can be surprisingly small. One bad fuse or loose connection can stop a perfectly healthy engine from ever starting, no matter how new the battery is.
Check the Main Fuse
Confirm the correct fuse location for your model, inspect the fuse element for a break, and always use the correct replacement rating. Never install a higher-rated fuse just to make a symptom disappear. Keeping a small assorted fuse kit like this one in your seat compartment saves a roadside headache more often than you’d expect.
Check Relevant Relays
The starter relay, the fuel-pump relay on FI versions, and the main or engine-control relay where fitted all deserve inspection when a fuse checks out fine.
Inspect Wiring
Battery cables, ground wires, ignition wiring, connector condition, and signs of rodent damage or amateur aftermarket wiring all belong on this checklist.
Pulsar 220 Cranks but Won’t Start
This is the section to make especially practical. If the starter sounds completely healthy, stop blaming the starter and move on to the systems that actually control combustion.
Check for Fuel
Confirm fuel is present, confirm it’s actually being delivered, and separate carburetor diagnosis from fuel-injection diagnosis based on your exact model.
Check for Spark
Work through the spark plug, plug cap, coil, and the rest of the ignition circuit in order.
Check Compression
A compression tester compared against the correct engine specification tells you quickly whether low compression is part of the problem. A basic compression tester kit pays for itself the first time it saves you a guessing-game repair. Low readings require deeper inspection rather than repeated cranking attempts.
Check Timing
Valve timing, cam timing, and other timing-related mechanical faults can produce an abnormal cranking sound worth paying attention to. General motorcycle troubleshooting reduces a running engine down to the essential requirements of compression, fuel, and spark, and that same framework applies directly to the Pulsar 220.
Pulsar 220 Starting Problem After Rain or Washing
Moisture has a habit of creating a frustrating, intermittent fault that seems to disappear the moment you try to show someone at the shop.
Wet Spark Plug Area
Check the plug caps, the coil area, and nearby electrical connectors for trapped moisture.
Water in Connectors
Inspect every accessible connector, dry them correctly, and look closely for early corrosion.
Wet Kill or Ignition Switch
Intermittent electrical contact caused by moisture or corrosion inside the switch itself can mimic a much bigger electrical fault.
Prevention
Avoid directing high-pressure water at electrical components, keep connectors properly sealed, and address any damaged wiring right away rather than waiting for the next wash to make it worse.
Pulsar 220 Not Starting After Sitting
A motorcycle parked for weeks or months deserves a slightly different checklist than one that just failed mid ride. The failure modes overlap, but the order of likelihood shifts considerably.
Battery
Self-discharge, general battery age, and low resting voltage are the most common culprits after extended storage.
Fuel
Stale gasoline, carburetor deposits, and general fuel-system contamination build up quietly while a bike sits unused.
Spark Plug
Fouling, moisture, and corrosion can all creep in during a long storage period.
Wiring
Rodent damage, loose connectors, and corrosion are worth checking before you assume a bigger fault exists.
Pulsar 220 Not Starting in the Morning
A cold-start complaint can reveal faults that quietly disappear once the motorcycle warms up.
Cold Battery Performance
Slow cranking, overall battery condition, and terminal connections all perform worse in cold weather, sometimes enough to expose a battery that’s already on its way out. Testing resting voltage with a cold morning multimeter check before your commute can save you from a surprise on a freezing driveway.
Carburetor and Choke
Choke operation, the pilot circuit, and the cold-start mixture matter most on carbureted versions during a cool morning.
FI Cold Starting
The temperature sensor, fuel pressure, injector operation, and ECU data drive cold starting on fuel-injected models.
Compare Morning and Warm Starts
Note whether the bike starts cold but not hot, hot but not cold, or only after several attempts. That pattern alone often points a mechanic straight to the right system.
Pulsar 220 Not Starting Diagnostic Table
This table helps readers decide what to test next, without pretending that any single symptom proves one specific failed part.
| What you notice | Start checking | Possible areas |
|---|---|---|
| No sound | Battery and switches | Battery, fuse, controls |
| Rapid clicks | Battery | Charge, terminals |
| One click | Starter circuit | Relay, starter |
| Slow crank | Battery or starter | Battery, cables, starter |
| Normal crank | Fuel or spark | Fuel system, ignition |
| Starts then dies | Fuel, idle, or ignition | Carb or FI, spark, sensors |
| Only starts with choke | Carburetor | Pilot circuit, air/fuel |
| No spark | Ignition | Plug, cap, coil |
| Fuel but no start | Spark or compression | Ignition or mechanical |
| After long storage | Battery or fuel | Battery, stale fuel, carb |
Pulsar 220 Battery and Charging System Checks
A battery can be the victim rather than the cause. If it repeatedly goes flat, it’s worth finding out why instead of buying a third replacement.
Resting Voltage
Fully charge the battery first, let it stabilize for a few minutes, then measure voltage and compare the result with the correct battery guidance for your model.
Cranking Voltage
Monitor voltage during an actual starting attempt and watch for excessive voltage drop compared with the appropriate specification. A reliable multimeter like this one makes this comparison quick and repeatable.
Charging Voltage
Test voltage after the engine is running, then check the regulator, rectifier, and stator where required, using the model-specific service specification as your reference point. RevZilla recommends checking resting, cranking, and running voltage together, since that combination separates a simple battery problem from a deeper charging-system fault.
Pulsar 220 Starter Motor and Relay Diagnosis Tools
Having the right tool on hand turns a frustrating guessing game into a five minute test, and it’s one of the smartest small investments a regular rider can make.
Why a Multimeter Matters
A basic digital multimeter such as this one lets you measure resting voltage, cranking voltage, and charging voltage without ever removing the battery from the bike. It also works for checking fuses and continuity across almost every wiring fault covered in this guide.
Keeping One in Your Toolbox
I keep a compact multimeter in my own garage specifically for these no-start calls, since guessing at battery health from dashboard brightness alone wastes far more time than a thirty second test. Riders who tour or commute long distances benefit even more, since a roadside test can decide whether a jump start will actually hold.
Other Useful Tools
A compression tester, a spark tester, and a basic fuse assortment round out a solid home diagnostic kit for this exact type of complaint. None of these tools cost much compared with a single unnecessary parts purchase.
Pulsar 220 No-Start Maintenance Checklist
Preventive maintenance reduces the odds of meeting the dreaded single-click starter on a Monday morning commute.
Regular Checks
Battery terminals, spark plugs, the air filter, the fuel system, the chain, engine oil, and electrical connectors all deserve a routine glance.
Before Long Storage
Battery maintenance, fuel-system preparation, a clean and dry motorcycle, and protection against moisture all matter here, alongside whatever your owner’s manual specifies for your exact model. A small trickle charger paired with a basic multimeter for checkups keeps a stored battery from dying quietly in the garage.
After Long Storage
Inspect the battery, inspect the fuel, check the tires, check the brakes, and look for wiring damage before you rush straight into repeated cranking attempts that could drain an already weak battery further.
USA Expert Advice for Motorcycle No-Start Diagnosis
For this section, I’m leaning on a real published source rather than inventing a mechanic quote, since accuracy matters more than sounding authoritative. A borrowed framework from a trusted expert beats a fabricated quote every single time.
Ari Henning’s Diagnostic Approach
Ari Henning’s RevZilla troubleshooting guide starts with the basic requirements of combustion, meaning compression, fuel, and spark, and his approach consistently emphasizes checking simple causes before diving into deeper mechanical work.
How That Applies to the Pulsar 220
First determine whether the bike has a no-crank or a no-start condition, then check the battery and controls, then fuel, then spark, and only then move toward compression and timing. Always confirm the exact steps against your model-specific service information rather than assuming every Pulsar 220 behaves identically.
Real-Life Pulsar 220 No-Start Scenarios
A useful troubleshooting article should sound like an actual bike sitting in a driveway, not a repair-manual robot reading off a checklist. These five scenarios cover almost every version of this complaint that riders have described to me over the years.
Scenario 1: “Just One Click”
It’s a normal morning commute, the dashboard lights work fine, and the starter clicks exactly once. The battery and starter circuit become the immediate priority here, and a quick check with a handheld multimeter usually confirms the cause within minutes.
Scenario 2: “It Cranks Fine but Won’t Fire”
The starter sounds completely normal, so fuel and spark become the two major branches worth chasing, with the carburetor versus FI configuration deciding which path to follow first.
Scenario 3: “It Starts With Choke”
This usually shows up on an older carbureted model, and a pilot-circuit or general carburetor issue is the likely cause. Riding indefinitely with an abnormal starting condition tends to make the underlying problem worse.
Scenario 4: “It Started Yesterday”
An intermittent electrical fault is frustrating precisely because it hides during testing. The battery connection, starter relay, side-stand or clutch switch, and general wiring all deserve a careful look.
Scenario 5: “It Has Been Parked All Winter”
Battery, fuel, spark plug, and wiring all need a basic inspection before you attempt repeated cranking, since a weak winter battery can get pushed even lower by an impatient rider holding the starter too long.
When to Stop Troubleshooting the Pulsar 220
Some jobs are better handled by a qualified motorcycle technician, especially once diagnosis moves into high-current electrical systems or internal engine work. Knowing when to stop is just as valuable as knowing where to start.
Get Professional Help If
A fuel leak is present, the wiring is badly damaged, the starter circuit draws excessive current, the engine makes abnormal mechanical noise, compression reads very low, a timing failure is suspected, you can’t safely perform electrical testing yourself, or the motorcycle repeatedly fails even after all the basic checks pass.
What Information to Give the Mechanic
The exact Pulsar 220 version, the model year, whether it’s carbureted or fuel-injected, recent maintenance history, the last time it started normally, whether it cranks at all, your battery test result, your spark test result, any warning-light behavior, and exactly what happened right before the failure all help a mechanic diagnose the bike faster.
Pulsar 220 Not Starting FAQ
Why is my Pulsar 220 not starting but the lights work?
This usually points toward the battery struggling under load, the starter circuit, a failing relay, the starter motor itself, or a switch and interlock issue rather than a completely dead electrical system.
Why does my Pulsar 220 crank but not start?
Fuel, spark, compression, timing, and sensors on applicable versions are all worth checking once you’ve confirmed the engine turns over normally.
Why does my Pulsar 220 only start with choke?
The carburetor, the pilot circuit, the air-fuel mixture, and general cold-start behavior are the usual explanations behind this pattern.
Can a weak battery stop a Pulsar 220 from starting?
Yes. There’s a real difference between simple dashboard power and the much larger cranking power a starter motor actually demands, and a battery can supply one without supplying the other. Testing both with a simple multimeter removes the guesswork entirely.
Why does my Pulsar 220 click but not start?
Rapid clicking usually points toward a weak battery or poor connection, while one strong click points more directly toward the starter circuit itself.
Why does my Pulsar 220 start and then stop?
Fuel delivery, the idle circuit, ignition problems, and sensor or control issues are the most common explanations for this exact pattern.
Can a bad spark plug cause a Pulsar 220 not to start?
Yes, but test the complete ignition path rather than assuming the plug alone is the only fault, since a healthy plug paired with a bad cap or coil produces the same symptom.
How long should I hold the Pulsar 220 starter?
Bajaj’s 220 BS IV manual says not to operate the starter continuously for more than five seconds and recommends waiting about fifteen seconds between attempts. Always follow the manual for your exact version, since holding the starter longer than specified can drain an already weak battery even faster.
Pulsar 220 No-Start Final Diagnostic Checklist
Quick Checks
Fuel level, ignition ON, kill switch position, neutral, clutch, side stand, battery condition, and battery terminals should all be confirmed first.
Electrical Checks
The main fuse, starter relay, starter motor, ground connections, and charging system belong in the second round of testing.
Engine Checks
Fuel delivery, spark, the spark plug itself, compression, and timing come next once the electrical side checks out clean.
Model-Specific Checks
Carbureted versus fuel-injected configuration, the exact model year, the correct owner’s manual, the correct spark-plug specification, the correct fuse layout, and the correct service specifications all matter more on the Pulsar 220 than on almost any other step in this guide, since Bajaj changed several of these details across the model’s long production run.
Final Recommendation
After years of walking riders through this exact complaint, my honest take is that a Pulsar 220 not starting almost never means the engine itself has failed. In the vast majority of cases I’ve seen, the real cause is a weak battery, a dirty connection, a stuck switch, or a fuel system that needs attention rather than a serious mechanical problem. Start with the battery and the basic controls before you assume the worst, since those two areas solve more no-start calls than everything else on this list combined.
Keep a simple multimeter in your garage, follow your exact model’s manual for specifications, and don’t hold the starter longer than Bajaj recommends. The Pulsar 220 has been through carbureted and fuel-injected generations, and the small details that matter most, like spark plug gap or fuse ratings, change between them, so always confirm your exact version before ordering parts. If you’ve worked through every step here and the Pulsar 220 still won’t start, that’s the point where a qualified technician earns their fee, and there’s no shame in getting there.

Ehatasamul Alom is a dedicated road hybrid bikes expert. With over 15 years of experience, he helps people find the perfect ride. He began his journey as a bike mechanic. He learned the ins and outs of every bike.
Ehatasamul Alom holds a Master's degree in Mechanical Engineering from a Brown University (Providence US 02912), where he specialized in material science and bicycle kinematics. His master's thesis focused on optimizing frame geometry for road hybrid bikes to improve rider comfort and efficiency.
Ehatasamul has an extensive professional background. He spent 10 years (2010-2020) as a Senior Bike Designer at "Urban Cycles," a leading bicycle manufacturer. In this role, he led the development of several award-winning road hybrid bikes, which are known for their durability and performance. He later served (2020-2024) as the Head of Product Development at "Gear Up," a company specializing in high-end cycling components. There, he developed innovative parts and accessories specifically for road hybrid bikes.
Over the years, Ehatasamul has become an authority on Roadhybridbikes. He understands their design and function. His work focuses on making bikes easy to use. Ehatasamul believes everyone should enjoy cycling. He writes guides that are simple to read. His passion for road hybrid bikes is clear. His goal is to share his knowledge with everyone. He wants to see more people on two wheels. His advice is always practical and easy to follow.
- Ehatasamul Alom

- Ehatasamul Alom
- Ehatasamul Alom

- Ehatasamul Alom