
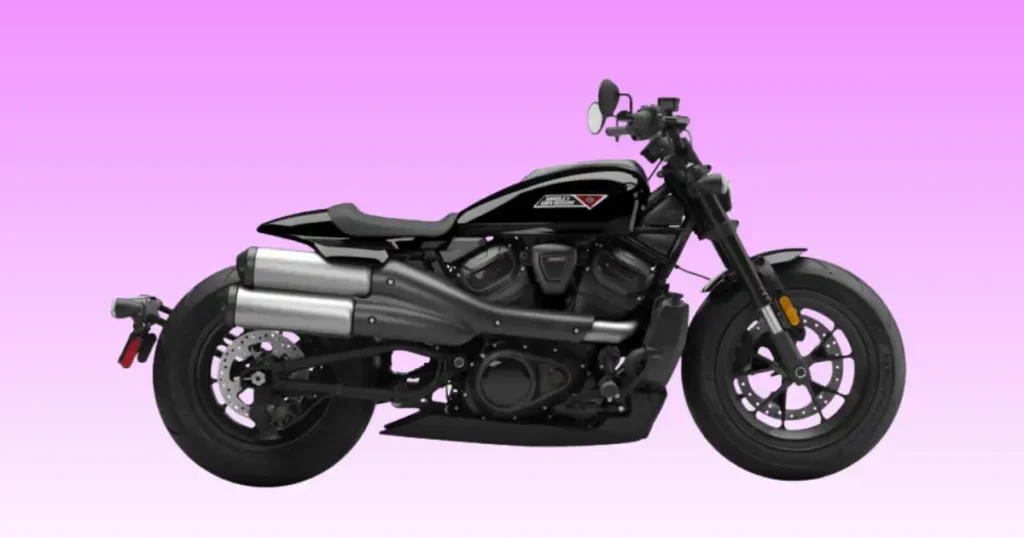
I sat in my garage in Phoenix last week, ready to hit the road on a clear day. I turned the key, pressed the button, and my heart sank into my boots. There it was: that classic Harley Davidson not starting clicking noise that leaves every rider stranded. As a longtime mechanic, I have seen this small click ruin a lot of great trips. Do not panic yet, because that rapid click is actually a cry for help you can trace. Let us roll up our sleeves and fix this weak spot together right now.
Harley-Davidson Clicking but Not Starting? Check These First
Hearing a click instead of your Harley roaring to life is frustrating, but it usually narrows the problem down. One cool Saturday morning in Sturgis, South Dakota, a rider thought his starter motor had finally quit. After five minutes with a multimeter, we found a loose ground cable hiding under the seat. Tightened it, hit the button, and that familiar V-twin rumble came right back. Sometimes motorcycles have a funny way of keeping us humble. Facing a harley davidson not starting clicking noise situation is annoying, but a clear step-by-step diagnostic process solves most issues at home.
What Type of Clicking Noise Do You Hear?
The specific rhythm and volume of the sound offer a huge clue. Pay close attention to what happens when you press the button.
- One loud click: A single heavy thunk often means power reaches the solenoid, but the motor cannot turn.
- Rapid clicking: A fast machine-gun chattering sound almost always points to a low battery.
- Repeated slow clicks: A lazy clicking pace shows a battery that is right on the edge of failure.
- Click with dim dashboard lights: This indicates the power drops severely the moment the circuit loads up.
- Click with no lights: A total electrical blackout means a dead short, blown fuse, or severed main line.
- No crank at all: Complete silence usually means a safety switch or main fuse issue, not a bad starter.
Five-Minute Safety and Quick Checks
Before pulling tools out, check the easiest parts of the bike. These quick tests verify the basic paths are open.
- Verify battery voltage: Use a digital multimeter to check the baseline charge at the terminals.
- Inspect battery terminals: Look for loose bolts or white crusty corrosion on the cable ends.
- Confirm the engine stop switch is ON: It sounds simple, but a bumped kill switch trips up many riders.
- Make sure the bike is in neutral: The neutral safety switch will block cranking if the bike is in gear.
- Check the side stand switch: Some models prevent starting if the stand is down and the clutch is out.
- Listen for the fuel pump priming: Listen for a clear two-second whirring sound inside the gas tank.
- Watch for warning lights: Check if the security lamp or check engine light stays lit on your dash.
When Should You Stop Troubleshooting?
Some symptoms mean you should turn off the key right away to protect your bike. Safety must always come first.
- Burning electrical smell: This means wire insulation is melting somewhere under the seat or tank.
- Smoke from wiring: Stop immediately if you see smoke, and disconnect the negative battery cable.
- Melted battery cables: Heat damage on heavy wires shows a severe short circuit or massive overcurrent.
- Grinding starter noise: Harsh metal grinding means the starter gear teeth are destroying the flywheel ring.
- Blown main fuse: If the large green fuse pops repeatedly, do not bypass it with a wire.
- Fuel leak: Raw gas smells or puddles mean a fire hazard exists near live ignition sparks.
What Does the Clicking Noise Actually Mean?
The clicking sound usually comes from the starter relay or starter solenoid. The sound itself is useful because it tells you the starter circuit is receiving at least some electrical power. The system tries to work, but it lacks the current or mechanical freedom to rotate the heavy V-twin pistons.
Single Click vs Rapid Clicking
A single loud click means the low-current side of the system works fine. The handlebar switch successfully triggers the starter relay, and the relay pushes the heavy solenoid plunger forward. The noise you hear is that heavy metal plunger striking its internal contacts. When you hear rapid clicking, the battery has enough juice to close the relay, but the moment the heavy starter motor draws power, battery voltage drops instantly. The relay drops open, voltage shoots back up, and the cycle repeats instantly.
Where the Clicking Comes From
- Starter relay: This small plastic cube sits in your fuse panel and makes a faint clicking sound.
- Starter solenoid: This larger metal cylinder sits right on top of the starter motor and clunks loudly.
- Starter motor: The motor itself does not click, but bad internal brushes can cause a faint tick.
Why Harley Motorcycles Click Instead of Cranking
- Low voltage: The battery plates do not hold enough electrical pressure to turn the heavy engine.
- High electrical resistance: Corroded wire joints act like a crimp in a garden hose, blocking current.
- Weak starter: Internal wear makes the starter draw too many amps, stalling the electrical system.
- Faulty relay: Burned contacts inside the relay box can drop voltage before it reaches the main lines.
- Bad battery: Internal cell failure means the battery looks fine at rest but dies under a heavy load.
Most Common Reasons a Harley-Davidson Clicks but Won’t Start
Most clicking problems are electrical rather than mechanical. Start with the simplest checks before replacing expensive parts. Keeping your diagnostic process orderly prevents you from wasting cash on items you do not need.
Weak or Dead Battery
Common Symptoms
A weak battery is the top cause for starting issues. You might see your digital speedometer screen flicker and reset. Sometimes the LED lights look bright until you hit the start button. Then everything goes totally dark right away.
Battery Voltage Test
Set your digital multimeter to DC volts. Place the red probe on the positive terminal post. Put the black probe on the negative post. A healthy battery sits at 12.8 volts. Anything under 12.2 volts means the charge is too low.
Battery Load Test
Static voltage does not tell the full story. Leave your meter probes connected while you hit the starter button. Watch the screen drop during active cranking. If the number falls below 9.6 volts, the battery is bad.
When Replacement Is Needed
Factory motorcycle batteries generally last between two and four years. High summer heat and long storage times shorten their life. If your battery fails a load test or shows bulging sides, buy a new one.
Loose or Corroded Battery Terminals
Signs of High Resistance
You might have perfect resting voltage but zero power at the starter. Loose ground straps cause high electrical resistance. This issue mimics a dead battery. It often causes a loud single click when you try to crank.
Proper Cleaning Method
Disconnect the negative ground cable first to prevent sparks. Remove the positive cable next. Use a stiff wire brush to scrub off any white powdery corrosion. Reattach the clean positive cable first, tighten the bolts, and use dielectric grease.
Bad Ground Cable
Why Grounds Matter
Electricity must flow in a complete loop from the battery, through the bike, and back to the frame. If the frame connection point is rusty or loose, the power loop breaks. The starter cannot get the amps it needs.
How to Inspect Ground Points
Follow the heavy black negative cable from the battery down to its mounting bolt on the frame or transmission case. Ensure the bolt is tight. Unbolt it to scrape away paint, dirt, or rust for clean metal contact.
Faulty Starter Relay
One Click Symptoms
The small starter relay sends low current power to the main solenoid. If the relay fails internally, you will hear a single faint click from the fuse panel. The heavy starter motor itself will remain completely silent and still.
Relay Testing
Locate the small square black relay in your main fuse block. You can swap it with the identical system relay next to it. If the bike now cranks normally but will not fire, you need a new starter relay.
Defective Starter Solenoid
Solenoid Operation
The solenoid is a heavy-duty switch mounted right on the starter. It acts as a bridge. When it gets power from the relay, it uses a magnet to slam a copper disk against two fat battery posts to spin the motor.
Voltage Drop Testing
Put your meter probes on the two large brass posts of the solenoid. Press the handlebar start button. If you see a large voltage drop across these two posts, the inner contacts are shot. Replace the solenoid unit.
Worn Starter Motor
Slow Cranking
A starter motor that is wearing out sounds very tired. It turns the heavy flywheel over very slowly. It makes a groaning or dragging sound even when hooked up to a perfect battery pack.
Excessive Current Draw
Hook up an automotive amp clamp meter to the main positive starter cable. Crank the engine over. A healthy stock starter draws around 140 amps. If your reading shoots over 220 amps, the starter has internal shorts.
Charging System Problems
Weak Stator
The stator sits inside the primary inner engine case and generates alternating current while the motor spins. If the copper coils burn out, the bike runs solely off the battery until the cell drains down and clicks.
Failed Regulator/Rectifier
The regulator transforms messy alternating current into steady twelve-volt direct current to charge the battery. If it dies, it will either starve the battery or cook it with raw, high-voltage power.
Harley Security System Issues
Dead Key Fob Battery
Modern security modules look for a specific radio signal from your key fob. If the small coin cell battery inside drops below 2.5 volts, the system locks out. The bike will refuse to start until fixed.
Immobilizer Activation
When the security system is active, your turn signals will flash rapidly. A red key icon will also light up on the dash. You can bypass this issue by entering your personal PIN with the turn signal switches.
Wiring Harness Damage
Loose Connectors
Large V-twin engines shake violently during operation. This constant vibration can fatigue thin copper wires over time. It leads to hidden breaks inside the insulation or loose ground eyelets on the frame.
Damaged Wiring
Look for wiring harnesses that rub against the frame neck or seat area. Pins inside plastic plugs can back out from road bumps. This breaks the vital path between sensors and the central computer.
One Click vs Rapid Clicking: What Each Sound Means
Different clicking patterns often point to different faults. Listening carefully can save hours of unnecessary diagnosis. Matching the rhythm of the noise tells you exactly where the electrical delivery system is failing.
One Loud Click
A single loud click indicates that the handlebar controls and the small starter relay are doing their jobs perfectly. The power travels down the line and successfully forces the starter solenoid plunger to snap forward.
- Starter relay: It sends the low amp signal properly, so you can skip testing the handlebar start button.
- Starter solenoid: The plunger moves, but power cannot cross the main heavy copper contacts inside the housing.
- Starter motor: The motor might have a flat spot on its armature, or the internal carbon brushes are worn out.
Rapid Clicking
A fast chattering sound means the system is trapped in an electronic loop. The power supply drops completely the millisecond a heavy electrical load hits the line, causing the switch to flip open and shut.
- Weak battery: The cell has enough power to trigger small parts but dies when asked to turn the engine.
- Loose battery cable: The connection is too poor to carry high current, causing voltage to drop at the terminal gap.
- Poor ground: Resistance at the frame chassis stops the return current, stalling the starting loop instantly.
Repeated Slow Clicking
A slow, lazy click indicates a failing power source that is losing its fight against the motor. The system struggles to reset itself because the available voltage decays lower with every single pulse.
- Battery nearing failure: The lead plates inside are sulfated, leaving very little storage capacity for cranking.
- Voltage dropping during cranking: The system voltage falls lower each time the solenoid attempts to bridge the gap.
Harley Clicks but Engine Won’t Turn Over
If the starter clicks but the engine never rotates, concentrate on the starting circuit before checking fuel or ignition. The issue is purely a matter of getting mechanical force to turn the crankshaft.
Battery Condition
A dead cell can provide enough power to drop the solenoid plunger but lack the raw torque to nudge the starter gears. Always load test the battery before assuming the heavy mechanical parts are broken.
Starter Relay
Ensure the relay is delivering full battery voltage to the solenoid trigger wire. If the inner contacts are pitted or burned, the relay might pass voltage but fail to carry the required amperage down the line.
Starter Solenoid
The heavy contacts inside the solenoid can wear out over time from the high heat of electrical arcing. If these copper pads burn away, the plunger cannot bridge the gap to pass current to the motor.
Starter Motor
Internal components like carbon brushes wear down with use. If the brushes cannot press firmly against the spinning armature, the motor stays dead. A failing starter motor often gets incredibly hot to the touch during use.
Engine Seizure (Rare)
In very rare cases, an engine problem can lock the crankshaft completely. If the motor cannot turn physically, the starter stall current shoots up instantly. Try putting the bike in top gear and rocking it backward.
Harley Clicks and Dashboard Lights Dim
Dimming lights usually indicate the battery cannot provide enough current while cranking. The electrical pressure drops across the whole motorcycle because the battery is starved or the path is highly restricted.
Perform a Load Test
Connect your multimeter to the battery posts and watch the screen while hitting the start button. If the numbers crash below ten volts, the battery cannot support the bike. A recharge or replacement is needed.
Check Ground Connections
A high-resistance ground path forces voltage to back up in the system. This starves the dashboard and modules of clean power. Clean the main frame ground bolt until the metal faces are bright and shiny.
Inspect Charging System
If the battery dies while you ride, the charging system is likely at fault. Check the output at 3,000 RPM using your meter. You should see a steady reading between 13.8 and 14.4 volts DC.
Harley Clicks After Winter Storage
Winter storage creates perfect conditions for battery discharge and fuel deterioration. Bikes left sitting without proper care often face a combination of minor electrical and fuel delivery problems come spring.
Battery Sulfation
When a battery sits in a low state of charge, sulfur crystals form on the lead plates. This chemical crust permanently reduces the battery’s power capacity. A sulfated battery will click rapidly even after a long charge.
Stale Fuel
Modern fuel spoils quickly when left open to the air inside a gas tank. Volatile elements evaporate, leaving a thick varnish. This sticky goo can freeze up the fuel pump gears or clog the injector ports.
Corroded Battery Terminals
Damp winter air accelerates the growth of lead oxidation on the battery posts. This white or green crust forms an insulating barrier. It blocks the heavy starter current while letting low-amp lights work.
Moisture in Electrical Connectors
Temperature changes cause condensation to form inside plastic wire plugs during winter storage. This moisture corrodes the delicate metal pins inside, which disrupts sensor communication and grounds out the starter relay path.
Step-by-Step Harley Clicking Noise Troubleshooting
Professional technicians follow a sequence instead of guessing. One Tuesday morning in Phoenix, Arizona, a rider arrived convinced his touring Harley needed a new starter motor. The battery looked healthy at 12.6 volts, but under load it dropped below 9 volts. A fresh battery solved the problem before coffee got cold. It’s funny how often the smallest test saves the biggest repair bill.
Step 1 – Measure Battery Voltage
Hook up your digital multimeter to the positive and negative battery posts. Note the resting voltage. A good battery must show at least 12.7 volts DC before you turn on the key switch.
Step 2 – Perform a Load Test
Watch the multimeter screen closely while you press the handlebar start button. If the voltage drops lower than 9.6 volts during this cranking attempt, your battery needs to be charged or replaced.
Step 3 – Inspect Battery Cables
Grab the heavy red and black battery cables near the terminal ends. Give them a firm tug to ensure they are solid. Inspect the copper strands for hidden corrosion or fraying under the plastic jackets.
Step 4 – Clean Ground Connections
Unbolt the main negative ground cable from the frame chassis or transmission case. Use a piece of sandpaper to clean the metal terminal ring and the frame pad until you see bare bright metal.
Step 5 – Test the Starter Relay
Pull the small starter relay from the main fuse panel block. Check the metal pins for green corrosion or burn marks. Swap it with an identical system or accessory relay to see if the clicking stops.
Step 6 – Test the Starter Solenoid
Locate the small green or tan wire on the starter solenoid tower. Verify it receives twelve volts when the start button is pushed. If it gets power but only clicks, the solenoid is bad.
Step 7 – Check Charging System Output
If you get the bike started with a jump, leave the meter connected to the battery. Rev the engine up to mid-range speeds. The voltage screen should climb smoothly up to around 14 volts DC.
Step 8 – Inspect Wiring Harness
Look along the main wiring loom paths for any signs of rubbing or pinching against the heavy steel frame. Pay close attention to the harness section that wraps around the steering neck area.
Step 9 – Scan for ECU Trouble Codes
Hold down the trip odometer reset button while turning the ignition switch to the on position. Read the diagnostic trouble codes on the digital speedometer screen to find any hidden sensor faults.
Clicking Noise Diagnosis Table
The following table provides an easy diagnostic reference based on common starting noises. Use this guide to match the specific sound your bike makes with the most likely root cause.
| Clicking Sound | Most Likely Cause | Difficulty | DIY Repair |
| One loud click | Starter relay or solenoid | Easy | Yes |
| Rapid clicking | Weak battery | Easy | Yes |
| Click then silence | Bad starter motor | Medium | Sometimes |
| Click with dim lights | Battery failure | Easy | Yes |
| Click with bright lights | Starter circuit | Medium | Yes |
| No click | Fuse or switch | Easy | Yes |
Battery Voltage Reference Table
This reference table outlines the health of a standard twelve-volt motorcycle battery based on static voltage. Testing the voltage is always the best place to start your electrical diagnostic process.
| Voltage | Battery Condition | Recommended Action |
| 12.8–13.0V | Excellent | Continue diagnosis |
| 12.5–12.7V | Good | Load test |
| 12.2–12.4V | Weak | Recharge and test |
| Below 12V | Poor | Replace soon |
| Below 10V while cranking | Failed | Replace immediately |
Diagnose the Problem by Symptom
This troubleshooting chart pairs specific system behaviors with their primary causes. Check these items in order to isolate the fault quickly without replacing good components on your bike.
| Symptom | Most Likely Cause | First Thing to Check |
| Rapid clicking | Weak battery | Load test |
| One click | Starter relay | Relay voltage |
| Click with dim lights | Battery | Battery terminals |
| Click but no crank | Starter motor | Voltage drop |
| No clicking | Main fuse | Ignition switch |
| Starts after jump-start | Battery | Charging system |
Essential Diagnostic Tools
Having the proper tools on hand makes electrical troubleshooting safe and easy. You can find these basic diagnostic items at any local auto parts store or motorcycle shop.
- Digital multimeter: Measures voltage, ohms resistance, and continuous electrical circuit paths safely.
- Battery load tester: Applies a true electrical resistance load to check real-world battery cell health.
- Smart battery charger: Automatically charges and maintains the correct voltage curves for AGM batteries.
- Battery tender: Keeps a small continuous maintenance charge on the battery during long storage weeks.
- Spark tester: Connects inline to check for strong ignition spark without shocking yourself.
- Motorcycle scan tool: Plugs into the factory data port to read live computer engine codes.
- Test light: Quick tool to check for the presence of twelve-volt power at switches and fuses.
- Socket set: Needed to remove seats, battery hold-down brackets, and main frame ground bolts.
- Contact cleaner: Special fast-drying spray that removes oil and dirt from sensitive wire plugs.
- Flashlight: Helps you see deep into the dark spaces of the motorcycle frame and battery tray.
Common Mistakes Harley Owners Make
Many starting problems become unnecessarily expensive because basic diagnostic steps get skipped. Avoiding these simple pitfalls keeps your maintenance costs down and your bike running strong.
Replacing the Starter Too Early
The single biggest mistake is buying a brand new starter motor the first time the bike makes a clicking sound. Starter motors are tough components. They rarely fail compared to weak batteries or loose wires.
Ignoring Battery Load Testing
Riders often assume a battery is perfectly healthy simply because a meter reads 12.6 volts at rest. A damaged battery can mimic a good one until a heavy cranking load forces it to fail.
Forgetting Ground Connections
It is common to check the positive battery terminal bolt while ignoring the negative ground wire chassis connection. A loose ground frame connection blocks electrical current just as fast as a disconnected positive wire.
Skipping Fuse Inspection
Home mechanics often tear into heavy wiring looms before checking the main fuse block. A simple tiny blown system fuse can stop the entire starting sequence from opening up.
Assuming the Battery Is Good Because Lights Turn On
Dashboard LED lights require very little electrical current to glow brightly. Do not assume your battery has the massive power needed to turn a heavy V-twin engine just because the dash lights look active.
Ignoring Charging System Problems
Replacing a dead battery with a new one provides a temporary fix if the stator is broken. The new battery will work fine for a few miles until it drains flat and the clicking return.
Expert Advice From a U.S. Harley Technician
Years of dealership experience reveal the same pattern again and again. Listening to professional shop technicians saves you time and keeps you from chasing non-existent electrical ghosts.
“About eight out of ten Harley motorcycles with a clicking starter arrive with battery or cable problems, not failed starter motors. Always test voltage under load before ordering parts.” — Steve Anderson, Harley-Davidson Master Technician, Wisconsin
Why Load Testing Beats Voltage Testing
Large American big-twin engines feature massive pistons and high compression ratios. Turning these heavy internal parts requires an immense surge of cold cranking amps. A static voltage test only checks the surface pressure of the cell plates. A proper load test forces the battery to prove it can deliver real work under a heavy electrical strain.
Real Workshop Story
A customer brought his clean cruiser into our shop on a Friday afternoon. He was stressed out and completely convinced his starter motor had burned out. He noted that his battery was brand new and showed a full charge on his home garage wall charger. We hooked up our digital load tester and watched the cell voltage crash straight down to six volts during cranking. The new battery had an internal plate weld failure. We swapped in a fresh factory battery, and the bike started up immediately.
How to Prevent Harley Clicking Problems
Good electrical maintenance keeps your Harley ready for every ride, whether it’s a daily commuter or a weekend cruiser. Preventive care stops starting issues before they leave you stranded on the side of the road.
Keep the Battery on a Smart Tender
Modern Harley security modules draw a tiny amount of continuous power from the battery even when the ignition key is turned off. Always plug your motorcycle into a quality smart tender if it sits for more than a few days.
Tighten Battery Connections Regularly
Engine vibration can slowly loosen the main terminal bolts over time. Make it a regular habit to check these fasteners with a socket wrench whenever you change the engine oil or remove the seat.
Clean Ground Points
Inspect the main ground cable connections once a year for signs of rust or road grime. Cleaning these connection pads ensures a low-resistance path for the high-amp starter current to return to the battery.
Inspect Charging System Annually
Use your multimeter to check your battery charging voltage at the start of every riding season. Catching a weak stator early protects your battery from getting cooked or deeply drained on long road trips.
Replace Aging Batteries Before They Fail
Do not try to squeeze a fifth year out of an old motorcycle battery. Replace your battery every three to four years as cheap insurance against unexpected starting failures far away from home.
Keep Connectors Dry and Clean
When washing your motorcycle, avoid spraying high-pressure water directly into the handlebar switch housings or fuse block. Use dielectric grease inside major wire plugs to seal out damp road moisture.
When It’s Time to Visit a Harley-Davidson Dealer
Some electrical faults require advanced diagnostic equipment and factory service information. If basic troubleshooting does not locate the problem, seeking professional dealership help is the smartest choice.
ECU Communication Errors
If your digital dashboard display screen shows a continuous connection error code, the main modules have stopped talking to each other. This digital issue requires a factory computer scanner to locate the broken circuit line.
Persistent Check Engine Light
When a warning light stays on after you try clearing the codes, a hard sensor fault is active. Dealership technicians have the training to pinpoint broken internal sensors without throwing unneeded parts at the bike.
Wiring Harness Damage
Tracking down a broken or shorted wire hidden deep inside a thick factory wiring bundle is incredibly difficult. Dealerships have access to full master color schemes to fix complex circuit cuts safely.
Repeated Charging Failures
If your bike continues to destroy batteries or regulators, a deeper electrical issue exists. Professional diagnostics can find hidden AC shorts inside the engine case before they ruin new parts.
Starter Motor Internal Failure
If your tests show the starter motor has shorted out internally, it must be removed. Replacing the starter assembly often requires removing the inner primary chaincase components, which requires specialized shop tools.
Harley Models That Commonly Experience Clicking No-Start Symptoms
The troubleshooting process is nearly identical across Harley models because they share many electrical components. Whether you ride a classic touring bike or a stripped-down cruiser, the starting logic remains the same.
Harley-Davidson Street Glide
The Street Glide features a large front batwing fairing that holds gauges, radios, and a lot of wiring. The extra accessories draw more continuous power from the battery system. This model is very sensitive to minor voltage drops, which quickly causes rapid relay clicking if left off a tender.
Harley-Davidson Road King
The Road King uses a classic tank-mounted instrument console with a large mechanical or electronic ignition switch. This top console can trap rain or wash water underneath it over time. Water intrusion here will rust the switch contacts, leading to single-click no-start symptoms.
Harley-Davidson Breakout
The Breakout features long custom drag handlebars that route the internal switch wiring tightly through the triple trees. This tight factory routing makes the model prone to pinched wires inside the switch housing. A pinched line can short out the start button circuit entirely.
Harley-Davidson Sportster
Sportster models mount their small batteries sideways in a tight frame compartment. The negative ground cable is very short and bolts directly to the rear of the transmission case. This ground bolt is hard to see and often loosens up from standard engine shaking.
Harley-Davidson Fat Boy
The Fat Boy features a massive rear tire and a wide rear fender assembly. The main wiring harness runs close to the inner fender wells where road debris can kick up. Chafed wires in this rear section can cause short circuits that blow the main starting fuses.
Common Starting System Components Across Harley Models
No matter the specific name on the fuel tank, almost all modern Harleys utilize the same basic starting blueprint. Modern models rely on a heavy-duty starter motor paired with an electronic fuel injection system. Because engines like the Twin Cam, Evolution, and Milwaukee-Eight feature high compression, they all share a baseline vulnerability to low battery power. Clean connections are vital across every model line.
Frequently Asked Questions
Why does my Harley-Davidson only make a clicking noise when I press the starter?
The clicking sound means your battery has enough power to trigger the small starter relay, but it lacks the raw amperage needed to spin the heavy starter motor. When the motor tries to draw power, the weak battery drops voltage instantly, causing the switches to click open and closed.
Is a clicking Harley always caused by a bad battery?
Not always, though a weak battery is the root cause roughly eighty percent of the time. Loose battery terminal bolts, a corroded main frame ground cable, or burned copper contacts inside the starter solenoid can produce the exact same clicking noise.
Can a bad starter relay cause one loud click?
A bad starter relay usually causes a faint click from the fuse block or total silence. A single loud metallic clunk sound usually means the relay is working fine, but the heavy starter solenoid plunger is slamming forward without passing power to the motor.
Why do my dashboard lights dim while clicking?
The lights dim because the starter motor draws a massive amount of electrical current when it tries to turn. If the battery is weak or a connection is loose, the overall system voltage drops severely across the whole bike during the starting attempt.
Can a weak charging system cause starting problems?
Yes, if your stator or voltage regulator fails while you are riding, the motorcycle will run entirely off the battery power. Once the battery drains down below roughly 11.5 volts, it will no longer turn the engine over and will start clicking.
Should I replace the starter motor first?
No, replacing the starter motor first is an expensive mistake. Always perform a quick battery load test and clean your main cable connections before buying a new starter. Most starting issues are caused by simple connection problems.
Why does my Harley start after a jump-start?
Starting with a jump confirms that your bike’s starter motor, solenoid, and wiring paths are perfectly healthy. The extra booster battery provides the cold cranking amps that your own weak or broken internal battery cells can no longer deliver.
How much does it cost to repair a Harley that only clicks?
If the problem is a loose terminal bolt or a blown fuse, the repair is essentially free to fix at home. A fresh high-quality battery costs around one hundred and fifty dollars, while a professional starter motor replacement at a dealer can range up to five hundred dollars.
Final Recommendation
When you deal with a harley davidson not starting clicking noise issue, always check your battery cables and voltage first before purchasing expensive replacement components. Throughout my years diagnosing these heavy V-twin electrical systems, I have found that simple connection issues cause the vast majority of shop visits. Keep your custom ride plugged into a smart battery tender when it sits, use fresh premium fuel, and clean your battery terminals annually. Taking a calm and systematic approach to troubleshooting will protect your wallet and get your bike back on the road safely.

Ehatasamul Alom is a dedicated road hybrid bikes expert. With over 15 years of experience, he helps people find the perfect ride. He began his journey as a bike mechanic. He learned the ins and outs of every bike.
Ehatasamul Alom holds a Master's degree in Mechanical Engineering from a Brown University (Providence US 02912), where he specialized in material science and bicycle kinematics. His master's thesis focused on optimizing frame geometry for road hybrid bikes to improve rider comfort and efficiency.
Ehatasamul has an extensive professional background. He spent 10 years (2010-2020) as a Senior Bike Designer at "Urban Cycles," a leading bicycle manufacturer. In this role, he led the development of several award-winning road hybrid bikes, which are known for their durability and performance. He later served (2020-2024) as the Head of Product Development at "Gear Up," a company specializing in high-end cycling components. There, he developed innovative parts and accessories specifically for road hybrid bikes.
Over the years, Ehatasamul has become an authority on Roadhybridbikes. He understands their design and function. His work focuses on making bikes easy to use. Ehatasamul believes everyone should enjoy cycling. He writes guides that are simple to read. His passion for road hybrid bikes is clear. His goal is to share his knowledge with everyone. He wants to see more people on two wheels. His advice is always practical and easy to follow.
- Ehatasamul Alom

- Ehatasamul Alom
- Ehatasamul Alom

- Ehatasamul Alom



