
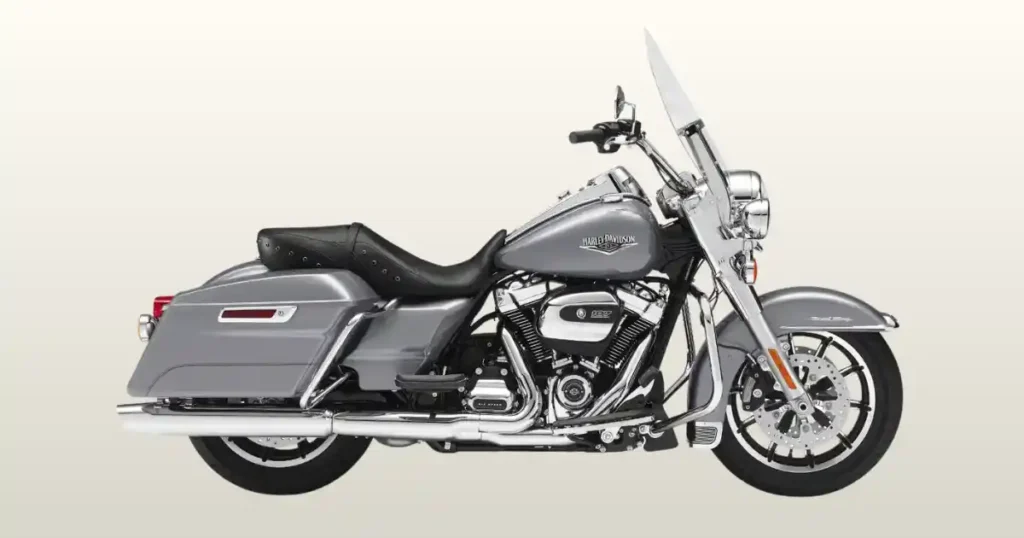
Nothing matches the frustration of gearing up for a long ride, swinging your leg over the saddle, and hitting a completely dead ignition button. That sinking feeling is exactly what a rider faced one crisp autumn morning outside Flagstaff, Arizona, right before a planned trek down Route 66. He was convinced his starter motor had fried, but we decided to check the battery cables first. Sure enough, a single loose terminal was the entire culprit. Five minutes of tightening had the massive Milwaukee-Eight V-twin roaring to life, and the whole crew joked that our coffee break lasted longer than the actual repair. If you are dealing with a harley davidson road king not starting, do not panic. Most of these issues come down to simple fixes you can easily handle right in your own garage.
Harley-Davidson Road King Not Starting? Check These Simple Things First
Before you start pulling side covers off or ordering expensive replacement parts, take a deep breath. Motorcycles are exposed to constant road vibration, weather, and long storage periods. These elements frequently cause tiny, simple issues that mimic major mechanical failures. Checking the easiest variables first saves you hours of unneeded diagnostic stress.
What Happens When You Press the Start Button?
- No response at all: The bike acts completely dead, with no lights, no clicks, and no signs of electrical life anywhere.
- Single clicking sound: You hear one solid, sharp click from under the seat, but the engine does not turn over.
- Rapid clicking: A fast, machine-gun-like clicking noise erupts the moment you press the start button.
- Engine cranks but won’t fire: The starter spins the engine rapidly and healthily, but the motor fails to catch and run.
- Engine starts then stalls: The V-twin fires up for a brief second or two, stumbles, and immediately dies.
- Slow cranking: The starter struggles heavily to turn the engine over, sounding weak and sluggish.
- Security light flashing: The red security icon on your dash stays lit or blinks rapidly while trying to start.
- Dashboard resets while cranking: The digital gauges go completely dark or flash back on the moment you hit the button.
Five-Minute Quick Inspection Checklist
- Battery voltage: Use a simple meter to check that the battery holds a healthy baseline charge.
- Fuel level: Open the tank lid to verify you actually have gas, rather than trusting a stuck fuel gauge.
- Engine stop switch: Ensure the handlebar kill switch is flipped to the “Run” position.
- Side stand: Double-check that your kickstand is fully up, as safety switches can cut power.
- Neutral indicator: Confirm the green “N” light is glowing on your dash before starting.
- Battery terminals: Wasp-waist loose bolts or powdery white corrosion will block vital electrical current.
- Main fuse: Inspect the heavy-duty max fuse behind the left side cover to ensure it is not blown.
- Fuel pump priming sound: Listen closely for a distinct, two-second high-pitched buzz when you turn the key.
- Key fob battery: A weak coin cell battery in your pocket fob can cause the security system to lock you out.
Warning Signs You Shouldn’t Ignore
- Burning electrical smell: Acrid, sweet smoke indicates shorted wires or an overheated component.
- Grinding starter noise: Harsh metallic grinding means the starter gear teeth are failing to engage the flywheel properly.
- Smoke from wiring: Stop cranking immediately if you see wisps of smoke near the battery or frame.
- Fuel leak: The smell of raw gas or wet spots under the tank point to dangerous fuel line leaks.
- Oil leak: Major puddles underneath the engine can lead to a sudden drop in vital oil pressure.
- Check Engine light: An illuminated amber engine icon means the computer has logged a specific error code.
How the Harley-Davidson Road King Starting System Works
The classic Harley touring setup blends raw heavy mechanical power with modern digital management. When you flip the ignition, a specific sequence must occur perfectly for the bike to run.
Main Components in the Starting System
- Battery: The heart of the system, supplying raw 12-volt chemical energy to every component.
- Starter motor: A high-torque electric motor tasked with physically spinning the heavy V-twin pistons.
- Starter relay: A small electrical switch that directs low handlebar current into heavy battery juice.
- Starter solenoid: An electromagnet that pushes the starter gear forward into the engine flywheel.
- Electronic Control Unit (ECU): The master digital brain controlling fuel injection and spark timing.
- Fuel pump: An electric pump submerged in the tank that pressurizes the entire fuel rail.
- Fuel injectors: Microscopic electronic valves that spray a fine mist of gasoline into the cylinders.
- Ignition coils: Transformers that step up low battery voltage into thousands of volts of spark power.
- Spark plugs: Small threaded plugs that create the actual electrical arc to ignite the fuel.
- Crankshaft position sensor: A magnetic pickup that tells the ECU exactly when to fire the spark plugs.
- Bank Angle Sensor: A safety tip-over switch that shuts down the bike if it drops past a specific angle.
- Harley Security System: An anti-theft module that checks for your physical key fob presence.
- Key fob receiver: An antenna that communicates directly with the wireless security chip in your pocket.
What Happens During Startup?
- Battery powers the ECU: Turning the ignition key sends immediate electrical current to the main computer.
- Security system verifies the key: The security module searches for the correct radio code from your key fob.
- Fuel pump primes: The pump runs briefly to pressurize the fuel lines for clean starting injection.
- Starter relay energizes: Pressing the handlebar button closes a low-amp switch to activate the starter system.
- Starter motor cranks: Heavy electrical current rushes into the starter, physically spinning the crankshaft.
- Injectors deliver fuel: The ECU tracks the spinning crankshaft and commands the fuel injectors to open.
- Spark ignites the mixture: The ignition coils release high-voltage power to create a bright arc at the spark plugs.
- Engine starts: Internal combustion takes over, and the starter automatically disengages from the running motor.
Most Common Reasons a Harley-Davidson Road King Won’t Start
When a bike refuses to play nice, it usually boils down to a handful of classic mechanical and electrical troublemakers. Finding the root cause requires a systematic approach.
Weak or Dead Battery
A weak battery is the undisputed king of no-start issues on heavy touring bikes. Harley touring models require immense cranking power to turn over large displacement cylinders.
Common Symptoms
You will hear a rapid, machine-gun clicking sound when pressing the start button. Your digital dash lights might flicker violently, fade out completely, or reset every time you try to crank the engine.
Battery Voltage Test
Set a digital multimeter to DC volts and place the leads directly on the clean battery posts. A fully healthy motorcycle battery must read at least 12.6 to 12.8 volts at rest.
Load Test
Resting voltage can be highly deceptive. Watch the meter screen while pressing the start button; if the voltage drops below 9.6 volts during cranking, the battery is toast.
Recharge or Replace
If the battery is merely discharged from sitting, hook it up to a dedicated automatic smart charger. If it fails a proper load test after a full charge, buy a new AGM battery.
Loose or Corroded Battery Connections
A battery is only as good as the wires connecting it to the motorcycle frame and starter. Vibration can easily work terminal bolts loose over a long riding season.
Corrosion Signs
Look closely for flaky white, green, or blue powdery crust building up around the lead battery posts. This crust acts like an insulator, blocking electricity from flowing freely.
Cleaning Procedure
Disconnect the negative cable first, then the positive. Scrub the posts and wire eyelets clean with a wire brush and a simple baking soda water mix, then bolt them back down tightly.
Faulty Starter Relay
The starter relay is a small plastic cube that handles the high-amperage current needed to jumpstart the heavy starter motor.
Single Clicking Sound
If you press the button and hear one loud click from under the seat but the engine does not turn over at all, the relay contacts are likely burned out.
Relay Testing
Locate the relay in the fuse panel. You can easily pull it and swap it with an identical non-critical relay next to it, like the lighting relay, to see if starting returns.
Starter Solenoid Failure
The solenoid sits directly on top of the starter motor body. It pulls a double duty of shifting the starter gear forward and closing heavy internal electrical contacts.
Symptoms
You may hear the starter motor spinning freely with a high-pitched whirring noise, but the actual engine pistons are not turning over because the starter gear never engaged.
Voltage Drop Test
Connect your multimeter to the main output post of the solenoid. If you see full battery voltage there when cranking but the motor does not turn, the internal solenoid disc is bad.
Starter Motor Problems
Over long years of service, the electric motor can develop internal wear that keeps it from spinning the heavy V-twin.
Slow Cranking
The starter sounds tired, groaning loudly and turning the engine over very slowly, even though you have already verified the battery is completely fresh and fully charged.
Bench Testing
Removing the starter allows you to apply direct 12-volt battery power to it on a workbench. If it spins weakly or pulls massive, fuse-blowing current, it requires a rebuild.
Fuel Pump Failure
Modern fuel-injected Harleys rely heavily on a pressurized fuel delivery system to feed the fuel injectors.
No Priming Sound
When you flip the handlebar switch to “Run,” you should hear a clear two-second buzzing sound from inside the gas tank. Absolute silence indicates a major fuel pump issue.
Fuel Pressure Test
Attach a dedicated fuel pressure gauge to the quick-disconnect fitting under the tank. The system should jump up to around 55 to 60 PSI instantly when priming.
Dirty Fuel Injectors
Over time, tiny deposits can clog the microscopic nozzles of your electronic fuel injectors, starving the cylinders of gas.
Restricted Fuel Flow
The engine might crank perfectly and display a strong spark, but it refuses to catch fire because no gasoline mist is reaching the combustion chambers.
Cleaning Methods
For mild issues, a high-quality fuel system cleaner added directly to the tank can clear deposits. Severe clogs require removing the injectors for professional ultrasonic cleaning.
Fouled Spark Plugs
Spark plugs live in a harsh environment and can easily wear out or become coated in deposits that block electrical arcs.
Carbon Deposits
Heavy black, flaky carbon crust building up on the plug tip will ground out the electrical current, preventing a clean spark from jumping the gap.
Excess Fuel Fouling
If the engine is repeatedly cranked without starting, the plug tips can become completely soaked in raw gasoline, which shorts them out and kills the spark.
Replacement Interval
Harley-Davidson generally recommends changing your spark plugs every two years or 10,000 miles to maintain crisp, reliable ignition performance.
Ignition Coil Failure
The ignition coil transforms weak battery power into a massive, hot electrical spike that can jump across the spark plug gap under high engine compression.
Weak Spark
A failing coil might produce a faint, dull yellow spark instead of a bright, crisp blue snap. This weak spark cannot ignite gasoline under compression.
Coil Testing
Use a digital multimeter to measure the primary and secondary resistance of the coil. If the ohms readings fall outside factory specifications, replace the coil.
Harley Security System Problems
The factory security setup is designed to prevent theft, but a simple oversight can easily lock the rightful owner out of their own motorcycle.
Dead Key Fob Battery
If your key fob battery dies, the bike will not recognize that you are standing right there. The turn signals will usually flash repeatedly to warn you.
Immobilizer Errors
The security module will completely cut power to the ignition circuit or the fuel pump, leaving you with a bike that cranks endlessly but never fires up.
Bank Angle Sensor Fault
This smart safety sensor is designed to protect your engine by shutting it down immediately if the motorcycle tips over on its side.
Tip-Over Detection
If the sensor gets stuck or fails internally, it falsely tells the main computer that the bike is lying on the ground, completely blocking the starting sequence.
Sensor Inspection
Ensure the sensor module is mounted perfectly level and secure in its bracket. You can often reset a tripped sensor by cycling the main ignition key off and back on.
Wiring Harness Problems
With miles of wire running through a vibrating steel frame, chafing and loose connections are bound to happen eventually.
Loose Connectors
Main wiring plugs can slowly back out over time due to road vibration, breaking critical connections between sensors and the central ECU brain.
Chafed Wiring
Look closely for wires that rub against sharp metal frame edges, particularly around the steering neck and directly underneath the heavy touring seat.
Harley-Davidson Road King Cranks But Won’t Start
When the starter spins the engine over at a healthy, rapid speed but the motor refuses to run, you can confidently rule out the battery and starter motor. The issue lies within the classic triangle of combustion: fuel, spark, or compression.
Check Spark
Pull a spark plug out, ground the threaded body firmly against a clean metal engine fin, and crank the motor over. Look for a bright, snapping blue arc across the electrode gap.
Listen for Fuel Pump Priming
Turn the ignition key and listen closely right next to the fuel tank. You must hear that distinct, high-pitched two-second buzz as the electric pump builds initial line pressure.
Verify Injector Operation
You can use a specialized inexpensive automotive “noid light” plugged into the fuel injector wiring harness. The light should flash rhythmely while cranking, proving the ECU is sending firing signals.
Measure Fuel Pressure
Hook up a proper fuel pressure tester gauge to the check port under the tank. Flip the switch and ensure the needle hits the factory specification of roughly 55 to 60 PSI.
Inspect the Air Intake
Remove the air cleaner cover to ensure the filter element is not completely choked with dirt or blocked by an old rag left behind during maintenance.
Perform a Compression Test
Thread a compression gauge into a spark plug hole and crank the engine with the throttle wide open. A healthy V-twin should read well above 120 PSI of pressure.
Harley-Davidson Road King Starts Then Dies
This frustrating symptom usually means the starting system works fine, but the engine cannot maintain a stable air-fuel mixture or proper electrical signals once it fires.
- Fuel Pressure Loss: The pump builds enough initial pressure to prime and start the bike, but fails to maintain constant fuel flow once the engine demands a steady supply.
- Injector Problems: The fuel injectors stick open or closed after the initial starting squirt, starving or flooding the hot cylinders with raw fuel.
- Vacuum Leaks: Unmetered air leaking past degraded rubber intake manifold seals leans out the air-fuel mixture, causing the engine to stumble and stall immediately.
- Idle Air Control Issues: A dirty or stuck Idle Air Control (IAC) valve cannot properly regulate the tiny amount of air required to keep the heavy V-twin idling smoothly.
- ECU Sensor Faults: A failing engine temperature or crankshaft sensor sends erratic data to the computer, causing it to mistime spark delivery and kill the engine.
Harley-Davidson Road King Won’t Start After Winter Storage
Leaving a motorcycle sitting parked for months at a time without proper preparation is a recipe for spring starting headaches. Fuel and batteries do not age well in isolation.
- Weak Battery: A battery left unmanaged will slowly drain itself over winter. Internal lead plates can sulfate, permanently destroying the battery’s ability to hold a strong charge.
- Stale Fuel: Modern gasoline begins breaking down in less than a month. It turns into a gummy varnish that easily clogs tiny fuel pump strainers and internal injector ports.
- Fuel Pump Sticking: Residual fuel varnish inside the pump housing can physically glue the internal spinning impellers in place, preventing the pump from running when powered.
- Injector Deposits: Dried fuel inside the microscopic injector tips leaves behind solid crusty deposits that ruin the clean, atomized spray pattern required for cold starts.
- Rodent Damage: Mice love nesting under touring seats and inside air filter boxes. They can easily chew right through vital wiring harnesses, causing difficult-to-find electrical shorts.
Harley-Davidson Road King Won’t Start After Rain or Washing
Water is highly conductive and can easily find its way into sensitive electrical connections when driven by high-pressure spray or heavy downpours at highway speeds.
- Wet Ignition Coils: Moisture coating the exterior housing of your ignition coil can provide an easy path for high-voltage electricity to short out directly to the metal frame.
- Moisture Around ECU Connectors: Water pooling inside the multi-pin main computer plug disrupts delicate low-voltage sensor signals, confusing the digital brain and halting startup.
- Water in Spark Plug Boots: Deep spark plug wells can trap water inside the rubber protective boots, grounding out the spark before it ever reaches the combustion chamber.
- Starter Relay Corrosion: Water creeping into the fuse block corrodes the thin metal pins of the starter relay, creating high resistance that prevents the switch from closing.
Step-by-Step Harley-Davidson Road King Troubleshooting Process
To diagnose a starting issue without wasting money on unneeded parts, you must follow a methodical testing path. I always use a reliable system whenever analyzing a bike that refuses to run. One bright Monday morning in Amarillo, Texas, a traveling rider was completely certain his expensive fuel pump had died. His battery showed a decent 12.5 volts at rest, but the moment he hit the start button, the voltage plummeted all the way down to 8 volts. A quick battery swap had him back on the highway before lunch, saving him hundreds of dollars on a fuel pump he did not actually need. Follow these steps in order to find your issue quickly.
Step 1 – Check Battery Voltage
Connect a digital multimeter to the battery terminals. Ensure the standing voltage reads at least 12.6 volts, and watch closely to make sure it stays above 9.6 volts during cranking.
Step 2 – Inspect Battery Connections
Physically grab the thick positive and negative battery cables and give them a firm wiggle. They must be completely rock-solid with zero signs of corrosion or loose mounting bolts.
Step 3 – Check Main Fuse
Pull the left side cover off and locate the large 40-amp green plastic main max fuse. Pull it out and inspect the internal metal element to ensure it is not melted through.
Step 4 – Listen for Fuel Pump Priming
Turn the main ignition key to the on position and flip the handlebar run switch. Listen for the clear, high-pitched two-second hum coming from inside the fuel tank.
Step 5 – Inspect Spark Plugs
Remove the spark plugs using a dedicated socket. Inspect the firing tips for wet raw gasoline, heavy black carbon buildup, or worn-out rounded electrodes that need replacement.
Step 6 – Test Starter Relay
Locate the small square starter relay cube inside your fuse panel. Gently pull it out and check the metal pins for white corrosion, or swap it with the identical lighting relay.
Step 7 – Measure Fuel Pressure
Attach a mechanical fuel pressure gauge directly to the quick-disconnect fuel valve under the gas tank. Cycle the ignition to verify the line holds a steady 55 to 60 PSI.
Step 8 – Perform a Compression Test
Thread a compression tester into the front cylinder head spark plug hole. Crank the motor over with the throttle held wide open to verify the cylinder builds adequate pressure.
Harley-Davidson Road King No-Start Diagnosis Table
Professional factory technicians always diagnose problems by analyzing specific symptoms rather than blindly swapping parts. This approach saves time and prevents expensive mistakes. Here is a clear breakdown of the most common issues you can easily identify right at home.
| Symptom | Most Likely Cause | DIY Difficulty | Usually Repairable at Home |
| No response at all | Dead battery or blown main fuse | Very Easy | Yes |
| Rapid clicking noise | Weak battery or loose cable | Easy | Yes |
| Single solid click | Faulty starter relay or solenoid | Medium | Yes |
| Cranks but won’t fire | Failed fuel pump or fouled spark plugs | Medium | Yes |
| Starts then immediately dies | Fuel pressure loss or intake vacuum leak | Medium | Sometimes |
| No fuel pump priming sound | Failed fuel pump or blown fuel fuse | Medium | Sometimes |
| Security light flashing | Dead key fob battery or system lockout | Medium | Sometimes |
| Slow, groaning cranking | Failing starter motor or high internal resistance | Medium | Sometimes |
Battery Voltage Reference Table
A basic digital multimeter can tell you almost everything you need to know about your electrical health in less than two minutes. Use this simple voltage guide to quickly determine whether your battery deserves further attention or if you should move on to testing other components.
| Voltage Reading | Battery Condition | Recommended Action |
| 13.0 Volts or higher | Excellent Surface Charge | Continue standard diagnosis elsewhere |
| 12.8 Volts | Fully Healthy Battery | Ride normally; battery is fine |
| 12.5 Volts | Slightly Low Charge | Connect to a smart battery charger |
| 12.2 Volts | Weak Battery | Perform a professional load test |
| Under 12.0 Volts | Severely Damaged/Poor | Replacement is highly likely required |
| Under 10.0V while cranking | Complete Battery Failure | Replace with a fresh AGM battery immediately |
Road King Starting System Troubleshooting Table
Different symptoms point directly to different components within your starting circuit. Matching what you hear and see to this helpful troubleshooting guide makes your garage diagnostic work much more efficient.
| Starting Symptom | Possible Root Cause | Recommended First Check |
| Clicking sound only | Failed starter relay or low voltage | Check battery connections and swap relay |
| Cranks healthy but won’t fire | Missing spark or lack of fuel delivery | Check spark plug arc and fuel pump fuse |
| Starts up then quickly stalls | Unstable fuel pressure or vacuum leak | Measure fuel rail pressure with a gauge |
| Hard starting when cold | Weak battery or dirty fuel injectors | Check cranking voltage drop on meter |
| Security dash light flashing | Unrecognized key fob signal | Replace the tiny key fob coin battery |
| Slow, labored cranking speed | Failing starter motor or bad ground | Clean the heavy main engine ground cable |
Essential Tools for Diagnosing a Harley-Davidson Road King
You do not need an expensive dealership workshop to track down most common starting issues. A small collection of simple, reliable diagnostic tools can help you tackle almost any situation right in your home garage.
Recommended Diagnostic Tools
- Digital multimeter: A vital tool for tracking down voltage levels, open circuits, and bad grounds.
- Battery charger: An automatic smart charger or tender to safely replenish a drained battery.
- Battery load tester: A dedicated tool that places a heavy simulated starter load on the battery.
- Spark tester: An inexpensive tool that lets you safely visually inspect ignition spark strength.
- Fuel pressure gauge: A mechanical gauge with a Harley-specific adapter to check fuel line pressure.
- Compression tester: A threaded gauge used to measure the mechanical seal of your pistons and valves.
- Motorcycle diagnostic scanner: A plug-in tool to read factory trouble codes directly from the ECU.
- Basic socket set: A collection of standard SAE sockets to remove seats, covers, and battery leads.
- Contact cleaner: A fast-drying aerosol spray to safely clean oil and dirt out of electrical plugs.
- Flashlight: A bright light to help you inspect dark areas under the tank and behind side panels.
Common Mistakes Road King Owners Make
Even highly experienced touring riders can easily overlook basic things when their bike refuses to start right before an important road trip. Avoiding these common traps saves you money.
Replacing the Starter Before Testing
Many owners assume a bike that will not turn over must have a bad starter motor. They spend hundreds of dollars replacing it, only to find the real issue was a simple loose battery bolt or a cheap five-dollar relay.
Ignoring Battery Load Testing
Assuming a battery is perfect just because a meter shows 12.6 volts at rest is a classic mistake. Batteries can easily hold surface voltage while completely lacking the internal amperage needed to crank a massive V-twin.
Forgetting the Key Fob Battery
It is easy to forget that your key fob relies on a tiny coin cell battery. When that battery dies, the security system will silently lock out the starting system, leaving you stranded over a three-dollar fix.
Using Old Fuel After Storage
Trying to start a bike on six-month-old fuel that has sat all winter is a major error. Stale fuel refuses to ignite easily and quickly gums up your expensive fuel injection components.
Skipping Spark Plug Inspection
Many riders leave old spark plugs in their engines for far too long. Worn out or carbon-fouled plugs cannot create the clean, hot arc needed for fast, reliable starting.
Replacing Parts Without Diagnosis
Throwing random new parts at a bike hoping something fixes the issue is expensive and frustrating. Always take the time to test and prove a component is actually bad before buying a replacement.
Expert Advice From a U.S. Harley Technician
Experienced motorcycle mechanics know that taking your time with careful testing beats unguided guessing every single time. Modern touring bikes place heavy demands on their electrical systems.
“Touring motorcycles like the Road King place heavy demand on the battery. We often see owners replace the starter motor when the real problem is voltage dropping below the ECU’s operating range during cranking.” — Mark Peterson, Harley-Davidson Master Technician, Arizona
Why Battery Testing Comes First
The central computer brain on a modern Harley requires a steady supply of clean electrical voltage to function properly. If the battery voltage drops too low while the starter is spinning, the computer will shut down, stopping the fuel injectors from firing and killing the spark. The engine will crank all day long but will never start until the system voltage is stabilized.
Real Workshop Example
One Monday morning in Phoenix, a rider brought his bike in ahead of a planned cross-country tour. The motorcycle would crank over but refused to fire up. The owner had already tested the battery at home and noted it read a seemingly healthy 12.6 volts at rest. However, when we connected a professional meter and hit the starter button, the heavy electrical draw caused the voltage to plummet down to 8.5 volts. The low voltage was completely blinding the ECU. Installing a fresh AGM battery restored normal starting instantly, allowing the rider to head out on his trip without any further delay.
How to Prevent Harley-Davidson Road King Starting Problems
A small amount of regular preventive maintenance goes a very long way toward ensuring your heavy touring bike is always ready to ride, whether you are running across town or heading out across the country.
Keep the Battery on a Smart Tender
Always connect your motorcycle to a dedicated automatic smart battery tender whenever you plan to leave it parked for more than a week. This keeps the battery fully charged and prevents damaging sulfation from ruining the internal plates.
Use Fresh Premium Fuel
Always fill your tank with fresh, high-quality premium fuel from busy gas stations. If you plan to store the bike, add a quality fuel stabilizer and run the engine for ten minutes to distribute it through the entire fuel system.
Replace Spark Plugs on Schedule
Do not neglect your spark plugs. Change them out every two years or 10,000 miles to ensure clean, efficient ignition. Always check and set the proper electrode gap using a spark plug gapping tool before installation.
Inspect Battery Connections
Make it a regular habit to remove your seat and inspect the main battery terminals during regular oil changes. Ensure the mounting bolts are snug and apply a light coating of dielectric grease to prevent corrosion.
Protect Electrical Connectors
Whenever you unplug electrical connectors during maintenance, apply a small dab of electrical dielectric grease inside the plastic housing. This simple step seals out moisture from rain and washing, preventing corrosion.
Ride Regularly During Storage Seasons
If weather permits, try to take your motorcycle out for a solid thirty-minute ride at least once a month during the winter season. This fully warms up the engine, burns off trapped moisture, and keeps fuel flowing through the system.
Follow Harley-Davidson Service Intervals
Stick closely to the factory recommended maintenance schedule outlined in your owner’s manual. Regular professional inspections can catch tiny developing issues before they turn into major breakdowns on the side of the road.
When You Should Visit a Harley-Davidson Dealer
While many basic starting issues can be safely sorted out right in your home garage with basic hand tools, some technical faults require specialized diagnostic equipment.
Persistent Check Engine Light
If your check engine light stays illuminated and you cannot clear the trouble codes using standard dashboard routines, you need a professional scanner to read the internal memory.
Immobilizer Problems
Advanced issues within the factory security system, such as a failed security module or an antenna failure, require specialized factory software to reprogram and pair components.
ECU Communication Errors
If the main computer brain stops communicating with the dashboard or sensors, troubleshooting requires advanced breakout boxes and factory wiring schematics.
Fuel Injector Failure
Replacing bad internal fuel injector assemblies or dealing with deep, hardened varnish clogs inside the fuel rail often requires specialized pullers and testing benches.
Internal Engine Problems
If your compression test reveals low pressure due to worn piston rings, sticky valves, or mechanical timing issues, fixing the root cause requires a professional engine teardown.
Harley-Davidson Road King vs Other Harley Touring Models
While Harley touring models share many identical frame components and electrical systems, each specific bike has its own unique layout considerations that can affect troubleshooting.
Harley-Davidson Road King vs Harley-Davidson Street Glide
The Street Glide features a heavy, fork-mounted batwing fairing packed full of audio equipment and instruments. This extra gear adds weight to the front end and draws more electrical current than the clean, classic layout of the Road King.
Road King vs Harley-Davidson Road Glide
The Road Glide utilizes a massive, frame-mounted sharknose fairing. Because the fairing is fixed directly to the motorcycle frame rather than the handlebars, the main wiring harness stays stationary, reducing wire chafing risks.
Road King vs Harley-Davidson Electra Glide
The Electra Glide is a full-dress touring machine featuring a large rear trunk, plush passenger seating, and a complete suite of electronic comforts. This extra equipment creates a highly complex wiring system that demands a flawless battery.
Which Starting Problems Are Common Across Harley Touring Models?
All heavy Harley touring models share the exact same large-displacement V-twin engine architecture and heavy starter components. This means they all face identical challenges regarding battery maintenance, loose terminal bolts, and fuel pump priming issues.
Frequently Asked Questions
Why is my Harley-Davidson Road King not starting even though the battery seems good?
A battery can easily show a decent resting voltage on a meter while lacking the actual internal amperage needed to turn over a heavy engine. Always perform a proper load test while cranking to see if the voltage drops below 9.6 volts.
Why does my Road King only make a clicking sound?
A rapid clicking noise almost always points to a weak battery or a loose ground cable. A single, solid loud click usually means your starter relay or the starter motor solenoid has failed internally.
Can a weak battery stop the ECU from starting the engine?
Yes, the central computer requires a minimum operating voltage to function. If your starter motor drains the battery voltage down below roughly 10 volts during cranking, the ECU will shut down, stopping spark and fuel delivery.
Why won’t my Road King start after winter storage?
The most common causes are a discharged battery and stale gasoline that has turned into a gummy varnish. This old fuel can easily clog the small ports inside your fuel injectors and pump.
How do I know if the starter relay has failed?
If your battery is fully charged but you hear a single click or nothing at all when pressing the button, pull the starter relay and swap it with the identical lighting relay to see if power returns.
Can the Harley security system prevent starting?
Yes, if the system does not detect the correct wireless radio signal from your pocket key fob, it will immobilize the starting circuit. This is often caused by a simple dead coin battery inside the fob.
Why does my Road King crank but never fire?
If the engine spins over at a normal speed, the battery is good. The issue is a lack of fuel or missing spark. Check for a humming fuel pump and visually inspect your spark plugs for a clean blue arc.
How much does it cost to repair a Harley-Davidson Road King that won’t start?
If the problem is a loose wire or a dead fob battery, the fix costs virtually nothing. A new starter relay runs around ten dollars, a quality replacement battery costs around 150 dollars, while a new starter motor can run several hundred dollars.
Final Recommendation
Dealing with a motorcycle that refuses to start can be incredibly frustrating, but approaching the problem systematically saves time and money. Over my years working around these heavy touring platforms, I have found that nearly eighty percent of all no-start issues boil down to simple battery health and clean connections. Before you spend money on a new starter motor or an expensive fuel pump, buy an inexpensive digital multimeter and perform a proper cranking voltage drop test. Taking ten minutes to verify the basics ensures you can pinpoint the real issue quickly, getting your bike out of the garage and back onto the open road where it belongs.

Ehatasamul Alom is a dedicated road hybrid bikes expert. With over 15 years of experience, he helps people find the perfect ride. He began his journey as a bike mechanic. He learned the ins and outs of every bike.
Ehatasamul Alom holds a Master's degree in Mechanical Engineering from a Brown University (Providence US 02912), where he specialized in material science and bicycle kinematics. His master's thesis focused on optimizing frame geometry for road hybrid bikes to improve rider comfort and efficiency.
Ehatasamul has an extensive professional background. He spent 10 years (2010-2020) as a Senior Bike Designer at "Urban Cycles," a leading bicycle manufacturer. In this role, he led the development of several award-winning road hybrid bikes, which are known for their durability and performance. He later served (2020-2024) as the Head of Product Development at "Gear Up," a company specializing in high-end cycling components. There, he developed innovative parts and accessories specifically for road hybrid bikes.
Over the years, Ehatasamul has become an authority on Roadhybridbikes. He understands their design and function. His work focuses on making bikes easy to use. Ehatasamul believes everyone should enjoy cycling. He writes guides that are simple to read. His passion for road hybrid bikes is clear. His goal is to share his knowledge with everyone. He wants to see more people on two wheels. His advice is always practical and easy to follow.
- Ehatasamul Alom

- Ehatasamul Alom
- Ehatasamul Alom

- Ehatasamul Alom



