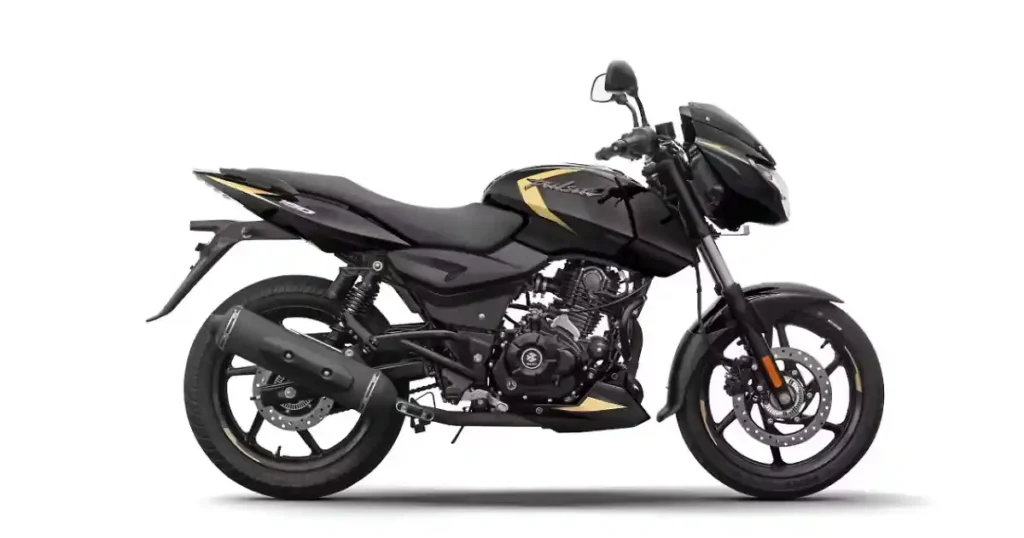
You’re standing in a parking lot in Seattle, Washington, thumbing the starter on your Pulsar 180, and it either cranks without firing or does nothing at all. Neither one automatically means a major engine failure. A Pulsar 180 not starting usually falls into one of two very different categories: the starter doesn’t turn, or the starter turns but the engine never fires. Those two symptoms point toward completely different parts of the bike, which is exactly why diagnosing the right one first saves you time and money.
Worth noting up front: the Pulsar 180 owner’s manual recommends checking basic starting conditions first and specifically warns against holding the starter continuously for more than 5 seconds at a time. This guide walks through the full diagnosis, from the simplest five-minute checks to deeper electrical and fuel-system work.
First, Find Out What Your Pulsar 180 Is Doing
A no-start problem gives clues through sound and behavior. Listen before reaching for a screwdriver.
The starter does not turn at all
No sound, a single click, repeated clicking, very weak cranking, or dashboard lights going dim all point toward a battery, fuse, relay, switch, or interlock issue.
The engine cranks but does not start
The starter motor sounds normal and the engine turns over, but it never fires. This moves the diagnosis toward fuel, spark, and air rather than the electrical starting circuit.
The engine starts and immediately dies
A choke or fueling issue, a weak battery or charging problem, a carburetor or fuel-delivery fault, or an idle and air-fuel imbalance can all cause this.
It starts only after several attempts
A weak battery, an incorrect cold-start procedure, a fouled spark plug, a fuel-delivery problem, or a carburetor or ignition issue are the usual suspects here.
It starts when pushed but not with self-start
This is a strong clue pointing toward starting-system or battery trouble specifically. Don’t automatically blame the CDI based on this symptom alone.
Check These Simple Things Before Opening Anything
This is the five-minute diagnosis. It can save an hour of unnecessary part swapping, especially if the bike simply has the wrong switch or fuel setting.
Check the ignition switch
Confirm the key is fully in the ON position, dash lights are present, and watch for any unusual warning lights.
Check the engine kill switch
Confirm it’s in the RUN or ON position. This easy mistake happens more often than most riders expect, especially after the bike has been handled or parked by someone else.
Put the transmission in neutral
Check the neutral indicator, and rock the bike slightly if the neutral light seems uncertain.
Pull the clutch lever
This engages the starter lockout or interlock system. Bajaj documentation states the motorcycle can start in gear when the clutch is depressed, though neutral remains the recommended starting position.
Check the fuel tap
Confirm it’s in the ON position, or RES when appropriate, and don’t assume there’s enough usable fuel simply because the gauge shows something.
Keep the throttle closed during normal starting
Repeatedly twisting the throttle while troubleshooting can make diagnosis harder rather than easier. Follow the specific owner’s manual for your exact motorcycle version.
Check the Pulsar 180 Battery and Self-Start
Battery trouble is one of the first suspects when the starter is slow, clicking, or completely silent. A weak battery can look exactly like a starter-motor fault, and a reliable multimeter is the single most useful tool for telling the difference.
Signs of a weak battery
A slow rrr-rrr-rrr sound, a clicking relay, dash resets, a weak-sounding horn, and noticeably dim lights all point toward a struggling battery.
Test battery voltage with a multimeter
Place the probes on the correct terminals, and understand that resting voltage tells a different story than cranking voltage. Avoid treating one single voltage number as a universal pass or fail test, and follow your specific battery and service-manual specifications instead.
Check battery terminals
Look for a loose positive terminal, a loose negative terminal, corrosion, and a poor ground connection.
When a battery charge is not enough
If the battery repeatedly goes flat or fails specifically under load, the charging system itself may be involved rather than the battery alone. RevZilla’s U.S. motorcycle technician Ari Henning recommends separating a “no crank” problem from a “no start” problem and using systematic battery and electrical checks rather than immediately replacing parts.
Check the Starter Relay, Fuse and Starter Button
If the battery appears healthy but pressing the button produces nothing, move one step down the electrical chain.
Starter relay symptoms
A single click, repeated clicks, or no response at all each point toward the relay in slightly different ways.
Inspect the main or start fuse
Look for a blown fuse, and replace it only with the correct rating. Fitting a larger fuse than specified is genuinely unsafe and can cause further electrical damage.
Check the starter button
Dirt, moisture, intermittent contact, or a button that only works when pressed at a certain angle all point toward a failing switch.
Check the clutch and neutral interlock
Safety switches can prevent cranking entirely, so rule this out before blaming the starter motor itself.
Check Fuel Before Blaming the CDI
A Pulsar 180 needs the right fuel supply and mixture to start. Older carbureted versions especially deserve a careful fuel-system check.
Is there fresh petrol in the tank?
Confirm the actual fuel level rather than trusting the gauge alone, and consider whether stale fuel is likely after long storage or fuel contamination.
Check fuel flow
The fuel tap, fuel line, filter, and carburetor fuel inlet all deserve inspection along the fuel’s actual path.
Look for a clogged carburetor
The pilot circuit, jets, float bowl, and fuel passages can all restrict fuel delivery in ways that mimic other problems entirely.
Check for flooding
A strong petrol smell, a wet spark plug, and repeated starting attempts are all signs of flooding. Avoid endlessly cranking the starter once you suspect this.
Don’t keep opening the throttle randomly
Troubleshooting gets confusing fast when several variables change at once. RevZilla’s troubleshooting guidance uses the basic combustion triangle of fuel, spark, and compression, then recommends checking simple fuel-delivery problems before tearing deeper into the motorcycle.
Use the Choke Correctly on a Cold Pulsar 180
Cold starting can be very different from starting a warm engine, especially on carbureted Pulsar 180 versions.
When to use the choke
A cold engine, the first start of the day, or a long period parked all call for choke use.
Basic cold-start sequence
Fuel tap ON or RES, ignition ON, kill switch ON, neutral confirmed, choke engaged as required, throttle kept closed, and the starter pressed briefly.
Turn the choke off after the engine warms
Leaving the choke engaged too long can cause poor running, with black smoke or rough running as clear warning signs. Bajaj’s Pulsar 180 documentation specifically describes using the choke for a cold engine and returning it to OFF once the engine is warm enough to idle normally.
Inspect the Spark Plug
A fuel-filled engine still won’t start without a usable ignition spark, and a basic spark plug gap gauge makes this check far more precise.
Remove and inspect the spark plug
Look for a wet plug, black carbon deposits, excessive wear, a damaged electrode, an incorrect gap, or a cracked insulator.
Check the plug cap and wire
A loose cap, damaged insulation, moisture, or a poor connection can all interrupt spark delivery.
What a healthy spark should look like
A strong, consistent spark is what you’re looking for. Keep your hands well away from high-voltage ignition components while testing.
When replacing the spark plug makes sense
An old plug, a fouled plug, an incorrect gap, or repeated hard starting all justify a fresh replacement spark plug. RevZilla notes that worn spark plugs can contribute to hard starting, poor performance, and higher fuel use, and recommends following the motorcycle’s specified plug and service interval.
Check the Air Filter and Intake
Fuel and spark may be present, but the engine still needs the right amount of air to run properly.
Signs of a restricted air filter
Hard starting, a rough idle, poor throttle response, and excess fuel symptoms all point toward the air filter.
Inspect the filter
Look for dust, oil contamination, water, or damaged filter material, and keep a spare replacement air filter on hand for quick swaps.
Check the intake path
A loose hose, a blockage, an air leak, or an improperly fitted filter can all restrict airflow even with a clean filter installed.
What If Your Pulsar 180 Starts but Stalls?
This symptom deserves its own section because the bike is technically capable of firing. Something is preventing it from continuing to run.
Starts with choke but dies without it
This points toward a possible fueling or carburetor issue, with the idle circuit often needing attention.
Starts for a few seconds then stops
Fuel starvation, blocked fuel flow, a carburetor issue, or an electrical interruption can all cause this.
Starts after sitting but not after warming up
This suggests a temperature-related electrical or fueling fault. Avoid guessing here; reproduce the symptom and test systematically instead.
Stalls after refueling
Consider fuel quality first, then fuel-flow restriction, a tank vent or fuel-cap issue, or a recent maintenance error.
Pulsar 180 Not Starting After Long Storage
A motorcycle that sat for weeks or months needs a different diagnostic approach entirely.
Check the battery first
Self-discharge, sulfation, and low cranking capacity are all common after extended storage.
Replace or assess old fuel
Old petrol, contamination, and water intrusion all become more likely the longer a bike sits.
Inspect the carburetor
Gummed-up fuel, a blocked pilot jet, or a sticking float or needle are common after long storage.
Inspect the spark plug
Fouling after repeated starting attempts is common on a bike that’s been sitting.
Do not keep pressing the starter
Bajaj’s manual warns against operating the starter continuously for more than 5 seconds and recommends waiting about 15 seconds between attempts.
Pulsar 180 Not Starting After Rain or Washing
A suddenly dead motorcycle after a pressure wash has a useful clue: moisture may be involved.
Check the spark-plug area
Look for moisture around the plug cap and water entering nearby electrical connections.
Check electrical connectors
Ignition-related connectors, corrosion, and trapped water in connectors all deserve a close look.
Let wet components dry naturally
Avoid aggressive heat, and don’t spray random chemicals into electrical connectors hoping to fix the problem faster.
Prevent repeat problems
Avoid blasting electrical connectors directly with a pressure washer. U.S. motorcycle troubleshooting guidance warns that high-pressure washing can force water into plug wires and electrical connectors, causing poor running or misfiring afterward.
Pulsar 180 Starts With Push but Not Self-Start
This is an especially useful symptom for diagnosis.
What push-start success tells you
The engine can potentially run, fuel and ignition may already be functioning correctly, and the self-start circuit specifically deserves your attention.
Check the battery
Resting voltage, cranking voltage, and terminal condition all matter here.
Check the starter circuit
The starter relay, starter button, fuse, wiring, and ground connection all belong on this checklist.
Don’t immediately replace the CDI
Symptom-based testing beats parts swapping every time. Use a multimeter and service information rather than guessing.
Pulsar 180 No Spark Troubleshooting
This section targets the more technical search variations around Pulsar 180 no spark, Pulsar 180 CDI problems, and Pulsar 180 ignition issues.
Start at the spark plug
Confirm spark presence before moving further into the ignition system.
Check the plug cap and high-tension lead
Damage or poor connection here interrupts spark before it ever reaches the plug.
Check ignition coil connections
Loose or corroded connections here can mimic a failed coil entirely.
Check relevant wiring and grounds
A poor ground connection causes symptoms that look electrical in nature but trace back to something much simpler.
Check the pickup or trigger system where applicable
This component tells the ignition system exactly when to fire, and a fault here can look identical to a CDI failure.
Test the CDI only after simpler causes are excluded
CDI, ignition-coil, and pickup testing should use the specifications for your exact Pulsar 180 generation rather than generic internet resistance numbers, since specs vary meaningfully between model years.
Pulsar 180 Not Starting Diagnosis Chart
Start with symptoms, not replacement parts. A slow crank points you toward the starting system, while normal cranking with no ignition points you toward fuel, spark, or compression instead.
| What happens | Most likely areas | First check |
|---|---|---|
| No sound | Battery, fuse, switch, relay | Battery and ignition |
| One click | Battery, relay, starter | Battery voltage |
| Slow cranking | Weak battery, terminals | Battery under load |
| Normal cranking, no start | Fuel or spark | Spark plug and fuel |
| Starts then dies | Fuel, choke, idle | Fuel flow or choke |
| Starts after push | Battery or start circuit | Battery and relay |
| Hard cold start | Choke, fuel, plug | Choke and plug |
| Problem after washing | Moisture or electrics | Plug cap or connectors |
A 15-Minute Step-by-Step Pulsar 180 No-Start Test
This is the article’s main actionable troubleshooting workflow. Start with the cheapest and simplest checks, then move toward deeper diagnosis.
Minute 1 to 2: Check switches and neutral
Ignition, kill switch, neutral, and clutch all get a quick visual and physical check.
Minute 3 to 5: Listen to the starter
Nothing, a click, a slow crank, or a normal crank each tell you something different about where to look next.
Minute 6 to 8: Check the battery
A visual inspection, terminal condition, and a multimeter test cover the essentials here.
Minute 9 to 11: Check fuel
Fuel level, fuel tap position, freshness, and overall fuel delivery all get checked in this window.
Minute 12 to 14: Check spark
Plug condition, plug cap, and actual ignition spark presence round out this stage.
Minute 15: Decide the next repair
Battery or start circuit, fuel system, ignition, a compression or mechanical problem, or professional diagnosis becomes the clear next step based on everything you’ve found.
Common Pulsar 180 Starting Mistakes to Avoid
Small mistakes can turn a five-minute diagnosis into an afternoon of frustration.
Holding the starter too long
This risks starter motor damage and battery strain well beyond the manufacturer’s 5-second guidance.
Repeatedly twisting the throttle
This changes multiple variables at once and makes an already tricky diagnosis harder to follow.
Replacing the CDI without testing
This is one of the most expensive guesses a rider can make without confirming the actual fault first.
Replacing a battery without checking charging
A new battery will fail again quickly if the charging system caused the original problem.
Ignoring loose battery terminals
This simple fix gets overlooked constantly in favor of far more expensive repairs.
Using stale petrol
Old fuel causes genuine starting problems that no amount of electrical troubleshooting will fix.
Leaving the choke on
This causes rough running and poor performance well after the engine has already warmed up.
Washing electrical areas with high pressure
This is one of the most common causes of a mysterious no-start problem right after a bike wash.
USA Expert Advice for Motorcycle No-Start Problems
For the U.S. expert perspective, Ari Henning of RevZilla and Common Tread offers genuinely useful guidance, recommending riders separate “no crank” from “no start” and check simple causes before deeper engine work.
The fuel, spark and compression approach
Fuel, spark, compression, and air together form the basic combustion system every no-start diagnosis eventually comes back to.
Why simple checks come first
This approach saves time, prevents unnecessary parts purchases, and creates a logical diagnostic trail you can actually follow instead of guessing.
Battery testing advice
Resting voltage, cranking voltage, and charging voltage all tell a different part of the story, so use model-specific specifications rather than a single universal number. RevZilla’s battery guidance explains that a battery can show acceptable resting voltage yet still perform poorly under cranking load, so a deeper battery check can be useful whenever symptoms point that way.
When You Should Stop DIY Troubleshooting
Not every Pulsar 180 starting problem belongs in the driveway.
Get professional help if
No spark remains after basic checks, compression appears abnormal, wiring is visibly damaged, the starter motor needs internal repair, the charging system repeatedly kills batteries, the carburetor requires specialist cleaning or rebuilding, or the engine makes unusual mechanical noise.
Avoid parts-swapping diagnosis
Don’t buy a CDI, coil, relay, starter motor, and battery one after another without testing each one individually first.
Use the correct service manual
Your exact Pulsar 180 generation, its exact electrical specifications, and the correct replacement parts all matter here. Bajaj directs owners toward its owner manuals and authorized service network for maintenance and model-specific servicing information.
How to Prevent Pulsar 180 Starting Problems
Prevention gives this guide extra value beyond the immediate bike-won’t-start moment.
Keep the battery charged
A battery tender during storage periods prevents most of the starting problems this article covers.
Inspect terminals periodically
A quick look catches corrosion long before it causes a no-start situation.
Use fresh fuel
Stale fuel is one of the easiest problems to avoid entirely with basic planning.
Service the air filter
A clean filter protects both starting reliability and overall engine performance.
Replace spark plugs according to the correct schedule
Following the manufacturer’s interval avoids most ignition-related no-start problems.
Keep electrical connectors clean and dry
This single habit prevents a surprising number of mysterious electrical faults.
Avoid prolonged storage without preparation
A few minutes of prep before storage saves hours of troubleshooting afterward.
Follow the Pulsar maintenance schedule
The manufacturer’s schedule exists precisely to prevent the problems covered throughout this guide.
Frequently Asked Questions About Pulsar 180 Not Starting
Why is my Pulsar 180 not starting but the lights work?
Battery load under cranking, the starter circuit, the relay, an interlock, or the starter motor itself are the likely causes, since lights can work fine on far less current than starting actually requires.
Why does my Pulsar 180 crank but not start?
Fuel, spark, air, and compression are the four basics worth checking in that order.
Why does my Pulsar 180 start after pushing but not with self-start?
This points squarely toward battery and starter-system diagnosis rather than fuel or ignition.
Why is my Pulsar 180 not starting in the morning?
Cold-start procedure, choke use, battery condition, and fuel freshness all deserve a look for morning-specific starting trouble.
Can a weak battery cause Pulsar 180 starting problems?
Yes. There’s a real difference between having enough voltage to light the dash and having enough current to actually crank the engine.
Why does my Pulsar 180 start and then stop?
Fuel supply, choke position, the idle circuit, and electrical faults are the most common explanations.
Can a bad spark plug stop a Pulsar 180 from starting?
Yes, through fouling, general wear, or a weak or completely absent spark.
Can old petrol cause a Pulsar 180 not to start?
Yes, stale or contaminated fuel is one of the most common and easily overlooked causes.
Why is my Pulsar 180 not starting after washing?
Moisture around ignition components and electrical connectors is the most likely explanation.
Should I replace the CDI if my Pulsar 180 won’t start?
Not without testing first. CDI replacement should always come after basic electrical and ignition testing has ruled out simpler causes.
Pulsar 180 No-Start Quick Checklist
Fuel available, fuel tap correct, ignition ON, kill switch ON, neutral confirmed, clutch pulled, battery terminals tight, battery tested, starter relay and fuse checked, spark plug inspected, plug cap secure, air filter checked, fuel flow checked, choke used correctly for a cold engine, recent washing or storage considered, and the CDI not replaced without proper diagnosis first.
Final Recommendation
After years spent walking riders through exactly this kind of roadside frustration, my honest recommendation is simple: separate no crank from no start before you touch a single part. Most Pulsar 180 starting problems trace back to a weak battery, stale fuel, or a fouled spark plug, not an expensive electronic failure. I always tell riders to work through the switches, neutral, battery, fuel, and spark in that order, since it mirrors exactly how a professional technician approaches the same problem.
Never hold the starter longer than the manufacturer recommends, and never swap the CDI as a first guess. If you’ve genuinely worked through the basics and the bike still won’t start, that’s the honest signal to bring in a qualified technician rather than keep guessing.

Ehatasamul Alom is a dedicated road hybrid bikes expert. With over 15 years of experience, he helps people find the perfect ride. He began his journey as a bike mechanic. He learned the ins and outs of every bike.
Ehatasamul Alom holds a Master's degree in Mechanical Engineering from a Brown University (Providence US 02912), where he specialized in material science and bicycle kinematics. His master's thesis focused on optimizing frame geometry for road hybrid bikes to improve rider comfort and efficiency.
Ehatasamul has an extensive professional background. He spent 10 years (2010-2020) as a Senior Bike Designer at "Urban Cycles," a leading bicycle manufacturer. In this role, he led the development of several award-winning road hybrid bikes, which are known for their durability and performance. He later served (2020-2024) as the Head of Product Development at "Gear Up," a company specializing in high-end cycling components. There, he developed innovative parts and accessories specifically for road hybrid bikes.
Over the years, Ehatasamul has become an authority on Roadhybridbikes. He understands their design and function. His work focuses on making bikes easy to use. Ehatasamul believes everyone should enjoy cycling. He writes guides that are simple to read. His passion for road hybrid bikes is clear. His goal is to share his knowledge with everyone. He wants to see more people on two wheels. His advice is always practical and easy to follow.
- Ehatasamul Alom

- Ehatasamul Alom
- Ehatasamul Alom

- Ehatasamul Alom