
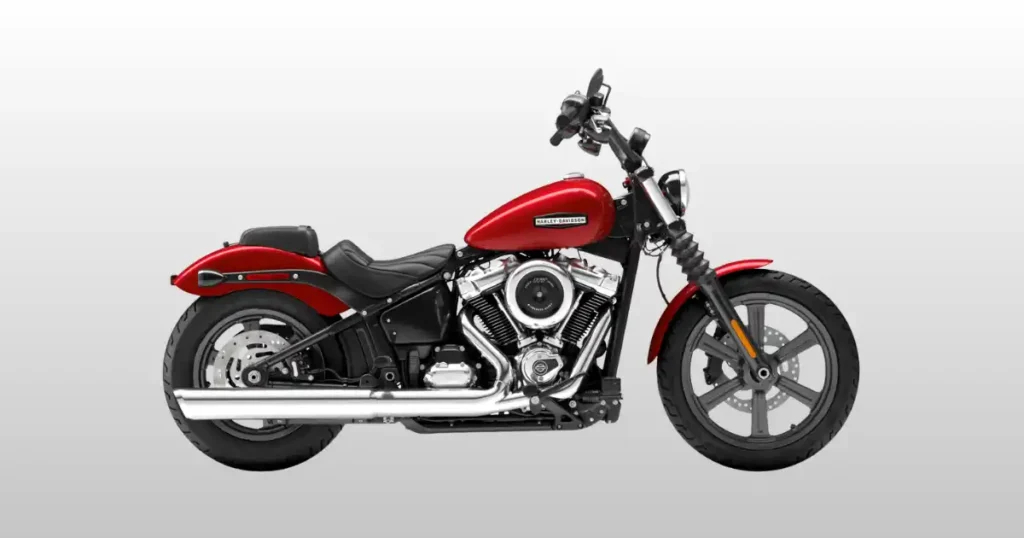
Pushing the start button on your bike only to meet dead silence or a weak click is a quick way to ruin a sunny day. Trust me, I know exactly how that feels. Just last month in Des Moines, Iowa, I stood over a beautiful Street Glide that refused to fire up right before a group ride. The owner was frantic, convinced his expensive starter motor was completely dead. After taking a deep breath and tracking down the actual cause, we found a loose ground wire beneath the seat. Ten minutes of simple tightening had the big Twin Cam engine roaring back to life, saving him a massive towing bill. When your Harley-Davidson motorcycle not starting becomes your reality, don’t panic or start throwing random parts at it. This guide will walk you through systematic, step-by-step diagnostic checks to get your ride back on the highway where it belongs.
Harley-Davidson Motorcycle Not Starting? Check These Things First
Before replacing expensive parts, take a few minutes to check the basics. One cool Friday morning in Milwaukee, Wisconsin, a rider thought his touring bike needed a new starter. It turned out the negative battery cable had loosened after weeks of riding. Ten minutes later, the engine came to life. Motorcycles can be stubborn, but they usually leave clues.
What Happens When You Press the Start Button?
- Nothing happens
- One loud click
- Rapid clicking
- Engine cranks but won’t start
- Engine starts then stalls
- Slow cranking
- Dashboard lights dim
- Security light flashes
- Check Engine light stays on
Five-Minute Harley Starting Checklist
- Check battery voltage
- Confirm fuel level
- Verify the engine stop switch
- Make sure the transmission is in neutral
- Check the side stand
- Listen for the fuel pump priming
- Inspect battery terminals
- Watch for warning lights
Warning Signs That Need Immediate Attention
- Burning electrical smell
- Smoke near wiring
- Grinding starter noise
- Fuel leak
- Oil leak
- Repeated blown fuse
How a Harley-Davidson Starting System Works
Modern Harley-Davidson motorcycles rely on electronics, fuel injection, and safety switches working together. Understanding the startup sequence makes troubleshooting much easier.
Main Components That Help a Harley Start
- Battery
- Starter motor
- Starter relay
- Starter solenoid
- Electronic Control Unit (ECU)
- Fuel pump
- Fuel injectors
- Ignition coil
- Spark plugs
- Crankshaft position sensor
- Bank Angle Sensor
- Side stand switch
- Clutch switch
- Harley security system
- Main fuse
What Happens During Startup?
- ECU wakes up
- Fuel pump primes
- Safety switches are checked
- Starter relay activates
- Starter motor cranks the engine
- Fuel injectors deliver fuel
- Spark plugs ignite the mixture
- Engine begins running
Most Common Reasons a Harley-Davidson Motorcycle Won’t Start
Whether you own a Sportster, Softail, Touring model, Street Glide, Road King, or Pan America, most no-start problems fall into a handful of common categories.
Weak or Dead Battery
Common Symptoms
A weak battery is the top cause for starting issues. You might hear rapid clicking or see your digital dash screen flicker and reset. Sometimes the lights look bright until you hit the start button, and then everything goes totally dark.
Battery Voltage Test
Set your multimeter to DC volts. Place the red probe on the positive terminal and black on the negative. A fully charged battery sits at 12.8 volts. Anything under 12.2 volts means the charge is too low to run the computer systems.
Battery Load Test
Voltage alone does not tell the whole story. Connect a dedicated load tester to the terminals and apply the load for ten seconds. If the needle drops below 9.6 volts during the test, the battery cannot hold power and must be replaced.
When Replacement Is Necessary
Harley batteries generally last between two and four years. High heat, heavy engine vibrations, and long periods of storage shorten their life. If your battery fails a load test or shows cracks, it is time for a new one.
Loose or Corroded Battery Connections
Signs of Poor Electrical Contact
You might have perfect battery voltage but still experience zero power at the starter switch. Loose connections cause a high resistance point. This issue mimics a dead battery and can cause a loud single click when trying to crank.
Proper Cleaning Procedure
Remove the negative cable first, then the positive. Use a stiff wire brush to scrub off any white or green corrosion from the terminals. Reattach the positive cable first, tighten the bolts firmly with a wrench, and apply a thin layer of dielectric grease.
Faulty Starter Relay
Clicking Without Cranking
The starter relay sends low current power from your handlebar switch to the heavy solenoid. If the relay fails internally, you will hear a single click from the fuse block area, but the actual starter motor will remain completely silent.
Relay Testing
Locate the relay in your fuse box. You can swap it with the identical system relay next to it as a quick test. If the bike now cranks but will not pop or fire, you have confirmed the starter relay is bad.
Bad Starter Solenoid
Common Symptoms
A bad solenoid often makes a loud, metallic clunk sound without turning the motor over. The internal copper contacts wear down over time from high electrical heat, preventing the battery power from jumping over to the starter motor windings.
Voltage Drop Testing
Put your multimeter probes on the input and output posts of the solenoid. Press the start button. If you see a major voltage drop across these two main terminal posts, the internal contacts are shot, and the unit needs replacement.
Worn Starter Motor
Slow Cranking
A starter motor that is wearing out will sound very tired. It will turn the engine over very slowly, making a groaning or dragging sound even when connected to a perfect, fully charged battery.
Current Draw Test
Hook up an amp clamp meter to the main positive starter cable. Crank the engine. A healthy factory starter draws around 140 to 180 amps. If your reading shoots well over 220 amps, the starter has internal binding or shorted windings.
Fuel Pump Failure
No Priming Sound
When you flip the handlebar run switch to the on position, you should hear a clear, two-second high pitched buzz from inside the gas tank. If you hear total silence, your fuel pump is not getting power or has failed completely.
Fuel Pressure Testing
Attach a fuel pressure gauge to the quick-disconnect schrader valve under the tank tank. Cycle the key to prime the system. Modern fuel-injected Harleys require a steady 55 to 60 PSI of pressure to start and idle correctly.
Dirty Fuel Injectors
Fuel Delivery Problems
Clogged injectors cannot atomize gasoline into a fine mist. Instead, they drip fuel or block it entirely. This issue leads to extended cranking times, severe engine misfires, a rough idle, or a bike that refuses to stay running.
Injector Cleaning
Remove the fuel rail to access the injectors. You can use a specialized pulse tool and pressurized carburetor cleaner to flush out gummed up fuel deposits. If the internal coil is shorted, replace the injector assembly.
Fouled Spark Plugs
Carbon Fouling
Short rides prevent spark plugs from reaching self-cleaning temperatures. This problem causes black carbon soot to bake onto the porcelain insulator, shorting out the electrical path and preventing the plug from creating a strong spark.
Fuel Fouling
If you crank the engine repeatedly without it starting, the combustion chamber gets flooded with raw gasoline. The wet fuel coats the spark plug electrodes, drowning out the spark and making starting impossible until they are dried out.
Replacement Schedule
Harley-Davidson recommends changing your spark plugs every two years or 10,000 miles. Keeping fresh plugs in the cylinders prevents ignition coil strain and guarantees clean, efficient combustion on cold mornings.
Ignition Coil Failure
Weak Spark
A failing ignition coil cannot produce the high voltage needed to jump the spark plug gap under engine compression. You might get a faint yellow spark instead of a bright, crisp blue snap when testing the ignition system.
Coil Testing
Use a digital multimeter to check the resistance of the primary and secondary coil windings. Compare your numbers to the factory service manual. If the ohms read open or show a total short, the coil must be replaced.
Crankshaft Position Sensor Failure
Common Symptoms
A bad crankshaft sensor stops the computer from knowing when the pistons are moving. The engine will crank perfectly, but the computer will never send a signal to fire the spark plugs or pulse the fuel injectors.
Diagnostic Tips
Watch your electronic tachometer while cranking the engine. If the needle stays completely dead at zero and does not wiggle or bounce up slightly, the crankshaft position sensor is likely dead or disconnected.
Harley Security System Problems
Dead Key Fob Battery
Modern Harley security modules look for a specific radio signal from your round key fob. If the little 3-volt coin cell battery inside the fob drops down to 2.5 volts, the system immobilizes the motorcycle.
Immobilizer Issues
When the security system is actively blocking a startup, your turn signals will usually flash rapidly, and a red key icon will light up on the dash. You can bypass this issue by entering your personal five-digit PIN using the turn signal switches.
Side Stand or Clutch Safety Switch Problems
Safety Lockout
Safety switches prevent the motorcycle from cranking if it is in gear or if the kickstand is down. A stuck switch tells the main computer that a dangerous condition exists, instantly cutting off the starting circuit.
Inspection Tips
Look closely at the spring mechanism on your kickstand switch and the plunger inside the clutch lever perch. Clean out any packed road grime or mud with contact cleaner and ensure the mechanical parts move freely.
Wiring Harness Damage
Broken Ground Connections
Harley-Davidson V-twin engines shake violently by design. This constant vibration can fatigue copper wires over time, leading to hidden breaks inside the insulation or loose ground eyelets on the engine case and motorcycle frame.
Damaged Connectors
Look for wiring harnesses that rub against the frame neck or beneath the seat. Pins inside plastic plugs can back out or corrode from rain water, breaking the vital electrical path between sensors and the central computer.
Harley Cranks But Won’t Start
If your Harley turns over normally but never fires, concentrate on fuel, spark, and engine compression before replacing expensive components.
Check for Spark
Remove a spark plug wire and insert a dedicated spark tester tool. Clip the tool to a clean metal spot on the engine cylinder head. Crank the engine and watch for a sharp, bright blue spark jumping across the tester gap.
Listen for Fuel Pump Priming
Turn the ignition key on and flip the run switch. Listen closely right next to the fuel cap. You must hear that distinct, clean whirring sound for two seconds. Total silence means an electrical issue or a dead pump motor.
Verify Fuel Injector Operation
You can use a set of automotive noid lights plugged directly into the factory fuel injector wiring plugs. Crank the engine over. If the test light blinks consistently, your computer is successfully sending the ground pulse to open the injectors.
Measure Fuel Pressure
Connect your fuel pressure gauge directly to the fuel tank outlet fitting. Turn the key on to run the pump. The pressure must shoot up quickly and hold steady around 55 to 60 PSI without dropping down when the pump stops buzzing.
Inspect the Air Filter
Unbolt your air cleaner cover and pull the filter element out. Hold a flashlight behind the paper filter pleats. If light cannot pass through because of heavy oil accumulation or road dirt, your engine is choking from a lack of oxygen.
Perform a Compression Test
Thread a compression gauge into an empty spark plug hole. Hold the throttle wide open and crank the engine for a few seconds until the needle stops rising. Healthy Harley engines should show between 150 and 180 PSI of cranking compression.
Harley Starts Then Dies
An engine that starts briefly before shutting off often points to fuel delivery, idle control, or sensor issues.
Fuel Pressure Loss
The motorcycle might start on the initial prime fluid, but stall out immediately if the fuel pump cannot sustain running pressure. A pinhole leak in the internal plastic fuel line inside the gas tank is a very common cause for this exact issue.
Dirty Injectors
Partial restrictions inside an injector can allow enough fuel through for a quick pop or brief start, but the restricted fuel flow cannot support a steady idle engine speed once the computer exits its initial startup fueling map.
Vacuum Leaks
Unmetered air entering through cracked rubber intake manifold boots or bad throttle body gaskets thins out the air fuel mixture. This lean condition makes the bike highly unstable, causing it to cough through the intake and stall out.
Faulty Idle Control
The Idle Air Control actuator manages engine idle airflow when the throttle plates are closed. If this small motorized valve gets gummed up with carbon deposits, the engine will die the moment you let go of the starter button.
ECU Sensor Problems
If the engine temperature sensor or intake air sensor sends completely incorrect data to the central computer, the system will deliver the wrong amount of fuel for a cold start, causing the engine to sputter and stall out.
Harley Won’t Start After Sitting for Weeks or Winter Storage
Storage creates several common issues. Weak batteries, stale gasoline, and moisture are responsible for many springtime breakdowns.
Weak Battery
Left sitting without a tender, a standard motorcycle battery discharges naturally over a few weeks. The security system draws a tiny amount of continuous power, which will slowly drain a healthy battery down until it is dead.
Old Fuel
Modern gasoline blends begin to break down and oxidize in as little as thirty days. Volatile components evaporate, leaving behind a gummy varnish that coats fuel pump screens, clogs tiny injector nozzles, and resists igniting.
Fuel Pump Problems
When old fuel sits inside the pump housing for months, it can varnish the internal moving parts. The pump gears become physically stuck, preventing the motor from spinning up when you flip the bike back into run mode.
Dirty Injectors
Varnish deposits from stale fuel dry out inside the micro-fine holes of the fuel injector tips during storage. This restriction blocks the fuel spray completely or ruins the pattern, preventing proper cylinder ignition.
Rodent Damage
Mice love to nest under Harley seat pans and inside air cleaner boxes during the cold winter months. They will chew through wire insulation, leaving you with short circuits, blown main fuses, or completely severed sensor wires.
Harley Won’t Start After Rain or Washing
Water inside electrical connectors can interrupt the ignition system, even when major components are healthy.
Wet Spark Plug Boots
High pressure water from a wash hose can force its way past the rubber sealing boots onto the top of the spark plugs. This moisture provides an easier path for electricity to jump directly to the engine block instead of firing the plug.
Moisture Around ECU Connectors
If water gets past the weather seals of the main computer plug, it can bridge the tiny metal pins together. This situation confuses the digital microprocessor, causing erratic sensor codes or a total system lockout until dried out.
Corroded Starter Relay
The starter relay sits in an area that can trap moisture if the side covers are not sealed right. Also, Water causes rapid rust on the small internal switch connections, which stops the electrical current from reaching the solenoid.
Water Inside Switches
Water can seep into the handlebar switch housings during a heavy downpour. This moisture grounds out the kill switch circuit or short-circuits the start button contacts, rendering the handlebar controls temporarily useless.
Step-by-Step Harley-Davidson No-Start Troubleshooting
Professional technicians follow a logical order instead of replacing random parts. One rainy Monday morning in Nashville, Tennessee, a rider was convinced his Road Glide needed a fuel pump. The battery measured 12.6 volts until it was load tested. Under load, it dropped below 9 volts. A new battery fixed everything before lunch. Sometimes the smallest part causes the biggest headache.
Step 1 – Test Battery Voltage
Grab your digital multimeter and set it to DC volts. Touch the meter leads directly to the clean lead battery posts. A completely healthy motorcycle battery should read 12.8 volts or higher before you turn the ignition key on.
Step 2 – Perform a Battery Load Test
Leave your multimeter connected while you sit on the bike and press the starter button. Watch the screen closely as the engine tries to spin. The voltage must stay above 10 volts during active cranking.
Step 3 – Inspect Battery Connections
Put your hand on the heavy battery cables and give them a firm wiggle. Use a 10mm socket or a Phillips screwdriver to verify both the positive and negative terminals are wrenched down tight against the battery face.
Step 4 – Check Main Fuses
Pull the plastic side cover off to locate your main fuse block. Pull the heavy 40-amp or 50-amp main fuse out and look through the clear plastic windows. If the silver metal bridge bar inside is broken, replace it.
Step 5 – Listen for Fuel Pump Priming
Turn the main switch to run and listen for the distinct electric whirring noise from the fuel tank. The sound should last for two seconds before stopping. No sound means you need to look at the fuel system fuses.
Step 6 – Inspect Spark Plugs
Use a spark plug socket to remove the plugs from the cylinder head. Look closely at the firing tips. They should be a clean, light tan color. If they are soaked in fuel or caked in black soot, replace them.
Step 7 – Test the Starter Relay
Locate the small square black cube labeled starter relay in the fuse panel. Pull it out and check the metal prongs for chalky corrosion. Swap it with an identical accessory relay from the box to see if cranking returns.
Step 8 – Measure Fuel Pressure
Pop the fuel pressure gauge onto the quick-disconnect fuel line fitting under the tank flange. Turn the ignition on. Ensure the gauge shoots up to 55 PSI instantly and holds that pressure without dropping over five minutes.
Step 9 – Perform a Compression Test
Thread your compression tester hose into the front cylinder head spark plug hole. Crank the motor over with the throttle held wide open until the gauge stops climbing. Record the number and repeat the process on the rear cylinder.
Harley-Davidson No-Start Diagnosis Table
Experienced mechanics compare symptoms before ordering parts. This approach saves time and money while preventing unnecessary repairs. The table below lists the most common starting issues encountered in the shop along with their difficulty ratings.
| Symptom | Most Likely Cause | DIY Difficulty | Home Repair |
| No response | Battery or fuse | Easy | Yes |
| Rapid clicking | Weak battery | Easy | Yes |
| One click | Starter relay | Easy | Yes |
| Cranks but won’t start | Fuel or ignition | Medium | Yes |
| Starts then dies | Fuel delivery | Medium | Sometimes |
| No fuel pump sound | Fuel pump | Medium | Sometimes |
| Security light flashing | Immobilizer | Medium | No |
| Slow crank | Starter motor | Medium | Sometimes |
Battery Voltage Reference Table
A simple voltage reading can eliminate several possible causes before deeper diagnostics begin. Use this chart to quickly interpret your digital multimeter readings when testing your Harley battery at rest and under starting loads.
| Voltage | Battery Condition | Recommended Action |
| 12.8–13.0V | Excellent | Continue diagnosis |
| 12.5–12.7V | Good | Recharge if necessary |
| 12.2–12.4V | Weak | Perform load test |
| Below 12V | Poor | Recharge or replace |
| Below 10V during cranking | Failed | Replace battery |
Diagnose the Problem by Symptom
Different starting symptoms usually point to different systems. This table helps narrow your search before buying parts. Match what you see and hear at the bike to the diagnostic steps below.
| Symptom | Most Likely Cause | Check First |
| One click | Starter relay | Battery voltage |
| Rapid clicks | Weak battery | Load test |
| Cranks only | Fuel or spark | Spark plugs |
| Starts then dies | Fuel system | Fuel pressure |
| Security warning | Immobilizer | Key fob |
| Slow crank | Starter motor | Voltage drop |
Essential Tools Every Harley Owner Should Have
Most starting problems can be diagnosed at home using affordable tools that every motorcycle owner should keep in the garage.
Recommended Diagnostic Tools
- Digital multimeter
- Smart battery charger
- Battery tender
- Battery load tester
- Spark tester
- Fuel pressure gauge
- Compression tester
- Motorcycle diagnostic scanner
- Socket set
- Contact cleaner
- Flashlight
Common Mistakes Harley Owners Make
Many expensive repairs begin with one simple mistake. Avoid these common errors and you’ll save both time and money.
Replacing Parts Before Testing
The most expensive way to troubleshoot a bike is to guess. Buying a brand new three hundred dollar starter motor when the real problem was just a blown three dollar fuse happens far too often in home garages.
Ignoring Battery Load Tests
A battery can easily read 12.6 volts on a static meter while still having completely failed internally. Skipping the cranking load test leads owners down deep diagnostic rabbit holes looking for problems that do not exist.
Forgetting Ground Connections
Riders often obsess over the positive terminal bolt but completely ignore the negative ground cable where it attaches to the inner primary or frame transmission case. A loose ground stops electricity just as fast as a disconnected positive wire.
Using Old Fuel
Trying to start a motorcycle on six month old winter storage gasoline is a recipe for clogged injectors and fouled plugs. Always drain stale fuel from the tank if it has turned yellow or smells sour like varnish.
Skipping Spark Plug Inspection
Assuming your plugs are good because they were changed last season is a major oversight. A single bad tank of fuel or an overly rich cold start map can foul out a brand new set of plugs in minutes.
Ignoring Warning Lights
Cranks can continue even when the check engine light or red security key icon is glaring at you from the speedometer face. Those factory dashboard lights are flashing specifically to tell you which computer module is throwing a fault code.
Expert Advice From a U.S. Harley Technician
Years in the workshop teach one lesson over and over. Test first, replace later.
“Nearly seventy percent of Harley motorcycles that arrive with starting complaints have battery, cable, or charging issues instead of failed starters. Start with voltage and load testing before buying any parts.” — Mike Reynolds, Harley-Davidson Master Technician, Missouri
Why Battery Testing Comes First
Big American V-twin engines require massive amounts of energy to push large pistons past top dead center compression. If the battery lacks depth, the vehicle electronics will shut down to protect the system memory maps.
Real Shop Example
- Saturday morning charity ride
- Rider suspected a failed starter
- Battery looked fully charged
- Load test exposed internal battery failure
- New battery solved the problem immediately
How to Prevent Harley Starting Problems
Routine maintenance is cheaper than roadside repairs. Small habits make a big difference over thousands of miles.
Keep the Battery on a Smart Tender
Always plug your motorcycle into a quality microprocessor controlled battery tender when it is parked in the garage. This practice counters parasitic security system draw and keeps the lead plates active and fully charged.
Ride Regularly
The best thing you can do for your bike is to take it out on the road. Frequent rides longer than twenty minutes allow the charging system to fully replenish the battery and burn off condensation from engine oil lines.
Replace Spark Plugs on Schedule
Do not wait for your engine to start misfiring before you change out the plugs. Stick to the factory recommended two year interval to ensure quick starting and clean fuel burning under all weather conditions.
Clean Battery Terminals
Make it a regular habit to inspect your battery connections during every oil change interval. Clean off any minor oxidation with baking soda water, wire brush the surfaces, and tighten the fasteners securely.
Use Fresh Fuel
Always buy top tier high octane premium gasoline from busy fuel stations. If you plan to store your motorcycle for longer than thirty days, add a high quality fuel stabilizer to prevent gas separation and varnish.
Protect Electrical Connectors
When washing your Harley, avoid blasting high pressure water directly into the handlebar switch housings, dash console, or under the seat. Apply dielectric grease inside major connection plugs to seal out road moisture.
Follow Harley-Davidson Maintenance Intervals
Adhering to the scheduled maintenance book guarantees that safety switches, charging components, and fuel filters get checked by standard procedures before they leave you stranded on the shoulder of a remote highway.
When to Visit a Harley-Davidson Dealer
Some failures require factory diagnostic equipment and advanced testing. If you’ve completed the basic checks without success, professional diagnosis is the next step.
ECU Communication Errors
If your digital dashboard shows a generic no bus error message, it means the primary control modules have stopped communicating over the wiring network. This issue requires a proprietary diagnostic computer to isolate the broken link.
Persistent Check Engine Light
When a fault code stays active after clearing it, special break-out diagnostic harnesses are needed to test the wiring paths. Dealership technicians can safely pinpoint internal sensor failures without damaging the sensitive main computer board.
Fuel Injector Failure
If an injector suffers a complete mechanical failure or an internal coil short circuit, it must be diagnosed using precise pulse simulator tools. Replacing these parts often requires clearing deep computer codes to restore proper fuel mapping.
Wiring Harness Damage
Tracking down a partial short circuit hidden deep inside a main factory wiring loom is a tedious chore. Dealerships have full wiring schematics and pin-out charts to safely pin down and repair damaged circuits without replacing the whole harness.
Internal Engine Damage
If your compression test reveals a complete loss of cylinder pressure, the issue sits inside the engine mechanical assembly. A failed valvetrain, broken piston rings, or a blown head gasket requires professional teardown and machine shop repair.
Harley Starting Problems by Model
While the diagnostic process stays similar, different Harley models develop different patterns over time.
Harley-Davidson Street Glide
Touring models like the Street Glide carry heavy electrical loads due to premium infotainment screens and audio amplifiers. These accessories place extra strain on the charging system, making clean, tight battery connections absolutely vital to prevent slow cranking.
Harley-Davidson Road King
The Road King features a classic nacelle headlight arrangement that houses a large bundle of wiring connectors. Over years of steering rotation, these wires can pinch against the fork stops, leading to intermittent ignition switch failures or blown fuses.
Harley-Davidson Sportster
Sportster models place the starter motor directly underneath the rear cylinder where it is exposed to road spray and oil drips from filter changes. This location can cause the main starter cable connection to loosen or corrode quickly.
Harley-Davidson Street 750
The liquid cooled Street 750 platform uses a compact electrical system that is sensitive to voltage drops. If the battery capacity drops even slightly, the starter relay will click rapidly but fail to engage the starter clutch ring gear.
Harley-Davidson Pan America 1250
The high tech Revolution Max engine in the Pan America uses an advanced electronic suite. Starting issues on this adventure bike are almost always software or safety switch related, requiring a digital scan tool to reset the tip-over sensor.
Common Starting Issues Shared Across Harley Models
Across all model years from Evolution to Milwaukee-Eight, the classic V-twin configuration creates heavy starting resistance. This means every model remains highly vulnerable to poor battery maintenance, loose terminal hardware, and aged key fob batteries.
Frequently Asked Questions
Why is my Harley-Davidson motorcycle not starting even though the battery seems charged?
A battery can hold enough voltage to light up the dashboard while completely lacking the internal cold cranking amps needed to turn the heavy V-twin flywheel over. Always confirm battery health with a load test rather than just a simple static voltage reading.
Why does my Harley only click when I press the starter?
A rapid clicking sound means your battery is weak and cannot supply enough current to keep the solenoid engaged. A single loud click usually indicates that the starter relay is working fine but the starter solenoid or motor itself has failed.
Can a weak battery stop the fuel injection system from working?
Yes, the Electronic Control Unit requires a minimum of 10.5 volts to operate its digital circuits. If the starter motor draws the system voltage down below this threshold while cranking, the computer will refuse to pulse the fuel injectors.
Why won’t my Harley start after winter storage?
The most likely culprits are a naturally discharged battery, gummed up fuel injectors from oxidized gasoline, or hidden wire damage caused by nesting rodents. Always use a fuel stabilizer and a smart tender during seasonal storage.
How do I know if the starter relay has failed?
If you press the start button and hear absolutely nothing from the fuse box, but your lights stay bright, the relay may be bad. You can verify this by swapping it with the identical accessory relay to see if the starter circuit wakes up.
Can the Harley security system stop my motorcycle from starting?
Yes, the factory immobilizer system cuts off both the ignition and fuel circuits if it does not detect a valid key fob signal. A dead fob battery will trigger this condition, which can be identified by flashing turn signals.
Why does my Harley crank but never start?
When the motor spins cleanly but will not fire up, the issue is a lack of fuel delivery or a missing ignition spark. Check for a running fuel pump noise and test the spark plug wires for a clean, bright blue electrical arc.
How much does it usually cost to repair a Harley that won’t start?
A simple blown fuse or loose battery bolt costs almost nothing to fix at home. If you need a premium factory battery, expect to pay around one hundred and fifty dollars, while a complete dealer starter replacement can run up to five hundred dollars.
Final Recommendation
When you find your harley davidson motorcycle not starting, always check the simplest components before opening your wallet for a new starter motor. In my years working around these heavy V-twin electrical systems, I have found that a vast majority of starting failures come down to basic maintenance oversights. Keep your machine plugged into a smart battery tender, make sure your terminal connections are clean and tight, and never ignore a flashing security icon on your dashboard. Taking a systematic approach to troubleshooting will save you time, protect your budget, and keep your motorcycle running smoothly for miles to come.

Ehatasamul Alom is a dedicated road hybrid bikes expert. With over 15 years of experience, he helps people find the perfect ride. He began his journey as a bike mechanic. He learned the ins and outs of every bike.
Ehatasamul Alom holds a Master's degree in Mechanical Engineering from a Brown University (Providence US 02912), where he specialized in material science and bicycle kinematics. His master's thesis focused on optimizing frame geometry for road hybrid bikes to improve rider comfort and efficiency.
Ehatasamul has an extensive professional background. He spent 10 years (2010-2020) as a Senior Bike Designer at "Urban Cycles," a leading bicycle manufacturer. In this role, he led the development of several award-winning road hybrid bikes, which are known for their durability and performance. He later served (2020-2024) as the Head of Product Development at "Gear Up," a company specializing in high-end cycling components. There, he developed innovative parts and accessories specifically for road hybrid bikes.
Over the years, Ehatasamul has become an authority on Roadhybridbikes. He understands their design and function. His work focuses on making bikes easy to use. Ehatasamul believes everyone should enjoy cycling. He writes guides that are simple to read. His passion for road hybrid bikes is clear. His goal is to share his knowledge with everyone. He wants to see more people on two wheels. His advice is always practical and easy to follow.
- Ehatasamul Alom

- Ehatasamul Alom

- Ehatasamul Alom
- Ehatasamul Alom


