
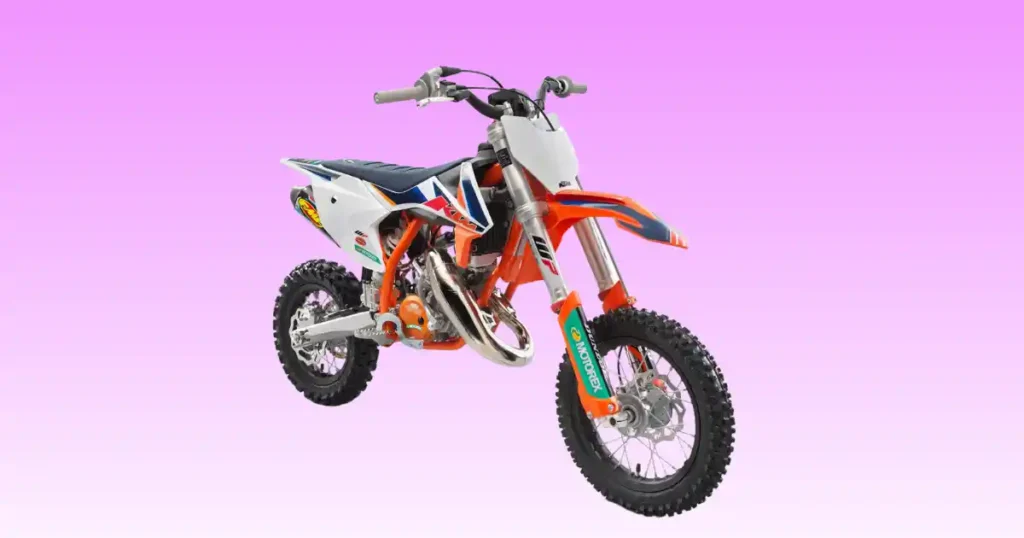
Hearing a dead silence from your child’s dirt bike right before a big race weekend can be incredibly stressful for any family. Last month during a hot track event down in Houston, a young rider faced this exact issue with his machine early in the morning. If your ktm 50 not starting is keeping your young racer off the dirt track today, try not to worry. Most issues with these small two-stroke motors are easy to diagnose and quick to fix with a few basic hand tools. I have spent many years working directly on these high performance junior racing bikes. Let us go through the easy checks to get that orange bike running strong once more.
KTM 50 Not Starting? Check These Simple Things First
Before pulling the bike apart, spend a few minutes checking the basics. Many KTM 50 starting problems come from small issues that are easy to fix, especially after the bike has been sitting between race weekends.
What Happens When You Try to Start It?
Pay close attention to how the bike feels and sounds when you kick it over. The exact feedback from the motor tells you which mechanical loop is failing to engage.
- Kick starter feels normal but engine won’t fire: The engine spins smoothly with good resistance, but lacks the necessary ignition spark or fuel delivery to ignite.
- Engine sputters for a second: The motor catches briefly for one or two cycles, but dies because it lacks continuous fuel flow or has a clogged jet.
- No response at all: Kicking the lever produces zero combustion noise, meaning the spark plug is wet or the electrical circuit is grounded.
- Starts briefly then dies: The bike fires up with the choke on, but stalls out immediately when you touch the throttle lever or turn the choke off.
- Backfires while kicking: A loud pop from the exhaust pipe indicates unburnt gas is igniting at the wrong time due to a bad spark plug or timing issue.
- Hard to kick over: The kick lever feels physically jammed or very heavy to push down, which signals internal fluid locking or mechanical engine binding.
Five-Minute Quick Inspection
Before grabbing your heavy tool box, check these external items. Many frantic track calls turn out to be a simple switch left in the wrong position.
- Fuel level: Look directly into the gas tank to ensure fresh premix gas is actually covering the main internal pickup tube.
- Fuel valve position: Verify the petcock lever points straight down to the open position, or sideways to reserve if your tank is getting low.
- Engine stop switch: Ensure the plastic button on the handlebars moves freely and is not stuck in the kill position from a recent crash.
- Spark plug cap: Push the heavy rubber cap down hard onto the top of the spark plug to ensure a firm mechanical connection.
- Air filter: Peer inside the air box to confirm the foam element is not soaked with washing water or blocked with thick track mud.
- Fuel line: Check the clear plastic hose for any visible kinks or large air bubbles that stop the downward flow of gasoline.
- Choke position: Pull the black knob up on the side of the carburetor if the engine is completely cold to richen the fuel mixture.
- Obvious loose connections: Give the wires near the steering stem a gentle tug to verify no grounds came loose during transport.
Warning Signs That Need Immediate Attention
Keep your eyes and nose sharp while trying to fire up the small dirt bike. Some symptoms mean you should stop kicking immediately to avoid destroying internal parts.
- Strong fuel smell: A heavy odor of raw gasoline means the carburetor is overflowing or the crankcase is completely flooded with liquid premix.
- Oil leaking around engine: Fresh black oil dripping from the cylinder base or exhaust header junction indicates blown seals or a loose engine case bolt.
- Strange knocking noises: Metallic clunking sounds when you push the kick lever mean a bad rod bearing or a broken piston ring.
- Coolant leak: Sweet smelling green fluid pooling beneath the water pump or radiator means an active head gasket failure or a cracked hose line.
- Smoke from electrical wiring: Any smoke rising from under the gas tank means a dead short circuit is melting the stator wire bundle.
- Metal particles during inspection: Finding bright silver flakes in the fuel line or on the air filter means major internal mechanical failure.
How the KTM 50 Starting System Works
The KTM 50 has a simple but reliable starting system. Understanding how fuel, spark, compression, and air work together makes diagnosing problems much easier.
Four Things Every Two-Stroke Engine Needs
A small two-stroke engine requires four elements to achieve combustion. If any single variable is missing or incorrect, the motor will remain dead.
- Spark: A clean, high-intensity electrical arc delivered at the precise millisecond the piston reaches the top of its mechanical travel cycle.
- Fuel: Fresh gasoline mixed accurately with two-stroke oil, atomized into tiny droplets that can ignite rapidly inside the hot combustion chamber.
- Air: Clean atmospheric oxygen drawn through the foam filter to create the correct chemical mixture ratio for efficient combustion.
- Compression: The physical sealing of the cylinder by the piston rings to compress the air and fuel mixture before the spark fires.
Main Starting Components
Every piece of hardware must function perfectly together. A breakdown in any single component halts the entire sequence instantly.
- Kick starter: The physical mechanical lever that spins the internal clutch basket and rotates the crankshaft to start the compression cycle.
- CDI ignition: The electronic black box that stores electrical energy and determines the exact timing curve for the ignition spark.
- Ignition coil: A compact transformer that amplifies the low voltage from the stator into thousands of volts needed to jump the plug gap.
- Spark plug: The terminal device screwed into the cylinder head that delivers the physical electrical arc to ignite the fuel mixture.
- Carburetor: The mechanical device that mixes precise amounts of liquid fuel and incoming air based on engine vacuum pressure.
- Reed valve: A one-way pressure valve that allows the fuel mixture to enter the crankcase but prevents it from blowing back out.
- Air filter: A porous foam element soaked in special tacky oil to trap fine dust particles before they can score the cylinder.
- Fuel petcock: The manual shutoff valve attached to the bottom of the gas tank that controls the gravity feed of fuel.
- Kill switch: A basic handlebar button that grounds the ignition circuit out against the metal frame to shut down the engine.
What Happens During Starting?
When your child pushes down on the kick starter lever, a fast sequence of events occurs inside the machine. Understanding this loop helps you see where the chain breaks.
The downward stroke of the lever rotates the internal primary gear, which spins the main engine crankshaft. As the crankshaft turns, the flywheel magnet spins past the stator coils to generate clean electrical current. This current flows directly into the CDI box, which releases a high voltage pulse to the ignition coil. The coil multiplies the voltage and sends it down the plug wire, creating a bright blue spark at the plug tip. Simultaneously, the upward movement of the piston creates a low pressure vacuum inside the lower crankcase. This vacuum pulls fresh air through the carburetor, drawing liquid fuel up through the brass jets to mist into the engine.
Most Common Reasons a KTM 50 Won’t Start
Most no-start problems fall into a handful of categories. Working through them one by one keeps troubleshooting simple and avoids replacing good parts.
Fouled Spark Plug
This is the single most common reason why a small youth dirt bike refuses to start. Two-stroke engines are notorious for coating plug tips in oil.
Common Symptoms
The kick lever moves with good compression, and you might smell fuel at the tailpipe, but the motor will not show any signs of firing.
How to Inspect the Plug
Use a deep spark plug socket to remove the plug from the cylinder head. Look closely at the firing tip to see if it is wet, black, or covered in oily soot.
When to Replace It
If the electrode is coated in wet black oil, or if the porcelain insulator is cracked, toss it out. Install a fresh, correctly gapped spark plug.
Dirty or Clogged Carburetor
The modern fuel jets inside a small dirt bike carburetor have tiny passages. These small openings clog easily from dirt or old fuel deposits.
Why Tiny Jets Cause Big Problems
The pilot jet controls fuel delivery from idle up to one-quarter throttle opening. Because its hole is as thin as a sewing needle, a single speck of dirt blocks it completely.
Signs of a Blocked Pilot Jet
The bike may start up easily with the choke pulled out, but it will stall out the exact moment you turn the choke knob off.
Cleaning the Carburetor Properly
Remove the aluminum float bowl from the bottom of the carburetor body. Use a dedicated spray can of carburetor cleaner to blast out the pilot jet and main jet passages.
Old or Bad Fuel
Gasoline begins to degrade and lose its volatile properties much faster than most parents realize. This is especially true for pre-mixed racing fuel.
Why Premix Fuel Goes Bad Quickly
When you mix two-stroke oil into gasoline, the chemical stability drops. The oil tends to break down the light ignitable elements of the gas over several weeks.
How Old Fuel Affects Starting
Stale fuel will not atomize properly inside the cool carburetor venturi passage. It will wet the spark plug electrode without igniting, leading to a no-start.
Safe Fuel Replacement
Loosen the drain screw on the bottom of the carburetor bowl to clear out any old remaining fuel. Empty the gas tank and fill it with fresh premium fuel.
Incorrect Fuel-to-Oil Ratio
Mixing your fuel and oil accurately is critical for correct engine operation. Eyeballing the ratio in a gas can usually leads to big starting headaches.
Rich Mixture Problems
Adding too much two-stroke oil to the gasoline creates a rich mix. This heavy oil mixture will coat the spark plug tip quickly, causing a fouled plug.
Lean Mixture Risks
Using too little two-stroke oil means your engine lacks internal lubrication. This causes high friction heat, which can score the piston and lower your engine compression.
Dirty Air Filter
A small engine requires a large volume of clean oxygen to match the fuel flowing through the carburetor jets. A blocked filter suffocates the combustion chamber.
Symptoms
The bike will start with difficulty, run very rough at low idle speed, emit dark smoke from the exhaust silencer, and foul spark plugs repeatedly.
Cleaning vs Replacing
Wash a dirty foam filter in a warm bucket of soapy water to remove grease. Replace the filter entirely if you see any tears or crumbling foam pieces.
Weak Spark or No Spark
If the electrical system cannot deliver a hot arc to the spark plug tip, the air and fuel mixture will never ignite.
Spark Plug Cap
The internal metal clip inside the rubber cap can vibrate loose over time. This creates high electrical resistance, which stops voltage from reaching the plug terminal.
Ignition Coil
A failing ignition coil can break down internally when it gets warm. It may provide a weak spark when cold, but stop working entirely during a race moto.
CDI Unit
The electronic CDI box manages spark timing. If it suffers internal water damage or a short circuit, it will cut off the ignition signal completely.
Magneto
The flywheel magnets must be clean and free of rust scale to generate power. Clean away any dirt or rust underneath the black plastic ignition cover.
Flooded Engine
An engine becomes flooded when too much liquid fuel enters the crankcase. This extra liquid dampens the spark plug, preventing combustion.
Signs the Engine Is Flooded
You will notice a very strong smell of raw gasoline near the bike. The kick lever might feel unusually heavy, and the spark plug comes out soaking wet.
How to Clear Excess Fuel
Turn the fuel petcock off and remove the wet spark plug. Hold the kill button down and kick the engine over ten times to pump out the extra gas.
Low Compression
Compression is the mechanical squeeze that heats up the fuel mixture for ignition. Without high compression pressure, the fuel cannot burn efficiently.
Worn Piston Rings
The small metal rings around the piston wear down over hours of hard riding. As they wear thin, compression pressure leaks down into the lower crankcase.
Cylinder Wear
Fine track dust bypassing a poor air filter will score the aluminum cylinder wall. These vertical scratches allow compression to bypass the piston face.
Compression Test
Thread a mechanical compression gauge into the spark plug hole. Hold the throttle wide open and kick the lever hard five times to read the total pressure.
Reed Valve Problems
The reed valve assembly acts as a mechanical check valve between the carburetor and the lower engine crankcase.
Damaged Reed Petals
The thin carbon fiber or fiberglass reed petals can chip, crack, or fray at the edges. Damaged petals stay open, allowing fuel to blow backward.
Air Leaks
If the rubber reed block gasket cracks, extra air enters the intake tract. This throws off the delicate air to fuel ratio needed for starting.
Air Leak Around Intake
Unmetered air entering the motor behind the carburetor lean out the mixture. This extra oxygen makes the bike highly difficult to start.
Intake Boot Inspection
Examine the rubber boot connecting the carburetor to the cylinder block. Look for fine dry rot cracks or loose metal hose clamps.
Crankshaft Seals
A failing rubber seal behind the ignition flywheel will pull outside air straight into the crankcase. This drops intake vacuum pressure completely.
Faulty Kill Switch
The handlebar kill switch functions by grounding out the ignition circuit. A shorted wire or stuck button keeps the engine permanently grounded.
Quick Testing Method
Unplug the small bullet connector wire leading from the handlebar switch to the main wiring harness. If the bike sparks now, the switch is shorted.
KTM 50 Won’t Start After Sitting for Weeks or Months
This is one of the most common situations for young riders’ bikes. Winter storage, race breaks, or long vacations can create fuel and ignition issues.
Old Premix Fuel
When premix fuel sits inside a small motorcycle tank for several months, the light chemical elements evaporate away. The heavy two-stroke oil remains behind, settling into the lowest points of the fuel system. This thick, oily fluid cannot ignite under normal cranking compression.
Carburetor Gumming
As raw gasoline evaporates out of the open carburetor float bowl, it leaves behind a thick, sticky varnish residue. This sticky green or yellow film coats the internal walls and plugs up the tiny internal fuel ports completely, locking out fuel delivery.
Sticky Float Valve
The small brass needle valve that controls fuel entry into the carburetor bowl can become stuck shut during long storage periods. The dried fuel varnish acts like glue, holding the valve closed and preventing fresh gasoline from entering the carburetor.
Moisture in Ignition Components
Storing a small dirt bike in an unheated shed allows condensation to form under the engine covers. This moisture oxidizes the stator electrical contacts and rusts the flywheel magnets, which drops the overall ignition system voltage output significantly.
Rodent Damage During Storage
Mice frequently seek out small, warm spaces inside air boxes or behind plastic body panels during winter storage. They can chew through the soft wiring insulation or build nests inside the intake tract, completely blocking off the engine air supply lines.
Safe First Start Procedure After Storage
Do not simply yank on the kick starter repeatedly when bringing a mini bike out of seasonal storage. Follow a systematic routine to avoid mechanical damage.
First, drain all the old fuel out of the gas tank and carburetor bowl safely. Mix a fresh batch of premium gasoline with high quality two-stroke oil at the correct factory ratio. Remove the old spark plug and install a fresh one to guarantee a clean ignition surface. Remove the air filter to verify no pests have nested inside the intake boot area. Turn the fuel valve on, pull the choke knob up, and give the motor three smooth, full kicks to prime the internal engine surfaces before trying to fire it up completely.
KTM 50 Has Spark but Won’t Start
If spark is present, focus on fuel delivery, compression, and carburetor settings. These are often the next pieces of the puzzle.
Check Fuel Flow
Pull the flexible fuel line off the side of the carburetor inlet port and hold it over a small clean container. Open the petcock valve to confirm that a steady, clean stream of gasoline flows out under normal gravity pressure. If it only drips slowly, clean out the internal fuel tank screen.
Inspect Carburetor Jets
If gasoline is reaching the carburetor but the engine stays dry, remove the internal brass jets for inspection. Hold the small pilot jet up to a bright light source and look through the center hole. If you cannot see a perfect circle of light, use compressed air to blow the blockage out.
Verify Compression
A bike with a strong spark can still refuse to catch if the cylinder compression has dropped below operating spec. Connect a mechanical pressure gauge to ensure the engine develops sufficient squeeze to ignite the atomized fuel charge. A low reading means it is time for a top end rebuild.
Check Reed Valves
Remove the intake manifold boot to access the internal reed cage assembly. Hold the reed block up to the light to check if the thin flexible petals sit perfectly flat against the rubber sealing cage. Any visible gap allows the fuel charge to escape back through the carburetor.
Confirm Choke Operation
The choke mechanism opens a dedicated internal fuel passage to enrich the starting mixture. Pull the black knob up and verify that the internal plunger moves fully through its mechanical stroke. A stuck or broken choke plunger will leave the cold engine running too lean to start.
KTM 50 Starts Then Dies Immediately
Starting for a second before stalling usually points to fuel starvation, carburetor problems, or air leaks.
Blocked Pilot Jet
An engine will often fire up on the choke because the choke circuit uses its own separate fuel passage. The moment the motor warms up and you push the choke knob back down, the engine drops back onto the main pilot jet. If that tiny jet is blocked with dirt, the engine starves for fuel and dies.
Incorrect Idle Adjustment
The small brass idle speed screw on the side of the carburetor body sets the physical stop point for the slide valve. If this screw is backed out too far, the slide drops down completely, shutting off all air flow. The engine will choke out and die the second you let go of the throttle grip.
Vacuum Leak
A major vacuum leak behind the carburetor leans out the engine mixture instantly. Check the rubber intake manifold boot for fine cracks or loose mounting bolts. An unmetered blast of air bypassing the carburetor will instantly kill the engine at low idle speeds.
Dirty Fuel Filter
A partially clogged internal fuel filter allows a tiny amount of gasoline to slowly trickle into the carburetor bowl over time. This gives the bike enough fuel to start up for a brief moment. However, the engine consumes the fuel faster than the clogged filter can replenish it, causing the bike to sputter out.
KTM 50 Hard to Kick Start
If the bike feels unusually difficult to kick, don’t force it. A mechanical issue may be increasing resistance.
Engine Flooding
When a carburetor float needle leaks, raw fuel fills the lower crankcase completely. Because liquid gasoline cannot be compressed like air, the piston hits a physical hydraulic wall near the top of its stroke. This condition makes the kick lever feel incredibly stiff or completely locked solid.
High Compression
A heavy carbon buildup on top of the piston crown reduces the total volume of the combustion chamber. This elevates the compression ratio significantly, making the kick lever feel unusually heavy to push down. Removing the cylinder head to scrape away dark carbon crust restores normal kicking effort.
Seized Components
If a bike has been run without enough two-stroke oil, the aluminum piston can melt and weld itself to the iron cylinder sleeve. This mechanical seizure locks the entire rotating assembly. If the kick lever refuses to budge even with the spark plug removed, the engine requires a complete teardown.
Kick Starter Gear Inspection
Remove the right hand aluminum engine case cover to inspect the internal kick starter engagement gears. The small metal teeth on the kick quadrant gear can chip or wear smooth after seasons of hard use. Damaged teeth will slip, bind, or jam the kick lever mechanically during use.
Step-by-Step KTM 50 Troubleshooting Process
When I troubleshoot a mini dirt bike, I always follow the same order. It keeps the process calm, organized, and saves time instead of chasing random guesses.
Step 1 — Verify Fresh Fuel
Open the plastic gas cap and smell the fuel inside the tank to check for any stale odors. If the fuel is older than thirty days, drain the tank and carburetor bowl completely, then refill with a fresh, accurate pre-mixed batch of premium gas.
Step 2 — Check Spark Plug
Use a deep socket to remove the spark plug from the cylinder head. Inspect the color and condition of the firing tip to see if it is fouled with wet black oil or dry soot, and verify that the electrode gap matches the factory manual setting.
Step 3 — Test Spark
Insert the spark plug back into its heavy rubber cap and hold the threaded metal body firmly against a clean spot on the engine cylinder block. Kick the starter lever down smoothly while watching the electrode tip for a bright, snapping blue electrical arc.
Step 4 — Inspect Air Filter
Remove the plastic seat to gain clear access to the air box housing. Pull the foam filter element out to ensure it is clean, correctly oiled, and free of any water or dirt blocks that could suffocate incoming air flow.
Step 5 — Clean Carburetor
Remove the carburetor from the engine intake boot and carefully disassemble the aluminum float bowl. Pull the brass pilot jet and main jet out, clear the tiny passages using a dedicated aerosol cleaner spray, and blow them clear with compressed air lines.
Step 6 — Check Compression
Thread a mechanical compression tester gauge tightly into the empty spark plug hole. Hold the handlebar throttle grip wide open and kick the starter lever hard five times to verify that the internal engine pressure meets minimum operating specifications.
Step 7 — Inspect Reed Valves
Unbolt the rubber intake manifold from the engine case to pull the reed valve block out. Inspect the thin flexible reed petals closely to guarantee they are not chipped, cracked, or warped, and ensure they seal flat against the cage body.
Step 8 — Look for Air Leaks
Examine all engine gaskets, intake boots, and crankcase joints for any signs of wet oily residue. Spray a small amount of contact cleaner around the intake joints while the engine is running to see if the idle speed changes, which indicates a leak path.
KTM 50 Starting Problem Diagnostic Table
Over the years, I’ve found that matching the symptom before replacing parts prevents unnecessary repairs. This simple chart helps narrow the problem much faster.
| Symptom | Most Likely Cause | Difficulty | DIY Fix |
| Won’t fire at all | Fouled spark plug or dead kill switch ground | Easy | Yes |
| Starts then dies | Internal carburetor pilot jet is blocked with dirt | Medium | Yes |
| Strong fuel smell | Flooded crankcase from a leaking float needle valve | Easy | Yes |
| Hard mechanical kicking | Hydraulic fluid lock or mechanical engine seizure | Medium | Sometimes |
| No fuel reaching carb | Clogged fuel tank petcock screen or kinked line | Easy | Yes |
| Weak yellow spark | Failing ignition coil or corroded stator contacts | Medium | Yes |
| Only starts with choke | Lean fuel mixture caused by an active air leak path | Medium | Yes |
| Pops while kicking | Damaged reed valve petals or incorrect spark timing | Advanced | Sometimes |
KTM 50 Spark Plug Reading Guide
Spark plugs tell an honest story about how the engine is running. Reading plug color is one of the quickest diagnostic tricks every KTM owner should learn.
| Spark Plug Color | Meaning | Recommended Action |
| Light brown or tan | Optimal combustion mixture | No action needed; continue riding |
| Black and wet | Too rich or severely flooded engine | Clean or replace plug; check float level |
| Dry fluffy black | Rich fuel mixture settings | Adjust carburetor jetting down or check air filter |
| White or blistered | Engine running dangerously lean | Inspect fuel delivery and check for air leaks |
| Heavy oily coating | Excessive engine wear or high oil mix | Inspect compression rings and verify premix ratio |
Basic Tools You’ll Need
You don’t need a race shop full of equipment. A few simple tools handle most KTM 50 starting problems at home.
Essential Tools
- Spark plug wrench: A dedicated thin-walled deep socket needed to remove the plug without damaging the cylinder cooling fins.
- Socket set: A small metric socket set used to quickly remove body plastics, seat brackets, and engine covers.
- Screwdrivers: High quality flat and phillips screwdrivers needed to adjust carburetor screws and remove hose clamps.
- Carburetor cleaner: An aggressive aerosol chemical spray that dissolves sticky fuel varnish and clears out clogged jets.
- Compression tester: A mechanical screw-in gauge used to accurately measure internal cylinder pressure and ring health.
- Feeler gauge: A precision measurement tool used to check the exact electrical gap between the spark plug electrodes.
- Fuel line pliers: Small pliers used to safely slide spring hose clips off the fuel lines without tearing the rubber material.
- Clean shop towels: Lint-free cloth towels used to wipe down delicate internal carburetor parts during cleaning steps.
- Flashlight: A bright portable light source needed to inspect dark air boxes and check internal jet openings.
- Multimeter: An electrical testing meter used to measure resistance values on the ignition coil and stator windings.
Common Mistakes Owners Make
It’s easy to assume the worst when a bike won’t start. I’ve made a few of these mistakes myself after a muddy Sunday at a local motocross track, and they cost more time than the actual repair.
Replacing Parts Without Testing
Many owners immediately order expensive new CDI boxes or ignition coils the moment a bike refuses to start. They waste hard-earned money swapping good electronics when the actual problem is a simple five dollar fouled spark plug. Always test the cheaper items systematically before buying electrical components.
Ignoring Old Premix Fuel
Pouring fresh gasoline directly on top of old, stale fuel that has been sitting inside the gas tank for months will not fix a starting issue. The bad fuel remains trapped at the bottom of the tank and enters the engine first. Always drain the system completely to guarantee clean combustion.
Over-Choking the Engine
Yanking the choke knob up and kicking the starter lever twenty times continuously will quickly flood the small combustion chamber with raw oil. If the engine does not fire within the first five kicks, turn the choke off to avoid soaking the spark plug tip completely in wet fuel.
Forgetting to Turn On the Fuel Valve
It sounds incredibly basic, but many riders pull up to the track and forget to open the manual fuel petcock valve entirely. The engine will run for a brief minute on the residual fuel left inside the bowl, then starve for fuel and stall out unexpectedly.
Cleaning Only the Main Jet
When parents spray out a dirty carburetor, they often only clean the large, easy-to-see main jet located right in the center. They completely miss the tiny pilot jet hidden deep inside its recessed tunnel tube. A dirty pilot jet will keep the engine from idling correctly.
Using the Wrong Spark Plug
Installing a random spark plug that does not match the exact heat range specified by the factory manual can cause severe starting issues. A plug that runs too cold will foul out within minutes, while a plug that runs too hot can burn a hole through the piston.
Expert Advice From a U.S. Motocross Technician
Experienced race mechanics often begin with fuel and spark because they solve most no-start complaints on youth motocross bikes.
“On KTM 50 models, the carburetor and spark plug are responsible for most starting complaints we see after a bike has been sitting. Fresh premix and a clean pilot jet solve many of them before expensive repairs are ever needed.” — Derek Harris, AMA Motocross Technician, Texas
Why Professional Mechanics Start With the Basics
Top tier race mechanics never waste time guessing or performing complex engine teardowns early in the diagnostic process. They understand that ninety percent of two-stroke failures stem from basic delivery issues that can be isolated within a few minutes using simple checks. This disciplined approach keeps repair costs low and gets riders back on the track quickly.
Real Weekend Track Example
During a hot Saturday practice session at a busy track down in Texas, a frustrated parent was changing spark plugs continuously on a dead bike. He assumed the high-dollar ignition system had failed completely. However, a quick ten-minute disassembly revealed that a tiny grain of track sand was wedged tightly inside the pilot jet passage. After a fast spray of aerosol cleaner and a blast of compressed air, the small bike fired up on the very first kick, saving the family’s race weekend.
How to Prevent KTM KTM 50 Starting Problems
Regular maintenance takes less time than repairing a bike on race morning. A few simple habits can make starting much more reliable.
Drain Fuel Before Long Storage
If you know your child’s machine will sit idle for more than two weeks, loosen the bottom drain screw on the carburetor bowl to empty it completely. This simple step prevents fuel from evaporating inside the small passages, eliminating the formation of sticky varnish scale.
Clean the Air Filter After Every Dusty Ride
Never let a dirt bike sit with a dirty, dust-choked foam filter after a long day at the track. Clean the filter element thoroughly and re-oil it with high quality filter fluid to guarantee maximum air flow and protect the internal cylinder walls from premature wear.
Replace Spark Plug Regularly
Do not wait for your ignition plug to fail completely before installing a new one. Treat spark plugs as cheap insurance items and replace them every five to ten hours of riding time to guarantee crisp throttle response and effortless cold starting performance.
Keep Fresh Premix Fuel
Always mix your racing fuel in small, manageable batches that your child can easily consume within a two-week period. Store your fuel cans in a cool, dry location out of direct sunlight to prevent chemical breakdown and water condensation buildup inside the container.
Inspect Fuel Lines
Examine the flexible clear plastic fuel lines once a month for any signs of physical hardening, cloudiness, or fine outer surface cracks. Replace stiff or brittle lines immediately to maintain smooth fuel flow and prevent unexpected track fuel leaks.
Clean the Carburetor Each Season
Make complete carburetor cleaning a regular part of your seasonal maintenance schedule. Fully disassembling the aluminum body to scrub away hidden deposits ensures the internal fuel circuits remain completely open, keeping your engine tuned perfectly for changing weather conditions.
When It’s Time to Visit a KTM Dealer or Repair Shop
Some problems need specialized tools or engine rebuilding experience. If the basic checks don’t solve the issue, professional diagnosis can prevent bigger damage.
Very Low Compression
If your mechanical tester gauge reads below ninety pounds per square inch of pressure, the internal engine components are worn past safe operating limits. Remedying this requires professional cylinder measuring, honing, and installation of a fresh piston kit to restore factory power.
Crankshaft Seal Failure
When internal rubber crankshaft seals wear out, they allow transmission oil or outside air to leak directly into the combustion loop. Replacing these deep seals requires separating the main engine cases, a precision task best left to factory trained technicians.
Internal Engine Damage
Severe metallic knocking, deep internal scraping noises, or a completely locked rotating assembly mean serious structural failure. Attempting to force start a bike with damaged bearings can fracture the engine cases, turning a basic rebuild into a total loss.
CDI or Stator Failure
Diagnosing complex electrical issues inside the main ignition advance curves requires specialized peak-voltage adapters and factory testing equipment. If your bike lacks spark after replacing basic parts, a professional shop can test the electronics safely without shorting them out.
Repeated Starting Problems After Repairs
If your machine continues to foul spark plugs or stall out continuously even after you have cleaned the carburetor completely, a deeper underlying issue exists. Professional technicians can run advanced diagnostic tests to locate hidden faults that basic tools miss.
KTM 50 vs Other KTM Mini Bikes With Starting Problems
Many KTM mini bikes share similar engines, but a few differences affect troubleshooting and maintenance.
KTM 50 SX vs KTM 65 SX
The smaller 50 model utilizes a fully automatic centrifugal clutch assembly, which means it can be kick-started without pulling a manual clutch lever. The larger 65 model features a standard manual clutch and a multi-speed transmission, introducing extra safety switch loops to check during troubleshooting.
KTM 50 Mini vs KTM 50 Senior
The compact Mini version features smaller wheels and a shorter chassis layout, but uses the exact same base two-stroke engine architecture as its larger sibling. The Senior model features a slightly larger carburetor body with larger internal brass jet configurations to boost top end speed.
Which Problems Are Shared Across Models?
All of these lightweight youth racing machines use highly sensitive carburetors, small displacement cylinders, and compact ignition stators. They all suffer from the exact same vulnerabilities to old premix fuel, wet fouled spark plugs, and air filter blockages across the entire lineup.
Frequently Asked Questions
Why won’t my KTM 50 start even with a new spark plug?
If a new spark plug does not solve the starting problem, your engine is likely missing another critical element, such as fuel delivery or compression. Verify that fuel is actually entering the cylinder, and check the pilot jet for dirt blocks.
How do I know if my KTM 50 carburetor is clogged?
If the engine fires up easily with the choke pulled up but dies the exact millisecond you turn the choke knob off, your pilot jet is clogged. This small jet passage must be completely clear to deliver fuel at low idle speeds.
Why does my KTM 50 only start with choke on?
Starting only with the choke on means the engine is running too lean under normal conditions. This condition is caused by a blocked internal pilot jet passage, a low fuel level inside the bowl, or an active air leak behind the carburetor.
Can old premix fuel stop a KTM 50 from starting?
Yes, pre-mixed two-stroke fuel begins to degrade and lose its volatile properties in less than thirty days. The old oil settles to the bottom of the fuel system, coating the spark plug tip and preventing clean engine combustion.
How often should I clean the carburetor?
Clean your dirt bike carburetor thoroughly at least once every riding season, or anytime the bike has sat idle for more than three weeks. Hard riding in muddy or dusty track conditions will require more frequent cleaning intervals to clear out debris.
What compression should a healthy KTM 50 have?
A healthy, crisp engine should develop between one hundred and one hundred and twenty pounds per square inch of compression pressure. Any reading that falls below ninety pounds indicates worn piston rings that require immediate replacement.
Why is my KTM 50 flooding every time I try to start?
Repeated engine flooding is usually caused by a dirty float needle valve that is stuck open, allowing fuel to flow continuously. It can also happen if a rider holds the throttle wide open while kicking a cold motor over endlessly.
Is it safe to push-start a KTM 50?
No, the 50 model uses a fully automatic centrifugal clutch assembly that only engages when the engine spins fast under its own power. Attempting to push-start or bump-start the bike by rolling it down a hill will not rotate the internal crankshaft.
Final Recommendation
When your child’s mini dirt bike refuses to start on race morning, remember to stay calm and always check the simplest links first. Based on my extensive experience with these high-performance youth machines, nearly all issues are solved by draining old fuel, installing a fresh spark plug, and clearing out the tiny pilot jet. Take your time, work systematically through the easy steps, and keep the electrical grounds clean and dry. This basic discipline will keep your machine running strong and ensure your young racer never misses a fun day out on the dirt track.

Ehatasamul Alom is a dedicated road hybrid bikes expert. With over 15 years of experience, he helps people find the perfect ride. He began his journey as a bike mechanic. He learned the ins and outs of every bike.
Ehatasamul Alom holds a Master's degree in Mechanical Engineering from a Brown University (Providence US 02912), where he specialized in material science and bicycle kinematics. His master's thesis focused on optimizing frame geometry for road hybrid bikes to improve rider comfort and efficiency.
Ehatasamul has an extensive professional background. He spent 10 years (2010-2020) as a Senior Bike Designer at "Urban Cycles," a leading bicycle manufacturer. In this role, he led the development of several award-winning road hybrid bikes, which are known for their durability and performance. He later served (2020-2024) as the Head of Product Development at "Gear Up," a company specializing in high-end cycling components. There, he developed innovative parts and accessories specifically for road hybrid bikes.
Over the years, Ehatasamul has become an authority on Roadhybridbikes. He understands their design and function. His work focuses on making bikes easy to use. Ehatasamul believes everyone should enjoy cycling. He writes guides that are simple to read. His passion for road hybrid bikes is clear. His goal is to share his knowledge with everyone. He wants to see more people on two wheels. His advice is always practical and easy to follow.
- Ehatasamul Alom

- Ehatasamul Alom
- Ehatasamul Alom

- Ehatasamul Alom



