Preparing for a high-intensity moto only to find your machine completely dead destroys your track day energy. It feels incredibly frustrating when your bike refuses to fire right before a critical practice session begins. A few months ago in Houston, I met a rider kicking his modern four-stroke machine until he was totally exhausted. The ktm 250 sx f not starting issue had him completely convinced his expensive electronic fuel injection system was totally ruined. I walked directly over, cleaned a thick crust of dried racetrack mud out from beneath his main handlebar kill switch housing, and the engine fired up instantly. Before you pack up your truck or spend money on unnecessary components, let us run through a professional diagnostic routine to get your bike back on the line.
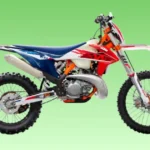
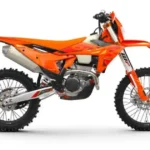
KTM 250 SX-F Not Starting? Check These Simple Things First
Modern motocross bikes can refuse to start for surprisingly small reasons. I remember a muddy practice day at a motocross track outside Austin. A rider was convinced the fuel injector had failed. The real problem? The engine stop button had packed up with dried mud after the previous weekend’s race. Two minutes with contact cleaner, and the bike fired immediately.
What Happens When You Press the Starter Button?
Your bike communicates its exact internal mechanical and electrical state through immediate sensory feedback. Paying close attention to these initial sounds and reactions helps narrow down your troubleshooting focus right away.
- No response at all: The starter button feels totally dead with zero click or movement.
- Single click: A clear, solitary click echoes from the rear frame section near the airbox.
- Rapid clicking: A fast machine-gun buzzing noise sounds out when you apply pressure.
- Starter turns slowly: The motor drags heavily, rotating the crankshaft in a sluggish rhythm.
- Engine cranks but won’t fire: The engine spins over rapidly but never initiates combustion.
- Engine starts then stalls: The power plant fires up for a brief second then dies.
- Fuel pump doesn’t prime: Absolute silence follows when you initial-wake the electrical network.
- Dashboard lights dim while starting: Visual indicators fade out completely under starting load.
Five-Minute Pre-Ride Inspection Checklist
Run through these basic, non-invasive checkpoints before using any tools or removing structural panels. Most racetrack starting failures come down to simple oversights or dirt interference.
- Battery voltage: Ensure your starting cell contains a healthy charge to drive the system.
- Fuel level: Physically look inside the tank to confirm fresh premium petrol is present.
- Engine stop switch: Check that the handlebar kill button is not mechanically stuck down.
- Starter button: Confirm the electronic switch makes clean, crisp physical contact when pressed.
- Fuel pump priming sound: Listen closely for a soft two-second buzz near the tank area.
- Battery terminals: Verify the metal cable bolts remain tight with zero physical play.
- Main fuse: Inspect the primary fuse link to ensure it remains completely intact.
- Air filter condition: Check that the foam element is clean and free of heavy mud layers.
- Side stand: Ensure the safety stand is flipped up on converted cross-country trail models.
Warning Signs You Shouldn’t Ignore
Certain physical symptoms indicate that further attempts to crank the engine could cause severe mechanical damage. Stop troubleshooting immediately if you spot any of these critical system red flags.
- Burning electrical smell: Acrid odor signaling melting wire insulation or overloaded circuits.
- Smoke around wiring: Visible smoke wisps rising from behind the front number plate.
- Grinding starter noise: Loud harsh metallic scraping echoing from the inner engine cases.
- Fuel leak: Raw petrol dripping onto a hot exhaust pipe or engine casing.
- FI warning light staying on: The indicator alerts you to a serious active sensor failure.
- Coolant leak: Bright sweet-smelling fluid weeping from water pump seals or radiator cores.
How the KTM 250 SX-F Starting System Works
The KTM 250 SX-F uses a fuel-injected four-stroke engine with electronic engine management. Every successful start depends on several systems working together in the correct order.
Main Components That Make the Bike Start
This high-performance racing machine relies on an interconnected grid of precision electronic parts and mechanical components. Every piece must work within exact tolerances to launch the engine.
- Lithium or AGM battery: The primary power cell supplying current to the electronic control unit.
- Starter motor: An electric motor that physically spins the flywheel to rotate the crankshaft.
- Starter relay: An electromagnetic switch routing high-power current directly to the starter motor.
- Starter solenoid: Integrates with the relay to bridge massive battery current safely.
- ECU: The central computer brain managing fuel delivery mapping and ignition advance curves.
- Fuel pump: Submerged electric pump building high line pressure for the injection system.
- Fuel injector: Electronic solenoid valve misting atomized petrol directly into the intake tract.
- Ignition coil: Steps up low battery voltage into thousands of volts for the spark.
- Spark plug: Delivers the hot electrical arc required to ignite compressed race fuel.
- Crankshaft position sensor: Reports exact piston location data back to the central ECU.
- Kill switch: Manual handlebar grounding button designed to cut off ignition fields instantly.
- Tip-over sensor: Safety switch disabling the fuel system if the bike crashes sideways.
What Happens During Starting?
Pressing the starter button initiates a rapid, automated sequence handled by the engine management system. Each step must conclude perfectly before the next phase triggers.
- ECU powers on: The initial button touch wakes up the central computer brain.
- Fuel pump primes: The system builds high operational line pressure across the fuel circuit.
- Starter relay activates: The internal magnetic coil snaps shut to bridge heavy current lines.
- Starter motor turns engine: Physical gears engage to rotate the internal piston assembly.
- Injector sprays fuel: A fine atomized petrol mist enters the combustion chamber intake port.
- Spark plug ignites mixture: High-voltage electricity jumps the gap to initiate the power stroke.
- Engine starts: Sustainable combustion takes over, allowing the starter clutch to disengage cleanly.
Most Common Reasons a KTM 250 SX-F Won’t Start
Most no-start problems come down to electrical power, fuel delivery, ignition, or sensor communication. A logical troubleshooting process saves both time and money.
Weak or Dead Battery
Modern motocross bikes feature ultra-lightweight batteries that lack the massive reserve capacity found in street bikes.
Common Symptoms
When your battery charge drops, the starter motor will refuse to spin completely or will turn the engine over very slowly. You may notice the main fuel injection indicator light blinking erratically, or you might hear a rapid clicking sound from the airbox area.
Battery Voltage Test
Take a digital multimeter and set it to read direct current voltage across the battery cells. A healthy lithium battery should read above 13.0V at rest, while a standard AGM battery should register at least 12.8V.
Lithium Healthy: 13.0V+
AGM Healthy:     12.8V+
Weak State:      12.2V - 12.5V
Dead State:      Below 12.0V
When Replacement Makes Sense
If your lithium battery drops below 10.0V while you press the starter button, an internal cell has suffered structural failure. Lithium cells rarely recover from deep discharges, making immediate replacement necessary to protect the bike’s electrical system.
Loose or Corroded Battery Connections
Rough track conditions create massive physical vibrations that can slowly back out your main terminal bolts over time.
Signs of High Resistance
Your digital dashboard displays bright numbers initially, but the moment you touch the starter button, everything drops dead. You might also spot a fine white powdery crust forming around the lead terminal pads.
Cleaning Procedure
Remove the negative terminal wire first to prevent short circuits, then remove the positive wire. Scrub the metal clean with a wire brush, apply a thin coat of dielectric grease, and torque the bolts down tightly.
Faulty Starter Relay
The starter relay acts as the high-current gateway directing heavy battery power straight into the starter motor windings.
Single Click Diagnosis
If you hear a single distinct click near your airbox but the engine fails to rotate, your starter button circuit is complete. The sound indicates the relay internal magnet is moving but the high-power contacts fail to conduct current.
Relay Testing
Set your multimeter to measure voltage and connect it to the starter side of the relay terminal block. Press the starter button; if the meter displays 12V but the starter motor remains dead, the relay is internally damaged.
Bad Starter Motor
When internal components wear out, the starter motor cannot convert electrical energy into mechanical engine rotation.
Slow Cranking
A failing starter motor draws excessive electrical current while turning the engine over at a very sluggish pace. The starter housing itself will become intensely hot to the touch after only a few seconds of continuous cranking.
Current Draw Test
Connect an inductive amp clamp around the primary positive starter cable while pressing the ignition button. If the current draw exceeds factory specifications while cranking slowly, the starter motor contains shorted internal windings.
Fuel Pump Failure
The electronic fuel injection system requires constant high fuel line pressure to spray petrol through the injector nozzle.
No Priming Sound
Turn your ignition key or press the start button briefly while listening closely to your fuel tank. If you fail to hear a clear, high-pitched two-second hum, your fuel pump is not spinning up.
Fuel Pressure Test
Install an inline fuel pressure gauge between your main fuel line quick-disconnect joint and the throttle body intake line. Press the start button; the pressure reading must reach a stable 50 PSI for the bike to run.
Dirty or Clogged Fuel Injector
Motocross fuel injectors feature microscopic discharge holes that can easily clog with fine track dust or stale fuel varnish.
Common Symptoms
The bike might start after extended cranking but will suffer from a rough idle or die instantly when you twist the throttle. You may experience severe popping, backfiring, or mid-range bogging while riding.
Cleaning Methods
Remove the injector unit from the throttle body and connect it to a dedicated electronic pulse cleaner tool. Flush the nozzle backward using specialized injector cleaning solvent to blow out trapped dirt particles safely.
Worn Spark Plug
High-revving four-stroke engines subject spark plugs to extreme heat and intense mechanical stress during a single moto.
Fouled Plug
Excessive idling or an rich fuel mixture can coat the ceramic insulator tip with dark conductive carbon soot. This soot provides an alternative path for electricity, causing the spark to short out inside the plug body.
Spark Test
Remove the spark plug, insert it back into the rubber cap, and hold the threaded base firmly against the engine case. Press the starter button while watching the tip; you should see a bright, snappy blue arc jump the gap.
Ignition Coil Failure
The ignition coil transforms low battery voltage into high-voltage current to generate a hot spark under compression.
Weak Spark
A failing ignition coil creates a dull, faint orange spark that lacks the power to ignite compressed fuel mixtures. The bike may start easily when cold but begin cutting out and stalling once the engine reaches full temperature.
Coil Resistance Testing
Set your digital multimeter to ohms to measure the primary and secondary internal winding resistance fields. Compare your specific readings against the factory workshop manual tolerances; any variance means the coil must be replaced.
Crankshaft Position Sensor Failure
The crankshaft position sensor tells the central ECU exactly when the piston approaches top dead center.
No Injector Pulse
If this sensor fails, the ECU becomes blind to engine movement and will refuse to trigger the fuel injector or spark plug. The engine will crank over perfectly, but the fuel pump and spark plug will remain dead.
Sensor Diagnosis
Connect your multimeter to the sensor output pins and switch the scale to read alternating current voltage. Crank the engine over; a healthy sensor should generate a small but steady AC pulse voltage signal.
Engine Stop Switch Problems
Handlebar kill switches are highly exposed to low-pressure bike washing spray, deep track mud, and heavy rain.
Mud and Moisture Damage
Wet mud can seep past the outer rubber boot, trapping the internal metal contact plates in a permanent grounding position. This completely disables the ignition circuit, leaving the bike in a continuous state of shutdown.
Electrical Testing
Disconnect the main kill switch wiring harness connector located behind the front plastic number plate. Test for continuity across the switch pins; the circuit must remain completely open until you manually press the button down.
ECU or Wiring Problems
The central electronic control unit requires flawless electrical connections across its entire multi-pin wiring harness loom.
Loose Connectors
Heavy track vibrations or poor landings can back main multi-plug connectors out of their locking sockets. Check the main ECU connection block beneath the seat to ensure the plastic latch is locked down.
Harness Damage
Look along the frame rails near the steering head lock for areas where wires might rub against sharp metal brackets. A single chafed wire grounding against the frame can disrupt the entire sensor communication network.
Clogged Air Filter
Motocross racing exposes engines to massive clouds of fine silt, thick dust, and heavy flying track roost.
Dust Build-Up
A foam filter loaded with deep dust cuts off the critical air volume required to mix with fuel. This restriction rich-fouls the combustion chamber, making starting difficult or causing the motor to stall out immediately.
Cleaning and Oiling
Wash the foam element thoroughly using specialized filter cleaner solvent to dissolve old tacky oil and dirt. Allow it to dry completely, apply fresh foam filter oil evenly, and squeeze out all excess fluid before installation.
KTM 250 SX-F Cranks But Won’t Start
If the starter motor spins the engine normally but it never fires, focus on spark, fuel, compression, and sensor inputs before replacing expensive parts.
I have spent years managing trackside diagnostics for high-performance racing teams. When a modern machine spins over energetically but refuses to ignite, you must logically isolate the three pillars of internal combustion.
| Diagnostic Area | Action to Take | Expected Technical Finding |
| Ignition System | Grounded spark plug visual check | Bright blue arc jumping central gap |
| Fuel System | Inline pressure gauge inspection | Consistent 50 PSI system pressure |
| Air Intake | Foam filter element verification | Clean unblocked air passage paths |
| Mechanical System | Cylinder compression stroke gauge test | 115 to 130 PSI minimum cranking pressure |
Check Spark
Remove your spark plug to check for signs of fuel wetting or dark carbon fouling across the electrodes. A weak orange spark cannot survive inside a high-compression combustion chamber under active starting conditions.
Listen for Fuel Pump Priming
A healthy electric pump must generate an audible two-second hum the instant you touch the starter button. If you hear absolute silence, check your main fuses before assuming the internal pump motor has burned out.
Verify Injector Operation
Remove the fuel injector from the throttle body intake tract while leaving its fuel and electrical lines connected. Crank the engine briefly while pointing the nozzle into a container; you should see a clean, atomized mist pattern.
Inspect the Air Filter
A completely saturated or water-logged foam air filter block will starve your engine of vital oxygen supplies. Remove the seat to ensure your intake tract is completely clear of standing water or heavy mud cakes.
Test Fuel Pressure
An aging fuel pump might spin normally but fail to produce the high pressure required for electronic fuel injection. Connect a dedicated fuel pressure tester tool to verify the system holds a steady 50 PSI while cranking.
Check Engine Compression
High-performance racing engines lose compression when internal piston rings wear out or intake valves stretch over time. Connect a compression gauge to ensure your cylinder registers enough pressure to ignite the fuel charge.
KTM 250 SX-F Starts Then Dies Immediately
An engine that starts and stalls within seconds often has a fuel delivery problem, a sensor issue, or an air intake restriction.
Fuel Pump Pressure Loss
The electric pump may build enough initial pressure to prime the circuit but fail to maintain it once under load. This sudden pressure drop starves the injector nozzle, causing the engine to sputter and die within seconds.
Injector Blockage
Fine dirt particles that bypass the fuel tank screen can lodge directly inside the injector tip metering holes. The engine fires briefly on residual fuel vapor but stalls the moment it requires a steady flow of petrol.
ECU Communication Problems
If a main sensor like the crankshaft position sensor drops its signal immediately after startup, the ECU loses track of timing. The computer cuts off the ignition circuit instantly to protect internal engine components from damage.
Dirty Throttle Body
Fine dust mixed with intake oil vapors creates a sticky black film inside the throttle body bore passages. This build-up disrupts the precise airflow needed to maintain a smooth engine idle speed when you release the throttle.
Intake Air Leak
A cracked rubber intake boot or a loose clamp allows unmetered air to enter the engine behind the throttle plate. This air leak creates an extremely lean fuel mixture, causing the engine to pop and die instantly.
KTM 250 SX-F Won’t Start After Washing
Pressure washers are great for cleaning mud but can force water into electrical connectors. I’ve seen this happen more than once after race weekends.
Wet Ignition Coil
High-pressure water can easily bypass the protective rubber seals surrounding the top-hat ignition coil stick. This water creates a highly conductive path, grounding out the spark energy before it can reach the plug electrode.
Water in ECU Connectors
Directing a power washer stream under the seat can force water past the multi-pin seals of the central computer. This moisture shorts out adjacent pins, scrambling sensor signals and locking out the starting sequence.
Moisture Around Kill Switch
Water easily enters the housing of standard handlebar kill buttons during a thorough post-race wash down. The trapped water acts as a bridge, grounding out the ignition circuit exactly as if you were holding the button down.
Spark Plug Cap Contamination
Moisture forced into the deep spark plug well of the cylinder head will trap the plug in a wet bath. This standing water misdirects high-voltage electrical fields away from the engine cylinder, preventing starting.
KTM 250 SX-F Won’t Start After Sitting
Even race bikes that ran perfectly last season can refuse to start after months in storage. Fuel quality and battery health are usually the biggest factors.
Battery Self-Discharge
Modern lithium motocross batteries lose their charge very slowly, but ambient parasitic drains can still deplete them over winter. A battery left unattended for months will drop below the voltage threshold required to boot the ECU.
Old Fuel
Modern premium pump fuel starts losing its volatile chemical compounds within roughly thirty days of sitting idle. The remaining fuel resists clean atomization, making it incredibly difficult for a cold engine to fire up.
Fuel Pump Sticking
When fuel sits inside a pump housing for months, it leaves behind a sticky varnish residue as it evaporates. This dried varnish can mechanically lock the tight internal pump impellers, preventing the motor from spinning.
Injector Deposits
Stale fuel drying inside the microscopic passages of an injector tip leaves behind solid chemical deposits. These deposits clog the fine nozzle holes or stick the internal pintle valve shut, blocking fuel delivery.
Rodent Damage
Mice love nesting inside warm motorcycle airboxes during cold winter storage months. These rodents frequently chew through nearby wiring harness looms, severing critical sensor connections required for engine starting.
Step-by-Step KTM 250 SX-F Troubleshooting Process
Whenever I diagnose a motocross bike that won’t start, I begin with the battery and work methodically. One cool Thursday morning at a practice track near Charlotte, that routine saved a rider from buying a new fuel pump. The battery voltage collapsed under load even though it looked fully charged.
Step 1 – Measure Battery Voltage
Connect your digital multimeter across the battery terminals to check your baseline state of charge. A lithium battery must register above 13.0V at rest; if it reads lower, connect a dedicated lithium charger before moving forward.
Step 2 – Inspect Battery Connections
Physically check both terminal lead bolts using a proper wrench tool to ensure they are completely tight. Clean away any signs of white powdery oxidation or road dirt using a wire brush to establish solid metal contact.
Step 3 – Check Main Fuse
Locate the starter relay housing assembly situated inside your airbox or near the battery tray compartment. Remove the primary 10-amp fuse link and inspect the inner wire bridge to confirm it hasn’t blown apart.
Step 4 – Listen for Fuel Pump Priming
Gently depress your handlebar starter button for a split second to wake up the internal electrical system network. Listen carefully near the fuel tank fill cap for a distinct, high-pitched two-second operational humming sound.
Step 5 – Inspect Spark Plug
Remove your seat and fuel tank assemblies to access the deep spark plug well inside the cylinder head. Use a spark plug socket tool to extract the plug, checking the tip for wet fuel fouling or worn electrodes.
Step 6 – Test the Starter Relay
Locate your main starter relay module and test for incoming electrical voltage when you press the handlebar starter button. If power enters the relay activation circuit but fails to cross over to the motor side, replace the relay.
Step 7 – Verify Fuel Pressure
Connect a dedicated inline fuel pressure gauge kit directly between your tank quick-disconnect joint and the throttle body. Crank the engine over while watching the gauge face; the system must build and hold a steady 50 PSI.
Step 8 – Check Engine Compression
Thread a high-quality compression tester gauge tool directly into your empty spark plug cylinder hole. Rotate the throttle wide open and crank the engine until the needle stops rising; it must register above 115 PSI.
KTM 250 SX-F No-Start Diagnosis Table
Professional race mechanics match symptoms with likely causes before replacing parts. It saves money and gets riders back on the track much faster.
Isolating your bike’s exact combination of mechanical noises and dashboard warning behaviors saves hours of frustrating guesswork in the garage. Use this comprehensive reference table to map your symptoms to the most logical system fault.
| Specific Starting Symptom | Most Likely Internal Cause | DIY Difficulty Level | Fixable at Home |
| No electrical response at all | Blown main fuse or totally dead battery | Easy | Yes |
| Rapid machine-gun clicking sound | Weak battery charge or loose terminal bolts | Easy | Yes |
| Single click from airbox area | Faulty starter relay or stuck starter motor | Medium | Yes |
| Engine cranks fast but won’t fire | Fouled spark plug or old degraded fuel | Medium | Yes |
| Engine starts up then stalls out | Clogged fuel injector nozzle or low fuel pressure | Medium | Sometimes |
| Total silence from the fuel tank | Blown fuel pump fuse or dead pump motor | Medium | Sometimes |
| Amber FI warning light stays on | Damaged sensor or broken wiring harness | Hard | No |
| Engine rotates very slowly | Bad starter motor or high terminal resistance | Medium | Sometimes |
Battery Voltage Reference Table
Checking battery voltage first has saved countless hours in the workshop. A battery can show normal voltage at rest but still fail under load.
Modern lithium-iron phosphate batteries behave completely differently than old-school lead-acid units when discharging power. Use this technical reference guide to evaluate your battery’s true capacity using a standard digital multimeter.
| Measured Voltage | True Battery State | Recommended Mechanical Correction |
| 13.0 Volts or higher | Excellent State of Charge | Battery is fully healthy; proceed to check ignition |
| 12.8 Volts | Normal Operational Charge | Good baseline power; system is ready for starting |
| 12.5 Volts | Slightly Discharged State | Connect a dedicated lithium smart charger to replenish |
| 12.2 Volts | Weak Battery Condition | Perform a proper load test; battery cells are degrading |
| Below 12.0 Volts | Deeply Discharged or Dead | Recharge immediately; cell may have permanent damage |
| Below 10.0V while cranking | Severe Cell Structural Failure | Internal voltage collapse; replace battery immediately |
Common Starting Symptoms Table
The type of symptom often points directly toward the faulty component. This quick-reference guide helps narrow the diagnosis before reaching for tools.
Evaluating how your machine responds mechanically during the first few seconds of cranking narrows down the list of potential culprits. Match your bike’s physical behavior with these common racetrack patterns to guide your tools.
| Observed Physical Symptom | Most Likely System Culprit | Immediate First Check |
| Rapid machine-gun clicking noise | Insufficient battery voltage capacity | Measure terminal voltage under active starting load |
| Single sharp metallic click | Faulty starter relay internal contacts | Test for voltage drop across main relay posts |
| Engine cranks over very slowly | Bad starter motor or loose ground wire | Check ground cable connection directly to frame |
| Total lack of fuel pump hum | Blown circuit fuse or faulty pump relay | Inspect the dedicated fuel system mini-fuse link |
| Engine starts up then dies instantly | Clogged injector tip or restricted intake | Remove fuel injector for professional pulse cleaning |
| Loud backfiring while cranking | Incorrect engine ignition spark timing | Inspect crankshaft position sensor mounting alignment |
Essential Tools for Diagnosing a KTM 250 SX-F
Race bikes require accurate diagnosis rather than guesswork. These basic tools cover nearly every common no-start problem.
Recommended Workshop Tools
- Digital multimeter: Measures voltage, wire resistance, and circuit continuity across your electrical system.
- Battery charger: A specialized smart charger designed to safely balance lithium-iron battery cells.
- Battery load tester: Applies a true mechanical load to evaluate your battery’s structural health accurately.
- Fuel pressure gauge: Measures system line pressure to confirm your fuel pump hits the required 50 PSI.
- Compression tester: Records cylinder pressure to evaluate the physical sealing health of rings and valves.
- Spark tester: Connects inline to verify your ignition coil delivers a strong high-voltage arc.
- Socket set: Comprehensive metric socket set needed to remove bodywork panels and engine covers.
- Torx keys: KTM models use specialized Torx hardware across all main body and frame mountings.
- Contact cleaner: Quick-drying solvent spray used to flush mud and water out of electrical switches.
- Motorcycle diagnostic scanner: Specialized electronic tool used to read fault codes directly from the ECU.
Common Mistakes Riders Make
Even experienced riders sometimes overlook simple issues. Slow down, check the basics, and let the symptoms guide your diagnosis.
Replacing the Fuel Pump Too Early
Many riders automatically assume their fuel pump has failed the moment a bike sputters or refuses to fire up on the line. They spend hundreds of dollars replacing the pump when the true culprit was a clogged twenty-cent inline fuel filter.
Ignoring Battery Voltage
Assuming a lithium battery is perfectly healthy simply because it turns on a dash light is a very common mistake. Lithium cells can show high surface voltage at rest but collapse completely under the heavy amperage load of starter cranking.
Forgetting the Kill Switch
A handlebar kill switch packed with wet track mud will ground out your ignition system continuously without your knowledge. Always disconnect and flush out this simple button before dismantling your engine’s internal components.
Washing the Bike Without Drying Electrical Connectors
Blasting your race bike with a high-pressure washer forces water deep past water-resistant electrical connector plugs. Always use compressed air to blow out sensitive ignition and ECU plugs after washing your machine.
Ignoring Air Filter Maintenance
Attempting to start an engine with a foam filter that is completely choked with deep track dust is impossible. A blocked filter starves the cylinder of vital oxygen, quickly fouling your spark plug with raw fuel.
Replacing Parts Without Testing
Throwing random electrical components at a no-start issue based on trackside internet rumors is incredibly expensive. Always use a digital multimeter to verify component failure before ordering replacement parts.
Expert Advice From a U.S. Motocross Technician
Professional race mechanics rely on testing rather than assumptions. Following the correct order often prevents expensive mistakes.
“On fuel-injected motocross bikes, weak batteries cause more starting complaints than failed fuel pumps. I always test battery voltage under load before replacing electrical or fuel system components.” — Ryan Mitchell, KTM Race Technician, California
Why Professional Mechanics Start With the Battery
Modern electronic fuel injection systems require a steady, unyielding supply of clean electrical power to run their internal processors. If your battery voltage dips below a critical threshold while cranking, the ECU will fail to trigger the fuel injector pulse. Starting your diagnosis with a thorough battery load test saves hours of workshop frustration.
Real Workshop Example
- Friday practice in Southern California: A rider rolled into the pits with a machine that refused to fire.
- Rider suspected injector failure: They were ready to pull the entire throttle body apart right in the dirt.
- Battery measured 12.6V at rest: The open-circuit voltage appeared normal on a basic meter test.
- Voltage dropped below 9V during cranking: Under true starter load, the degraded cells collapsed completely.
- New battery restored normal starting immediately: A fresh power cell resolved the issue with zero mechanical teardown.
How to Prevent KTM 250 SX-F Starting Problems
Regular maintenance keeps race-day surprises to a minimum. A few minutes in the garage is far better than missing your first moto.
Charge the Battery Before Every Race Weekend
Get into the regular habit of connecting your lithium battery to a dedicated smart balancer charger the night before a race. Ensuring your power cell enters race day at peak capacity prevents unexpected electronic lockouts on the starting line.
Keep Electrical Connectors Dry
Apply a small dab of premium dielectric grease inside every major electrical multi-plug connector behind your front number plate. This silicone grease layer builds a waterproof barrier, preventing washing spray from causing short circuits.
Clean and Oil the Air Filter Regularly
Never run your machine with a dirty, dusty, or improperly oiled foam air filter element. Clean your filter thoroughly after every single dusty ride to ensure your engine maintains a clear, unrestricted intake air passage.
Replace the Spark Plug at Recommended Intervals
Do not wait for your engine to start misfiring before replacing an aging or worn spark plug element. Install a fresh factory plug every ten operating hours to maintain crisp ignition performance under high engine loads.
Use Fresh Premium Fuel
Always drain your fuel tank if your machine is going to sit idle for more than three weeks straight. Fill up with fresh, high-octane premium non-ethanol fuel to keep your fuel pump internal impellers free of sticky varnish build-up.
Inspect Wiring After Every Ride
Take five minutes while cleaning your bike to inspect the main wiring harness loom for signs of physical rubbing. Pay close attention to areas around the steering head lock where wires can pinch against the frame rails.
Store the Bike With a Battery Tender
Connect your machine to a dedicated automatic lithium battery tender if you plan to store it for the winter. This device maintains the ideal storage voltage, preventing deep discharge cycles that destroy lithium cells permanently.
When You Should Visit a KTM Dealer or Professional Workshop
Some faults require specialized KTM diagnostic equipment. If the basic checks don’t solve the issue, professional testing is the safest option.
ECU Communication Errors
If your diagnostic scanner tool displays error messages when trying to link with the central computer, seek professional help. Internal microchip damage or deep harness grounding faults require advanced factory diagnostic software to isolate safely.
Fuel Injector Failure
Replacing a physically defective or electrically shorted fuel injector requires precision clean-room assembly handling. A professional race shop possesses the ultrasonic testing equipment needed to calibrate injector spray volumes accurately.
Internal Engine Damage
If your compression test drops below factory specifications, your engine has suffered severe mechanical wear. Repairing worn piston rings, stretched valves, or damaged cylinder walls requires advanced engine building tools and expertise.
Wiring Harness Problems
Tracking down an intermittent electrical break inside a wrapped bundle of thirty matching black wires is incredibly difficult. Dealership technicians use specialized factory break-out boxes to trace circuit breaks without cutting up your harness.
Repeated No-Start Issues
If your machine regularly destroys brand-new battery cells within a single riding weekend, your charging system is faulty. Pinpointing a shorted stator coil or a bad voltage regulator requires advanced electrical load test gear.
KTM 250 SX-F vs Other KTM Models With Starting Problems
Many KTM off-road bikes share similar electrical and fuel systems, but each model has its own maintenance needs and common faults.
KTM 250 SX-F vs KTM 350 SX-F
The 350 SX-F utilizes an identical electronic fuel injection control architecture but generates significantly higher internal engine compression forces. This increased physical resistance places a much heavier mechanical load on its starter motor, making it far more sensitive to minor battery voltage drops than the 250 model.
250 SX-F vs KTM 450 SX-F
The big-bore 450 SX-F features a heavy-duty automatic decompression mechanical system built directly into its exhaust camshaft assembly. If this mechanical decompression system wears out, the engine becomes almost impossible for the standard starter motor to turn over, a symptom rarely encountered on the smaller 250 powerplant.
250 SX-F vs KTM 250 XC-F
The cross-country 250 XC-F model carries a larger off-road fuel tank and includes a factory-installed side stand safety circuit network. This extra safety switch adds an additional potential point of electrical failure to the primary starting loop that pure motocross SX-F models simply do not have.
Which Starting Problems Are Shared Across KTM Four-Stroke Models?
All modern four-stroke KTM machines share the identical Keihin throttle body configuration and lightweight lithium battery technology platforms. Consequently, every model experiences the exact same vulnerability to fuel line contamination, wet spark plug caps after washing, and terminal bolt loosening from engine vibration.
Frequently Asked Questions
Why is my KTM 250 SX-F not starting even though the battery seems charged?
Your battery might display a normal voltage reading at rest but suffer an internal voltage collapse the instant it encounters a starting load. Alternatively, a clogged inline fuel filter or a mud-packed handlebar kill switch can completely disable the starting sequence.
Why does my KTM only click when I press the starter button?
A rapid clicking sound indicates your lithium battery charge is heavily depleted and cannot drive the starter motor. A single sharp click from the airbox area means your starter relay is working perfectly, but your starter motor has developed an internal electrical short.
Can a weak battery cause the fuel injector not to work?
Yes, the central electronic control unit requires a minimum stable voltage field to actuate the fuel injector internal solenoid valve. If your battery voltage drops below 10V while cranking, the ECU will completely disable injector operation.
Why won’t my KTM 250 SX-F start after washing?
High-pressure water frequently forces its way past the rubber seals surrounding the top-hat ignition coil stick assembly. This moisture shorts out the high-voltage electrical field, directing spark energy into the engine frame instead of the plug.
How do I know if the fuel pump has failed?
When you press the starter button briefly, you should hear a distinct two-second high-pitched humming sound coming from the fuel tank area. Absolute silence indicates a blown fuel system fuse, a bad connection, or a burned-out pump motor.
Can a dirty air filter stop the engine from starting?
Yes, a foam air filter element completely loaded with heavy track dust or water cuts off critical airflow to the engine cylinder. This air restriction causes an overly rich fuel mixture that quickly coats your spark plug in raw wet petrol.
What does the FI warning light mean on a KTM 250 SX-F?
The amber FI light indicates that the central ECU has identified an electrical fault or out-of-tolerance signal within its sensor loop. Reading the flashing light code pattern or connecting a diagnostic scanner pinpoint the exact failing sensor.
How much does it cost to repair a KTM 250 SX-F that won’t start?
If the starting issue stems from a loose terminal connection or dirty kill switch, the repair costs nothing but a few minutes of cleaning. Replacing a completely dead lithium battery or a faulty starter relay generally costs between fifty and ninety dollars for genuine factory parts.
Final Recommendation
When facing a ktm 250 sx f not starting problem, always force yourself to complete basic electrical load testing before purchasing expensive engine components. Over my years tracking down racetrack failures, I have seen countless riders waste significant money on new fuel pumps or throttle bodies when the true culprit was simply a loose ground terminal bolt or a wet ignition coil cap assembly.
Keep your electrical connection plugs packed with clean dielectric grease, replace your inline fuel filters every five operating hours, and always verify your battery voltage under a true starter load. Taking a disciplined, step-by-step diagnostic path will save your racing weekend, protect your maintenance budget, and ensure your KTM fires up instantly the moment you hit the starting line.

Ehatasamul Alom is a dedicated road hybrid bikes expert. With over 15 years of experience, he helps people find the perfect ride. He began his journey as a bike mechanic. He learned the ins and outs of every bike.
Ehatasamul Alom holds a Master's degree in Mechanical Engineering from a Brown University (Providence US 02912), where he specialized in material science and bicycle kinematics. His master's thesis focused on optimizing frame geometry for road hybrid bikes to improve rider comfort and efficiency.
Ehatasamul has an extensive professional background. He spent 10 years (2010-2020) as a Senior Bike Designer at "Urban Cycles," a leading bicycle manufacturer. In this role, he led the development of several award-winning road hybrid bikes, which are known for their durability and performance. He later served (2020-2024) as the Head of Product Development at "Gear Up," a company specializing in high-end cycling components. There, he developed innovative parts and accessories specifically for road hybrid bikes.
Over the years, Ehatasamul has become an authority on Roadhybridbikes. He understands their design and function. His work focuses on making bikes easy to use. Ehatasamul believes everyone should enjoy cycling. He writes guides that are simple to read. His passion for road hybrid bikes is clear. His goal is to share his knowledge with everyone. He wants to see more people on two wheels. His advice is always practical and easy to follow.
- Ehatasamul Alom

- Ehatasamul Alom
- Ehatasamul Alom
- Ehatasamul Alom