
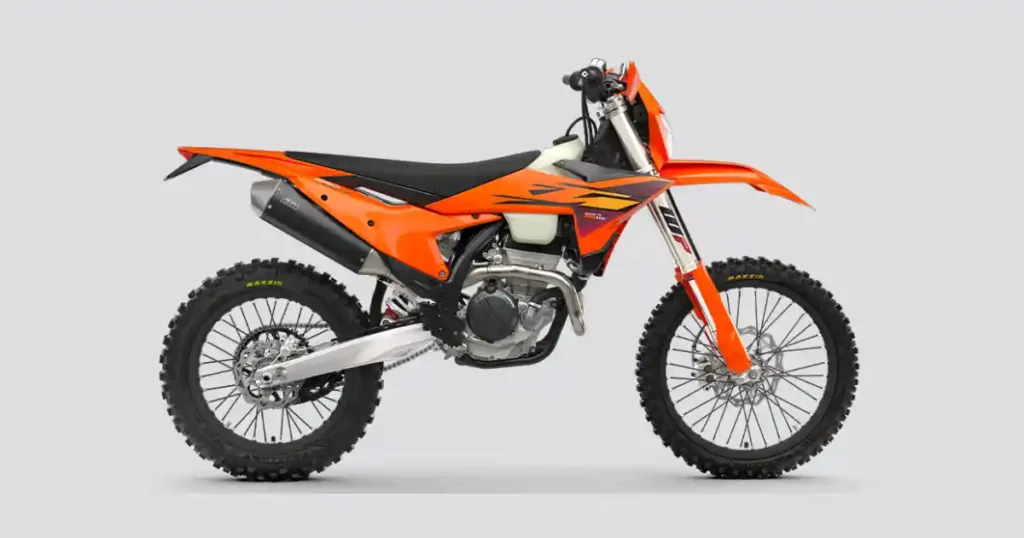
Nothing kills the pre-ride stoke faster than a bike that refuses to fire up when you are geared up and ready to hit the dirt. If you find your ktm 250 exc-f not starting, do not panic just yet. I remember a chilly fall morning out near Boise, Idaho, when a buddy’s bike suddenly went dead silent right at the trailhead. He was sure his fuel pump had completely fried, but a fast check revealed it was just a loose battery ground hidden under a thick layer of dried trail mud. We cleaned it up, tightened the bolt, and the machine fired right up within five minutes. Most starting issues on this specific fuel-injected enduro bike come down to simple fixes that you can easily handle yourself with the right approach.
KTM 250 EXC-F Not Starting? Check These Simple Things First
Before you start tearing down your bike or buying expensive replacement parts, it helps to pause and look at the basics. Dirt bikes live in a harsh world of deep mud, water crossings, vibrations, and dust, which can easily upset sensitive electrical components.
What Happens When You Press the Starter Button?
Paying close attention to exactly how your bike reacts when you hit the magic button will tell you exactly where to look first:
- No response at all: The bike is completely dead, indicating a total lack of power from the battery, a blown main fuse, or a disconnected kill switch.
- Single clicking sound: Power is reaching the starter relay, but it cannot turn the engine over, usually due to low voltage or a stuck starter motor.
- Rapid clicking: A classic sign of a deeply discharged battery that has enough juice to click the relay but drops voltage instantly under a load.
- Engine cranks but won’t fire: The starter motor is spinning the engine smoothly, but the vital spark or fuel mixture is missing from the combustion chamber.
- Engine starts then stalls: The bike fires up briefly on residual fuel or initial spark but dies immediately due to restricted fuel flow or a bad sensor signal.
- Slow cranking: The engine turns over sluggishly, suggesting a weak battery, poor ground connections, or internal drag in the starter motor.
- Fuel pump doesn’t prime: You miss that distinct, high-pitched hum when you wake up the bike, pointing to a fuel system power issue.
- Dashboard powers on but bike won’t start: The display lights up fine, but a safety switch or low cranking voltage is blocking the start sequence.
Five-Minute Pre-Ride Checklist
Run through this quick checklist right at your truck or garage bench to save hours of unnecessary frustration on the trail:
- Battery voltage: Check that your battery sits well above 12.6 volts when resting.
- Fuel level: Look inside the tank rather than trusting a gut feeling.
- Engine stop switch: Ensure the kill switch is not stuck in the “off” position.
- Starter button: Inspect the housing for packed dirt or corrosion.
- Fuel pump priming sound: Listen closely for the brief hum when you press the button.
- Battery terminals: Wiggle the cables to ensure they are rock-solid and clean.
- Main fuse: Pull the fuse near the starter relay to check for a broken element.
- Air filter: Confirm the filter element is clean, dry, and unblocked.
- Clutch switch (where equipped): Pull the lever fully to ensure the safety switch engages.
Warning Signs That Need Immediate Attention
If you notice any of these serious red flags while troubleshooting, stop cranking immediately to prevent permanent damage to your machine:
- Burning electrical smell: Indicates shorted wires or an overheating starter motor.
- Smoke near wiring: A clear sign of a direct electrical short circuit.
- Fuel leak: High-pressure fuel leaks pose an immediate fire hazard.
- Grinding starter noise: Suggests damaged teeth on the starter torque limiter or flywheel.
- FI warning light staying on: The Electronic Control Unit (ECU) has detected a critical sensor fault.
- Coolant leak: Risk of severe engine overheating if the bike does manage to fire up.
How the KTM 250 EXC-F Starting System Works
Modern enduro bikes are incredibly smart, but that intelligence means several different systems must talk to each other perfectly just to get the engine running.
Components That Work Together
To help you visualize how your bike brings itself to life, here are the core parts that form the starting and management network:
- Lithium or AGM battery: The primary power source for the entire machine.
- Starter motor: The electric motor that physically spins the crankshaft.
- Starter relay: A heavy-duty switch that routes high current directly to the starter.
- Starter solenoid: Works in tandem with the relay to engage power safely.
- ECU: The digital brain that manages fuel timing and spark delivery.
- Fuel pump: Submerged in the tank to deliver high-pressure fuel down the line.
- Fuel injector: Atomizes fuel into a fine mist directly into the intake tract.
- Ignition coil: Escalates low battery voltage into thousands of volts for the spark.
- Spark plug: Ignites the compressed fuel and air mixture inside the cylinder.
- Crankshaft position sensor: Tells the ECU exactly when to fire the spark plug.
- Throttle Position Sensor (TPS): Measures how far open the throttle butterfly valve is.
- Engine temperature sensor: Helps the ECU adjust the fuel mixture for hot or cold starts.
- Tip-over sensor (where applicable): Cuts power safely if the bike is laying on its side.
What Happens During Startup?
When everything is working perfectly, your bike executes a flawless sequence of events in a fraction of a second:
- ECU powers on: The system wakes up and prepares to run its startup code.
- Fuel pump primes: The pump runs for a few seconds to build essential line pressure.
- Sensors perform checks: The ECU reads current temperatures and position settings.
- Starter relay activates: Closing the circuit allows high-amperage current to flow.
- Starter motor turns the engine: Mechanical rotation begins compressing air in the cylinder.
- Injector delivers fuel: The ECU triggers a precise spray of fuel into the intake.
- Spark plug ignites the mixture: A strong spark jumps the gap at the perfect moment.
- Engine starts: Internal combustion takes over, and the starter circuit disengages.
Most Common Reasons a KTM 250 EXC-F Won’t Start
When your dirt bike refuses to cooperate, the issue almost always stems from a failure in one of four basic areas: battery power, fuel delivery, proper ignition spark, or electronic sensor signals.
Weak or Dead Battery
A weak battery is the number one cause of starting issues on modern fuel-injected bikes. Lithium batteries are fantastic because they are extremely light, but they do not like cold weather and can lose their cranking power quickly if left sitting.
Common Symptoms
You will notice the digital dashboard looks dim when you press the button, or the bike makes a rapid clicking sound. The engine might turn over very slowly once or twice before going completely silent.
Battery Voltage Test
Set your digital multimeter to the DC voltage setting and place the leads on the battery terminals. A healthy resting battery should read 12.8 volts or higher; anything below 12.4 volts needs attention.
Load Test
A battery can show a decent resting voltage but completely collapse under a real load. Keep your multimeter leads connected while you press the starter button; if the voltage drops below 10 volts during cranking, the battery is shot.
Recharge or Replace
If the battery fails the load test, connect it to a dedicated smart charger designed for your specific battery type (Lithium-ion or AGM). If it refuses to hold a charge above 12.6 volts after a full cycle, replace it.
Loose or Corroded Battery Connections
Dirt bike vibrations are intense, and it is very common for battery terminal bolts to back out slightly over time. Mud, water, and air can also create a layer of corrosion between the terminal and the wire lead.
Signs of High Resistance
You might have a fully charged battery, but the moment you hit the starter button, all the lights on the dash instantly die. You might also hear a single click, followed by a total loss of electrical power.
Cleaning Procedure
Remove the negative cable first, then the positive cable. Use a small wire brush or fine sandpaper to scrub away any white or gray oxidation until the metal shines, then apply a thin coat of dielectric grease.
Faulty Starter Relay
The starter relay acts as the heavy-duty bridge between your battery and the starter motor. If this component fails internally, power cannot bridge the gap to turn the engine over.
Single Click Diagnosis
If you press the starter button and hear a distinct, solid click from under the seat but the starter motor does not budge, the relay is likely working mechanically but failing to pass high current.
Relay Testing
You can test the relay by checking for 12 volts at the starter motor side of the relay while pressing the button. If voltage enters the relay but does not come out the other side, the unit is bad.
Bad Starter Motor
The starter motor lives in a hot environment right behind the cylinder. Over time, internal carbon brushes wear out, or water can get past the seals, causing internal corrosion and binding.
Slow Cranking
When a starter motor is failing, it will draw a massive amount of power from the battery but turn the engine over painfully slow, even when connected to a brand-new battery.
Current Draw Test
An experienced mechanic uses an amp clamp meter to see how much current the starter draws during cranking. A bound or shorted starter motor will draw excessive amps while barely turning the motor.
Fuel Pump Failure
Electronic fuel injection requires high pressure to operate. If your fuel pump cannot build adequate pressure, the injector will simply dribble fuel instead of creating a fine, combustible mist.
No Priming Sound
When you first press the starter button, you should always hear a clear, two-second buzzing sound from inside the fuel tank. If there is absolute silence, your pump is not getting power or has locked up.
Fuel Pressure Test
Connect a dedicated fuel pressure gauge to the quick-disconnect fuel line. When you crank the engine, the pressure must quickly rise to approximately 50 PSI (3.5 bar) for the injection system to work.
Dirty Fuel Injector
The tiny nozzle holes inside a fuel injector are incredibly small. Even a tiny speck of fine trail dust or gummy fuel varnish can easily block fuel flow and cause a no-start condition.
Symptoms
The bike will crank over beautifully and have a strong spark, but the spark plug stays completely dry. The engine might sputter for a split second but will not catch and run on its own.
Cleaning Methods
You can remove the injector and use a specialized reverse-flush tool along with aerosol carburetor cleaner to clear the nozzle. For severe blockages, an ultrasonic cleaning bath works wonders.
Fouled Spark Plug
A fouled spark plug is a very common issue, especially if the bike has been started repeatedly for short periods without being allowed to reach full operating temperature.
Carbon Build-Up
A thick layer of black, dry carbon soot on the ceramic insulator tip will short out the electrical current, causing the spark to jump inside the plug body rather than across the electrode gap.
Wet Spark Plug
If you crank the engine repeatedly without it firing, raw fuel can soak the plug tip. A wet spark plug cannot ignite fuel; you must remove it, clean it with contact cleaner, and let it dry.
Replacement Interval
Spark plugs are cheap insurance against trail failures. Replace your spark plug every 20 to 30 hours of hard riding, or at least once per season, to ensure crisp, reliable ignition.
Ignition Coil Failure
The ignition coil converts low battery voltage into the high-voltage surge needed to jump the spark plug gap under intense engine compression.
Weak Spark
A failing coil might still produce a faint spark in the open air, but that spark will completely blow out and disappear once subjected to high compression inside the cylinder.
Coil Resistance Test
Use a multimeter to measure the primary and secondary resistance of the coil winding circuits. Compare your numbers to the factory manual specs; any open circuit means the coil must be replaced.
Sensor Failure
The ECU relies heavily on data from various engine sensors to calculate the perfect spark timing and fuel delivery for startup.
Crankshaft Position Sensor
This sensor tracks the movement of the flywheel. If it fails or gets covered in metallic wear debris, the ECU will not know the engine is spinning and will refuse to fire the spark or injector.
Throttle Position Sensor
If the TPS is damaged or improperly adjusted, it might report to the ECU that the throttle is wide open when it is actually closed, causing the system to deliver an incorrect, flooded fuel mixture.
Engine Temperature Sensor
A faulty coolant temperature sensor might tell the brain that the engine is burning hot on a freezing morning, leading to an extremely lean mixture that makes starting almost impossible.
Wiring Harness Problems
Enduro bikes are subjected to constant washing, vibrating, and frame flexing, which can take a serious toll on the thin wires inside the main harness.
Connector Damage
Check the plastic plugs behind the front headlight mask and under the fuel tank. Pins can easily back out of the plastic housings, or corrosion can block the delicate low-voltage sensor signals.
Chafed Wires
Look closely at common rub points, such as around the steering head tube and where the harness passes near the shock reservoir. A single bare wire touching the frame will cause an intermittent short.
Dirty Air Filter
An engine needs a balanced mixture of air and fuel to fire up. A heavily restricted intake will prevent enough oxygen from reaching the cylinder.
Dust Restriction
If you ride in extremely dusty group conditions, fine silt can rapidly plug the foam pores of your filter, choking off the engine’s air supply and mimicking a heavily flooded condition.
Cleaning and Oiling
Wash your filter regularly in specialized foam filter cleaner, let it dry completely, and apply an even coat of high-quality tacky filter oil. Squeeze out all excess oil before reinstalling it.
KTM 250 EXC-F Cranks But Won’t Start
When the starter motor spins the engine over fast and strong but the bike simply refuses to catch fire, you need to isolate the problem by checking the essentials systematically.
Check for Spark
Remove the spark plug, insert it back into the rubber cap, and hold the threaded base firmly against a clean bare metal spot on the engine cylinder head. Press the starter button and look closely for a bright blue, crisp spark jumping across the gap. If you see a weak yellow spark or nothing at all, your issue lies within the ignition circuit, a fouled plug, or a bad kill switch.
Listen for Fuel Pump Priming
Turn key or press down on the start button to wake up the electrical system. Place your ear right against the fuel tank shell. You must hear a smooth, distinct buzzing sound for two seconds as the pump builds line pressure. If you hear total silence, check the fuel pump fuse, the main power relay, or the electrical plug tucked up underneath the rear of the tank.
Verify Fuel Injector Operation
If you have a strong spark and the fuel pump primes normally but the bike still won’t fire, you need to verify if fuel is actually entering the combustion chamber. Remove the spark plug after a long cranking attempt; it should smell faintly of fuel and look slightly damp. If it is bone dry, the fuel injector nozzle is likely blocked or the ECU is not sending the pulse signal to open it.
Measure Fuel Pressure
A fuel pump can spin and make plenty of noise while still failing to build the high pressure required by the electronic fuel injection system. Hook up an inline fuel pressure test gauge between the tank quick-disconnect fittings. Crank the engine over and verify the gauge reads a rock-solid 50 PSI; a reading of 30 PSI or lower means the internal fuel pressure regulator or the pump itself is bad.
Inspect the Air Filter
Pull off the left-side airbox cover panel and inspect the foam filter element. If the filter is dripping with excess filter oil or completely caked in thick, heavy mud from a deep water crossing, it will choke off the engine’s air supply. Remove the filter completely and try starting the bike briefly in a clean, dust-free garage environment to see if it immediately fires up.
Perform a Compression Test
An engine needs mechanical compression to ignite the air and fuel mixture. Thread a compression gauge tightly into the spark plug hole, hold the throttle wide open, and crank the engine until the needle stops rising. A healthy KTM 250 engine should show over 115 PSI minimum; a very low reading points to worn piston rings, a blown head gasket, or tight valves that need shimming.
KTM 250 EXC-F Starts Then Dies
It can be incredibly frustrating when your bike teases you by starting up for a brief second, only to sputter and stall out the moment you touch the throttle.
Fuel Pump Pressure Loss
This issue often happens when the internal fuel filter inside the gas tank becomes completely clogged with debris or when an internal fuel line develops a tiny split. The pump can build just enough initial pressure to start the engine, but it cannot sustain the continuous fuel volume required to keep the bike idling under its own power.
Injector Restriction
A partially restricted fuel injector might allow enough fine mist through for a quick start, but the moment the ECU demands a tiny bit more fuel to sustain an idle or respond to a throttle twist, the restricted fuel flow leans out the mixture too much, causing the engine to cough and stall out immediately.
ECU Sensor Fault
When the engine first fires up, the ECU reads data from the engine temperature sensor and atmospheric pressure sensor to calculate the ideal running mixture. If one of these sensors sends wild, incorrect data, the brain will instantly apply the wrong fuel mapping, causing the bike to die as soon as it transitions out of its initial startup mode.
Air Intake Leak
Check the rubber boot that connects the throttle body to the engine cylinder head. If this rubber boot has developed a hidden tear or if the metal clamping band has vibrated loose, unmetered air will enter the engine behind the throttle plate, creating an extremely lean mixture that causes an immediate stall.
Idle Control Problems
The fuel injection system uses an idle speed adjustment screw or an automatic bypass valve to regulate how much air enters the engine when your hand is completely off the throttle. If this bypass passage becomes gummed up with carbon or dirt, the engine will not get enough air to maintain a stable idle and will die instantly.
KTM 250 EXC-F Won’t Start After Washing
We all want to keep our bikes looking sharp, but high-pressure water wand washes at the local car wash can easily force water past rubber seals and deep into delicate electrical connections.
Wet Ignition Coil
The ignition coil sits high up under the fuel tank frame rails, making it a prime target for water spray. If water gets forced into the primary wire connectors or saturates the outer housing, the high-voltage current will short out directly to the frame instead of traveling down to the spark plug tip.
Moisture in ECU Connectors
The main ECU brain has a multi-pin plug that is protected by a rubber seal. However, if you blast water directly under the seat area, moisture can seep past the seal and bridge the tiny pins together, confusing the digital signals and causing a complete electronic lockout until the connection dries.
Water Around the Starter Relay
The starter relay and main fuse block live near the battery compartment under the seat. If water pools deep inside this rubber boot holder, it can create a temporary short circuit that either blows the main fuse instantly or stops the starter button signal from triggering the relay mechanism.
Spark Plug Cap Moisture
The deep spark plug well on top of the cylinder head can trap water like a small bucket. If the rubber seal on your spark plug cap is worn or unseated, water will fill the well and ground out the spark plug wire directly to the aluminum head, killing all spark completely until you dry the well.
KTM 250 EXC-F Won’t Start After Winter Storage
Leaving your bike sitting in a garage or shed for months at a time can cause several common issues that will prevent it from starting up smoothly in the spring.
Battery Self-Discharge
Lithium dirt bike batteries have a low self-discharge rate, but they will still slowly drain over months of complete neglect, especially if connected to a bike with a tiny parasitic draw from the digital dash clock. A battery left in a cold garage all winter will often be completely flat by spring.
Old Fuel
Modern pump fuel contains ethanol, which actively attracts moisture from the air over time. As the fuel sits inside your tank and lines, it begins to degrade, separate, and lose its volatility, making it incredibly difficult to vaporize and ignite on that first spring start attempt.
Fuel Pump Sticking
When old fuel sits inside the tight internal tolerances of the fuel pump assembly for months, it can leave behind a sticky varnish residue. This sticky film can physically lock up the small internal spinning gears of the pump, preventing it from spinning when power is applied.
Injector Deposits
The fuel remaining inside the injector tip can evaporate over the winter, leaving behind tiny, hardened mineral and fuel deposits right inside the micro-nozzle holes. These deposits completely block the path of fresh fuel, requiring a manual cleaning to restore proper spray patterns.
Rodent Damage
Mice love to nest inside warm dirt bike airboxes during the cold winter months. They can easily chew through your foam air filter element or gnaw on the insulation of the main wiring harness under the tank, creating hidden broken wires or direct short circuits.
Step-by-Step KTM 250 EXC-F Troubleshooting Process
Whenever you are faced with a bike that won’t start, it is best to follow a structured, step-by-step diagnostic process. This systematic approach saves you time and stops you from guessing wildly.
Step 1 – Measure Battery Voltage
Grab your digital multimeter, set it to DC volts, and place the leads on the battery terminals. Ensure the resting voltage reads 12.6V or more. Keep the leads attached while pressing the starter button to make sure the voltage stays above 10V under the load of the spinning starter motor.
Step 2 – Inspect Battery Connections
Physically check both the positive and negative cable bolts at the battery terminals using a wrench. Ensure they are completely tight and free of any loose play. Inspect the negative ground cable where it attaches to the bike’s frame rail to ensure it is clean and tight.
Step 3 – Check Main Fuse
Locate the main fuse block right next to the starter relay under the seat. Pull the clear plastic 10-amp or 20-amp fuse out of its holder and hold it up to a bright light. Look closely at the small metal element inside; if it is broken or burnt, replace it with the spare fuse.
Step 4 – Listen for Fuel Pump Priming
Turn on your bike’s ignition system and listen closely for the clear, high-pitched two-second hum coming from inside the fuel tank. If you do not hear it, check the fuel system relay and verify that power is reaching the wire plug connector located underneath the rear of the tank.
Step 5 – Inspect Spark Plug
Use a spark plug socket to remove the plug from the cylinder head. Check the color and condition of the firing tip. Clean any wet fuel or black carbon deposits away using contact cleaner and a small brass wire brush, or simply install a fresh, correctly gapped plug.
Step 6 – Test Starter Relay
If the bike clicks but won’t crank, locate the starter relay under the seat. Use an insulated screwdriver to briefly bridge the two large copper terminal posts together. If the starter motor instantly spins up, your starter motor is fine, and the relay itself or the handlebar button switch is faulty.
Step 7 – Measure Fuel Pressure
Connect an inline fuel pressure gauge to the quick-disconnect fuel line fitting. Press the starter button to prime the system and verify that the gauge needle shoots up to approximately 50 PSI. If the pressure is low, look into replacing the internal tank fuel filter or the pump.
Step 8 – Check Compression
Thread a mechanical compression tester gauge into the empty spark plug hole. Twist the handlebar throttle wide open and crank the engine over for a few seconds until the gauge needle stops climbing. Ensure the final reading is well above 115 PSI to guarantee healthy engine compression.
KTM 250 EXC-F No-Start Diagnosis Table
A clear overview of common symptoms can help you narrow down the fault quickly and logically before you begin removing body panels or ordering parts.
| Symptom | Most Likely Cause | DIY Difficulty | Usually Repairable at Home |
| No response at all | Dead battery or blown main fuse | Easy | Yes |
| Rapid clicking sound | Weak or discharged battery | Easy | Yes |
| Single solid click | Faulty starter relay or loose cable | Easy | Yes |
| Cranks but won’t fire | Fuel delivery issue or fouled plug | Medium | Yes |
| Starts then stalls | Restricted fuel injector or low pressure | Medium | Sometimes |
| No fuel pump sound | Bad pump, blown fuse, or loose plug | Medium | Sometimes |
| FI dashboard light stays on | Critical ECU fault or bad engine sensor | Medium | No |
| Sluggish, slow cranking | Weak battery or worn starter motor | Medium | Sometimes |
Battery Voltage Reference Table
One quick battery voltage test with a multimeter can eliminate the most common starting issue before you spend hours troubleshooting other complex systems.
| Voltage Reading | Battery Condition | Recommended Action |
| 13.0V or higher | Excellent health | Continue looking elsewhere for the fault |
| 12.8V | Healthy resting charge | Ride and use normally |
| 12.5V | Slightly low charge | Connect to a smart charger immediately |
| 12.2V | Weak charge | Perform a full load test on the battery |
| Below 12.0V | Poor condition | Battery replacement is highly likely |
| Below 10.0V while cranking | Internal battery failure | Replace the battery with a fresh unit |
Fuel Injection Troubleshooting Table
Fuel injection makes your enduro bike run cleanly across changing elevations, but it does add electronic steps to the starting process. Use this guide to simplify your diagnosis.
| Symptom | Possible Cause | First Inspection Step |
| No fuel pump priming sound | Faulty pump or bad power relay | Check the main fuse and tank wire plug |
| Hard cold morning starting | Bad engine temperature sensor | Verify sensor resistance readings with manual |
| Starts up then stalls out | Dirty injector nozzle or low pressure | Check fuel pressure and flush the injector |
| Poor throttle response | Misadjusted Throttle Position Sensor | Check TPS plug connection and base voltage |
| FI warning light flashing | ECU has logged a specific system fault | Perform a diagnostic code scan on the bike |
| Difficult hot trail restarts | Fuel pump overheating or vapor lock | Measure fuel pressure when the engine is hot |
Essential Tools for Diagnosing a KTM 250 EXC-F
Having a few reliable diagnostic tools in your home workshop will save you from guessing and replacing expensive electrical components by trial and error.
- Digital multimeter: Essential for tracking down broken wires and testing battery voltages.
- Battery charger: A smart charger designed specifically for Lithium-ion or AGM batteries.
- Battery load tester: Reveals how your battery performs under a real starter motor load.
- Fuel pressure gauge: Measures if your fuel pump is reaching the required 50 PSI operating level.
- Compression tester: Verifies the mechanical sealing health of your piston and valves.
- Spark tester: Lets you visually check the strength and consistency of your ignition spark.
- Motorcycle diagnostic scanner: Plugs into the factory OBD port to read ECU fault codes.
- Torx key set: Required to remove KTM body plastics and engine sensor mounts.
- Contact cleaner: An aerosol spray that cleans dirt and oil out of electrical plugs.
- Flashlight: Helps you spot chafed wires hidden deep inside the dark bike frame.
Common Mistakes Riders Make
When a bike won’t start, it is easy to get frustrated and make assumptions that end up wasting time and money. A calm approach will get you back on the trail much faster.
Replacing the Fuel Pump Too Soon
Many riders jump to conclusions and buy an expensive replacement fuel pump the second they don’t hear the priming hum, completely overlooking a simple blown 10-amp fuse or a loose ground wire.
Ignoring Battery Voltage
Assuming a battery is completely fine just because the dashboard lights up is a major pitfall. Always measure the voltage drop under load while cranking to know the battery’s true health.
Forgetting the Engine Stop Switch
It sounds silly, but many riders spend an hour troubleshooting a no-start issue on the trail, only to realize their kill switch button was bumped into the off position by a stray tree branch.
Pressure Washing Electrical Connectors
Blasting your enduro bike with high-pressure water right after a muddy ride is an easy way to force moisture deep into waterproof plugs, causing mysterious short circuits the next morning.
Skipping Air Filter Maintenance
Neglecting your foam air filter until it is completely choked with thick dust or dripping with excess oil restricts air flow so badly that the engine cannot draw enough oxygen to fire up.
Replacing Parts Before Testing
Throwing random new parts at a bike in hopes of fixing a problem is expensive and frustrating. Always test the component first using your multimeter or gauge to verify it has actually failed.
Expert Advice From a U.S. KTM Technician
Professional off-road mechanics follow a strict testing routine rather than relying on guesswork. This methodical approach saves riders both money and valuable riding time.
“On modern electronic fuel-injected enduro bikes like the KTM 250 EXC-F, a battery that looks healthy on the surface can still completely fail under a cranking load. I always perform a thorough voltage drop test before I ever recommend replacing expensive fuel system or ignition components.” — Jason Reynolds, KTM-Certified Off-Road Technician, Utah
Why Battery Testing Comes First
A modern fuel-injected bike requires a minimum amount of stable voltage just to keep the ECU brain awake and operating while the starter motor is drawing power. If your battery drops below 10.5 volts during cranking, the ECU will instantly shut down or stop firing the fuel injector, even though the engine seems to be turning over just fine.
Real Workshop Example
During a busy Friday morning right before a major trail ride event in Moab, a frustrated rider brought his bike into the shop. He was absolutely convinced his fuel injector had completely failed because the bike would crank over but wouldn’t fire. The battery measured a decent 12.6 volts while parked on the stand, but the moment we hit the starter button, the voltage dropped below 9 volts under load. A fresh battery replacement restored normal starting instantly.
How to Prevent KTM 250 EXC-F Starting Problems
Simple, consistent maintenance habits in your garage will prevent frustrating breakdowns out on the trail and ensure your bike is ready to rip every time you load it up.
Keep the Battery on a Smart Charger
Whenever your bike is going to sit for more than a week or two, connect it to a dedicated smart maintenance charger to keep the cell voltage topped up and healthy.
Use Fresh Premium Fuel
Always fill your tank with fresh, high-octane premium fuel from a busy station, and use a high-quality fuel stabilizer if you know the bike will sit for more than a month.
Clean and Oil the Air Filter Frequently
Never let dirt cake up on your air filter. Clean it after every few dusty rides, and ensure it is evenly oiled with tacky filter oil to protect the engine intake.
Inspect Electrical Connectors After Muddy Rides
After riding in deep mud or washing your bike, pull apart the main electrical plugs under the seat, spray them with contact cleaner, and apply fresh dielectric grease to seal out moisture.
Replace the Spark Plug on Schedule
Do not wait for your spark plug to fail completely on the trail. Replace it on a regular schedule according to your owner’s manual to ensure a crisp, hot spark.
Check Wiring Before Every Ride
Take two minutes to look over your bike before loading it up. Check for any loose battery bolts, rubbed insulation, or pinched wires around the steering head.
Store the Bike Properly During Winter
Drain the fuel out of the throttle body, put stabilizer in the gas tank, remove the battery to keep it in a warm room on a charger, and plug your exhaust to keep out mice.
When You Should Visit a KTM Dealer or Professional Workshop
While most starting issues can be solved at home with basic tools, some complex electronic problems require specialized factory equipment and expert knowledge.
ECU Communication Errors
If your bike’s main digital brain stops talking to the dashboard or refuses to connect to standard diagnostic tools, it requires proprietary KTM factory software to re-flash or diagnose the system.
Persistent FI Warning Light
If the Fuel Injection light on your dashboard stays illuminated or flashes a steady fault code even after you have checked all the basic sensors, a professional scan is needed to isolate the issue.
Fuel Injector Failure
If an injector has suffered severe internal electrical winding damage, it will require a specialized diagnostic machine to test its pulse rate and fuel delivery volume accurately.
Wiring Harness Damage
If a mouse has chewed deep into the middle of your main wiring harness or if a major short circuit has melted multiple wires together, a professional replacement is the safest route.
Internal Engine Problems
If your compression test reveals a severe loss of mechanical pressure due to worn piston rings or damaged valves, the engine will need to be torn down and rebuilt by a qualified tech.
KTM 250 EXC-F vs Other KTM Models With Starting Problems
While KTM’s four-stroke off-road lineup looks very similar from the outside, each engine size has its own small design characteristics that can affect how it starts.
KTM 250 EXC-F vs KTM 350 EXC-F
The 250 and 350 models share the exact same chassis and electrical layout, but the 350 has slightly higher compression. This means a weak battery will stop a 350 from turning over much sooner than it will affect the smaller 250 engine.
KTM 250 EXC-F vs KTM 450 EXC-F
The 450 model uses a completely different, larger engine design with a mechanical automatic decompression system on the camshaft. If this decompression mechanism wears out on a 450, it will mimic a dead battery by locking up the starter motor entirely.
KTM 250 EXC-F vs KTM 250 XC-F
The XC-F is a closed-course race bike that lacks the full street-legal lighting harness, key switch, and extra safety switches found on the EXC-F dual-sport, making its starting circuit much simpler to troubleshoot.
Which Starting Problems Are Shared Across KTM Four-Stroke Models?
All modern KTM four-stroke models share the same quick-disconnect fuel line fittings, which use a tiny inline fuel cone filter that can clog up and cause hard starting across every single model size.
Frequently Asked Questions
Why is my KTM 250 EXC-F not starting even though the battery seems charged?
A battery can hold enough voltage to illuminate the dashboard lights while failing to maintain the high amperage needed to spin the starter motor and power the electronic fuel injection system at the same time.
Why does my KTM only make a clicking sound when I press the starter?
A clicking sound means the starter relay is activating, but there is not enough power from the battery to turn the starter motor, or the starter motor itself has developed an internal flat spot.
Can a weak battery affect the EFI system?
Yes, the ECU and fuel pump require a stable supply of power to operate correctly. If the voltage drops too low while cranking, the ECU will shut down and stop firing the spark plug and fuel injector.
Why won’t my KTM 250 EXC-F start after washing?
Water from washing can easily seep into the spark plug well, the ignition coil connections, or the starter relay plug, grounding out the electrical current until the connections are thoroughly dried out.
How do I know if the fuel pump has failed?
If you do not hear a distinct two-second buzzing sound from inside the fuel tank when you wake up the bike’s electrical system, the pump is either not receiving power or has failed internally.
Can a dirty air filter stop the bike from starting?
Yes, if an air filter is completely clogged with thick dust or heavily oversaturated with filter oil, it will restrict the intake airflow so badly that the engine cannot draw enough oxygen to start.
What does the FI warning light mean?
The Fuel Injection warning light indicates that the ECU has detected an electrical fault or an incorrect signal from one of the vital engine sensors, which requires a diagnostic scan to read.
How much does it cost to repair a KTM 250 EXC-F that won’t start?
The cost depends entirely on the root cause. A simple loose wire or blown fuse costs next to nothing to fix at home, while a failed fuel pump or a damaged ECU can cost hundreds of dollars in parts.
Final Recommendation
When your bike refuses to fire up, always slow down and check the simplest components first before assuming the worst. Over my years of working on these high-performance enduro machines, I have found that a vast majority of no-start issues come down to a low battery, poor terminal connections, or a simple clogged inline fuel filter. Invest in a good digital multimeter, keep your electrical connections clean and greased, and always test your battery health under a real cranking load before buying expensive replacement parts. If you take care of the electrical basics, your machine will remain incredibly reliable out on the trail.

Ehatasamul Alom is a dedicated road hybrid bikes expert. With over 15 years of experience, he helps people find the perfect ride. He began his journey as a bike mechanic. He learned the ins and outs of every bike.
Ehatasamul Alom holds a Master's degree in Mechanical Engineering from a Brown University (Providence US 02912), where he specialized in material science and bicycle kinematics. His master's thesis focused on optimizing frame geometry for road hybrid bikes to improve rider comfort and efficiency.
Ehatasamul has an extensive professional background. He spent 10 years (2010-2020) as a Senior Bike Designer at "Urban Cycles," a leading bicycle manufacturer. In this role, he led the development of several award-winning road hybrid bikes, which are known for their durability and performance. He later served (2020-2024) as the Head of Product Development at "Gear Up," a company specializing in high-end cycling components. There, he developed innovative parts and accessories specifically for road hybrid bikes.
Over the years, Ehatasamul has become an authority on Roadhybridbikes. He understands their design and function. His work focuses on making bikes easy to use. Ehatasamul believes everyone should enjoy cycling. He writes guides that are simple to read. His passion for road hybrid bikes is clear. His goal is to share his knowledge with everyone. He wants to see more people on two wheels. His advice is always practical and easy to follow.
- Ehatasamul Alom

- Ehatasamul Alom
- Ehatasamul Alom

- Ehatasamul Alom



