
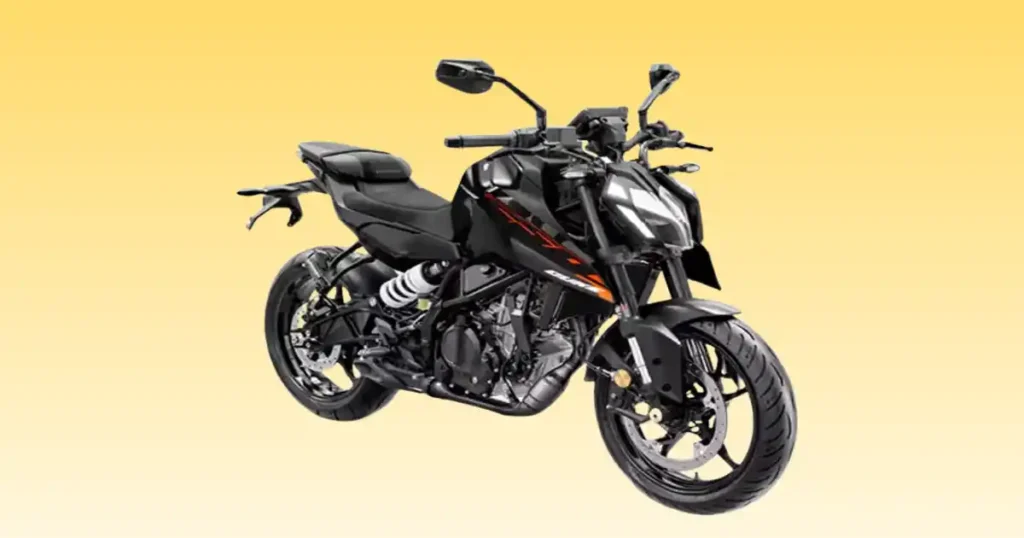
Hitting the starter button only to meet complete silence can ruin your day. This exact issue happened to a rider on a chilly morning in Phoenix, who feared a major fuel system breakdown. After a fast look, we found a single loose battery connection was the true cause. A quick turn of a wrench solved it instantly. Finding a ktm duke 250 not starting can be stressful, but most issues are simple to fix yourself. Let us walk through the fast checks to get you back on the road safely.
KTM Duke 250 Not Starting? Check These Simple Things First
Many starting problems look like a major failure but come down to minor details. Checking the simplest components first saves you hours of stress.
What Happens When You Press the Starter Button?
- No response at all: The bike acts dead with no lights or dashboard movement.
- Single click: You hear one solid click near the seat, but the engine stays still.
- Rapid clicking: A fast chattering sound repeats as long as you hold the button.
- Engine cranks but won’t fire: The engine spins fast and healthy but never catches life.
- Engine starts then stalls: It fires up for a few seconds and then dies out completely.
- Starter turns slowly: The engine strains to turn over with a sluggish, heavy sound.
- Dashboard lights dim: Your screen fades out the moment you press down on the switch.
- Fuel pump doesn’t prime: You miss the familiar whirring sound when turning the key on.
Five-Minute Quick Inspection Checklist
- Battery voltage: Must show a strong charge to run the complex digital systems.
- Fuel level: Verify you actually have fresh gas inside the tank.
- Engine kill switch: Ensure the red button is set to the run position.
- Side stand position: Flip the stand up completely to clear the safety cutoff.
- Neutral indicator: Confirm the green N light shows on your dashboard.
- Clutch switch: Pull the lever in fully while pressing the starter button.
- Main fuse: Inspect the primary fuse to ensure the metal strip is intact.
- Battery terminals: Shake the cables to ensure they are tight and clean.
- Fuel pump priming sound: Listen closely for a clear two-second hum when keying on.
Warning Signs You Shouldn’t Ignore
- Burning electrical smell: Indicates a short circuit or an overloaded wire melting down.
- Smoke from wiring: Stop immediately and disconnect the power to prevent a fire.
- Grinding starter noise: Points to damaged gears inside the starter motor assembly.
- FI warning light: The dash light shows the main brain sees an active sensor fault.
- Fuel leak: Check lines immediately since drops can cause a fire on hot pipes.
- Coolant leak: Sweet smells or puddles mean the engine might overheat fast.
How the KTM Duke 250 Starting System Works
The modern engine uses a precise system to manage power, fuel, and air. Knowing how these parts talk to each other helps you track down errors fast.
Main Components in the Starting System
Your battery acts as the heart, storing energy for the starter motor to turn the crankshaft. A tiny starter relay sends heavy current safely when you push the bar button. The starter solenoid moves the gears to spin the motor safely.
The electronic control unit or ECU acts as the brain. It commands the fuel pump to push gas through the fine fuel injector. This fuel hits the combustion chamber where the ignition coil creates a massive pulse for the spark plug.
Sensors keep things safe. The crankshaft position sensor tells the brain the exact location of the piston. The Throttle Position Sensor or TPS monitors your hand movement. Finally, the side stand switch and clutch switch prevent the bike from lunging forward accidentally if it is in gear.
What Happens During Startup?
- ECU wakes up: Turning the key boots up the main computer system instantly.
- Fuel pump primes: The pump runs for two seconds to build high pressure.
- Safety switches are checked: The brain confirms the bike is safe to crank over.
- Starter relay activates: High current flows down to the heavy starter motor lines.
- Starter motor cranks: The internal engine components begin to spin at high speed.
- Injector sprays fuel: A fine mist enters the fresh air stream in the intake.
- Spark plug ignites the mixture: A bright spark catches the compressed fuel mist.
- Engine starts: The bike settles into a smooth, controlled idle speed.
Most Common Reasons a KTM Duke 250 Won’t Start
Tracking down a no-start issue goes faster when you sort the problems into simple boxes. Let us look at the most frequent trouble spots.
Weak or Dead Battery
Common Symptoms
The digital display flickers or resets when you touch the starter button. You might hear a fast clicking sound, or the bike might stay completely silent.
Battery Voltage Test
Connect a high quality digital multimeter to the positive and negative terminals. A perfect battery reads above 12.6 volts when the bike is off.
Load Testing
A battery can look good at rest but drop under stress. Watch the multimeter screen while you press the starter button. If the number drops below 10 volts, the cells cannot handle the load.
Recharge vs Replace
If the battery is just low from sitting, a slow smart charger can restore it. If it fails the load test after a full charge, buy a new unit.
Loose or Corroded Battery Terminals
Signs of Corrosion
Look for a flaky white or blue powder growing around the metal lead posts. Even a thin layer of clean grease can block power flow.
Cleaning Procedure
Remove the negative cable first, then the positive line. Scrub the metal clean with a wire brush and warm water mixed with baking soda. Tighten them back down firmly with a wrench.
Faulty Starter Relay
Single Clicking Sound
If you hear a single loud click but the motor does not turn, the internal switch is moving but failing to pass heavy power along.
Relay Testing
Set your meter to DC volts and check the output side of the relay while pressing the start button. No power out means the internal copper contacts are dead.
Bad Starter Motor
Slow Cranking
The engine sounds like it is fighting to turn over, making a low groaning noise even with a fully charged battery.
Current Draw Test
A failing motor draws too much power from the system. If the wires get very hot to the touch during a short crank, the internal starter windings are shorted.
Fuel Pump Failure
No Priming Sound
You turn the key and hear nothing. The usual two-second high whirring sound from the fuel tank is missing.
Fuel Pressure Test
Mechanics connect a gauge to the fuel line. The system needs high pressure to feed the fuel injector properly. Low pressure means a worn pump pump.
Dirty Fuel Injector
Clogged Injector Symptoms
The bike will crank over fine and might pop, but it will not run smoothly. It may idle rough or sputter when you twist the throttle.
Cleaning Options
For minor clogs, premium fuel additives can clear the varnish. Heavy blockages require removing the injector to clean it with a dedicated tool.
Fouled Spark Plug
Carbon Deposits
A dark black layer of carbon on the tip stops the electricity from jumping the gap. This happens from short trips or rich running conditions.
Weak Spark
Pull the plug out, ground it to the engine block, and look for a bright blue spark while cranking. A weak yellow spark will not ignite fuel.
Replacement Guidelines
Change the plug at the factory intervals. Always use a proper gap tool to set the distance before twisting it into the aluminum cylinder head.
Ignition Coil Failure
Coil Testing
Use a meter to check the resistance of the primary and secondary copper turns inside the coil pack. Out of spec numbers mean it needs to be replaced.
Weak Spark Symptoms
The bike might start fine when cold but die as soon as the engine gets hot. Heat causes internal coil wires to expand and separate.
Side Stand Switch Failure
Common Symptoms
The motorcycle starts fine in neutral but dies the exact moment you click the shifter into first gear, even with the stand up.
Switch Inspection
Look under the frame for mud or road grime blocking the small plunger. Clean it with spray and ensure the mechanical arm moves freely.
Clutch Switch Problems
Why the Starter Won’t Engage
If the bike is in gear, the safety system demands to know the clutch is pulled in. A broken switch keeps the starter completely dead.
Testing the Switch
Locate the small wires under the clutch perch on the handlebars. Use a meter to ensure the circuit closes when you pull the lever back.
Crankshaft Position Sensor Failure
No Spark
Without a clear signal from this sensor, the computer does not know when to fire the plug. You get zero spark during testing.
ECU Communication Problems
A bad sensor often triggers the FI light on the dash. The computer cannot match the engine speed with fuel timing.
Wiring Harness Damage
Chafed Wires
The harness can rub against the sharp metal frame near the steering head. This rubs through the plastic jacket and grounds out lines.
Loose Connectors
Vibration can back main plastic plugs apart over time. Unplug main junctions, check for bent pins, and snap them back together tightly.
Dirty Air Filter
Airflow Restriction
A paper element packed with deep dust suffocates the intake. The engine needs a clean balance of air to match the injected fuel.
Cleaning Schedule
Inspect the air box during every oil change. Replace the element early if you ride through dusty dirt paths or heavy city smog.
KTM Duke 250 Cranks But Won’t Start
When the starter spins the engine fast but nothing fires up, you can rule out the battery and starter motor. The issue lives within fuel, spark, or compression.
Check Spark
Remove the spark plug cap and insert a dedicated spark tester. Ground the tool to a clean metal spot on the frame. Crank the engine and watch for a sharp blue arc. A missing spark means you need to look closer at the ignition coil or the main crankshaft sensor.
Listen for Fuel Pump Priming
Turn the key to the run position without touching the starter button. Listen closely with your ear near the gas cap. You must hear a clear whirring sound for two seconds. If the tank stays silent, check the fuel pump fuse before buying a new pump.
Verify Injector Operation
A wet spark plug after cranking tells you fuel is entering the cylinder. If the plug stays completely dry after spinning the engine, the injector is not opening. Check the electrical plug on the injector body to make sure it has not vibrated loose.
Measure Fuel Pressure
Connect a mechanical pressure gauge to the fuel delivery line. When you cycle the key, the pump must hit the factory pressure mark instantly. If the pressure rises slowly or drops down the moment the pump stops, the internal regulator is leaking.
Inspect the Air Filter
Open the airbox under the seat to check the condition of the filter element. A dark, clogged filter blocks fresh air from entering the throttle body. Try cranking the engine with the filter element removed for a moment to see if it fires up.
Perform a Compression Test
Thread a compression gauge into the empty spark plug hole. Hold the throttle wide open and crank the engine for a few seconds. Low compression means air is escaping past worn piston rings or tight valves, preventing the mixture from igniting.
KTM Duke 250 Starts Then Dies
An engine that fires up easily but cuts out after a few seconds points to a system that cannot maintain its supply lines or balance its sensors.
Fuel Pressure Loss
The fuel pump might create enough pressure to start the bike, but fails to maintain the flow under running conditions. If the fuel filter is choked with dirt, it restricts the steady path of fuel, causing the engine to starve and die.
Injector Restriction
A partially blocked injector tip sprays heavy droplets instead of a fine mist. The engine can catch fire on the initial fuel pool, but it cannot sustain a smooth burn cycle once the automatic cold-start fueling finishes.
ECU Sensor Problems
The main computer relies on the engine temperature sensor and the intake air sensor to balance the fuel mixture. If a sensor sends incorrect data, the brain may lean out the fuel mixture too fast, causing the warm engine to stall.
Intake Air Leak
Unmetered air entering through a cracked rubber intake boot alters the delicate air-fuel ratio. This extra air creates a lean condition that causes the engine to sputter and stall out the moment you let go of the starter button.
Idle Speed Issues
The electronic stepper valve manages the airflow at idle. If carbon deposits build up inside the bypass passages, the valve cannot maintain the minimum air required to keep the engine running without throttle input.
KTM Duke 250 Won’t Start After Rain or Washing
Water is a highly effective conductor that easily bypasses old seals, creating temporary electrical pathways that short out vital ignition signals.
Wet Ignition Coil
High-pressure water from washing or heavy downpours can pool around the ignition coil body. This dampness allows the high voltage spark to short across the plastic casing directly to the frame instead of traveling down to the spark plug.
Moisture Inside ECU Connectors
The multi-pin connectors on the main computer use rubber seals to keep water out. If these seals degrade, moisture gets trapped inside the tiny pin tracks, confusing the low-voltage data lines and locking out the starting cycle.
Water Around the Starter Relay
The starter relay sits in a low spot under the seat bodywork. Water collecting in this area can short the small activation wires, causing the relay to click randomly or fail to respond when you press the handlebar switch.
Spark Plug Cap Moisture
The deep spark plug well on the top of the cylinder head can trap water like a cup. If the drain hole on the side of the engine block gets plugged with dirt, water fills the cavity and shorts out the spark plug cap completely.
KTM Duke 250 Won’t Start After Sitting
Leaving a motorcycle parked for months without proper preparation allows fuel to turn into varnish and causes the battery to drain naturally.
Battery Self-Discharge
Lead-acid and lithium batteries lose charge over time when left idle. The small clock and security lights on the dashboard draw a tiny current continuously, draining the battery below the starting threshold within a few weeks.
Old Fuel
Modern fuel begins to break down after a few weeks in a motorcycle tank. It loses its volatile properties and absorbs moisture from the air, creating a stale mixture that resists ignition when sprayed into a cold cylinder.
Fuel Pump Sticking
As old fuel evaporates inside the pump assembly, it leaves a sticky residue behind. This varnish can lacquer the internal spinning impellers in place, preventing the electric pump motor from turning when power is applied.
Injector Deposits
The tiny spray holes on the tip of the injector nozzle can easily clog as fuel dries out. This dried varnish blocks the path of fuel completely or distorts the spray pattern into a useless trickle.
Rodent Damage
Mice love the warm, protected spaces under a motorcycle seat or gas tank. They can chew through the thin plastic insulation of the main wiring harness in a few days, creating open circuits that are difficult to find.
Step-by-Step KTM Duke 250 Troubleshooting Process
Testing components in a logical order prevents you from wasting time and money on good parts. This process isolates the fault quickly.
Step 1 – Check Battery Voltage
Using a digital multimeter provides immediate insight into the overall health of your electrical system. This tool eliminates guesswork before you start removing components.
Set your digital meter to DC volts. Place the red lead on the positive terminal and the black lead on the negative terminal. A healthy battery must read 12.6 volts or higher at rest.
Step 2 – Inspect Battery Connections
Grab the thick battery cables and give them a firm wiggle. The bolts must be tight enough to prevent any movement. If you notice any white powder or loose threads, back the bolts out and clean the mating surfaces down to bright metal.
Step 3 – Check the Main Fuse
Locate the starter relay housing near the battery under the rider’s seat. Pull the clear plastic cover off to expose the main 30-amp fuse. Hold the fuse up to the light to confirm the small metal link inside has not melted through.
Step 4 – Listen for Fuel Pump Priming
Turn the key to the on position and flip the kill switch to run. Listen closely for a clear two-second whirring sound from the center of the fuel tank. If you hear nothing, the fuel system is not building the pressure needed to start.
Step 5 – Inspect the Spark Plug
Use a spark plug socket to remove the plug from the cylinder head. Look at the color of the firing tip. A healthy plug has a light tan color, while a wet black tip means the engine is flooded or missing spark completely.
Step 6 – Test the Starter Relay
Locate the starter relay and attach your meter leads to the small signal wires. Press the starter button on the handlebar. If the meter shows 12 volts but the relay does not click, the internal magnetic coil is broken.
Step 7 – Measure Fuel Pressure
Teens a fuel pressure gauge into the high-pressure line running from the tank to the throttle body. Turn the key on to run the pump. The gauge must rise smoothly to the factory specification and hold that pressure without bleeding down.
Step 8 – Check Compression
Thread a compression tester into the spark plug opening. Hold the throttle grip wide open and crank the engine until the needle stops rising. A low reading means the engine needs mechanical repair before it can run again.
KTM Duke 250 No-Start Diagnosis Table
Comparing your exact symptoms to this reference chart helps guide your repair focus. It shows the relative difficulty of each common fix.
A systematic approach keeps you from guessing. Use this breakdown to see which items you can safely manage at home in your garage.
| Symptom | Most Likely Cause | DIY Difficulty | Usually Repairable at Home |
| No response | Battery or fuse | Easy | Yes |
| Rapid clicking | Weak battery | Easy | Yes |
| Single click | Starter relay | Easy | Yes |
| Cranks but won’t fire | Fuel or spark | Medium | Yes |
| Starts then dies | Injector or fuel pump | Medium | Sometimes |
| No fuel pump sound | Fuel pump | Medium | Sometimes |
| FI warning light | ECU or sensor | Medium | No |
| Slow cranking | Starter motor | Medium | Sometimes |
Battery Voltage Reference Table
A battery can light up the instrument cluster while lacking the power to turn the engine. Use these voltage values to assess battery health under load.
Connect your meter and monitor the numbers during a starting attempt. This simple test isolates a failing battery instantly.
| Voltage | Condition | Recommended Action |
| 13.0V | Excellent | Continue diagnosis |
| 12.8V | Healthy | Normal |
| 12.5V | Slightly low | Recharge |
| 12.2V | Weak | Load test |
| Under 12V | Poor | Replace likely |
| Below 10V | Battery failure | Replace |
EFI Starting System Troubleshooting Table
The fuel injection system relies on clear data paths between sensors. This guide helps map specific running faults to their physical causes.
When the fuel injection warning light blinks on your screen, use these common patterns to trace the source of the electrical fault.
| Symptom | Possible Cause | First Check |
| No fuel pump sound | Pump or relay | Fuse |
| Hard cold starting | Engine temperature sensor | Sensor |
| Starts then dies | Injector | Fuel pressure |
| Poor throttle response | TPS | Connector |
| FI warning light | ECU fault | Diagnostic scan |
| Difficult hot restart | Fuel pressure | Fuel pump |
Essential Tools for Diagnosing a KTM Duke 250
Having the proper tools on hand makes electrical and mechanical troubleshooting efficient and safe. They allow you to gather accurate numbers instead of guessing.
- Digital multimeter: Crucial for reading voltage drops, checking circuit continuity, and tracking shorts.
- Battery charger: A smart maintenance charger keeps the battery topped up safely during diagnosis.
- Battery load tester: Applies a true electrical load to see if a battery cell is weak.
- Fuel pressure gauge: Measures the operational pressure of the fuel delivery lines.
- Compression tester: Checks the physical sealing ability of the piston rings and engine valves.
- Spark tester: Provides a safe visual look at the strength of your ignition system output.
- Motorcycle diagnostic scanner: Reads fault codes directly from the computer brain to identify sensor failures.
- Socket set: Needed to remove seats, body panels, and main engine mounting hardware.
- Torx keys: KTM uses torx fasteners across the entire chassis and body framework.
- Contact cleaner: Cleans oil, dirt, and corrosion out of delicate electrical plastic plugs.
Common Mistakes Riders Make
It is incredibly easy to jump to conclusions when your primary ride fails to start before a long trip. Avoiding these common habits saves money.
Replacing the Fuel Pump Too Early
Riders often buy an expensive new fuel pump the second they miss the priming sound. Most of the time, the real fault is a simple blown fuse or a loose relay wire.
Ignoring Battery Voltage
Assuming a battery is perfect just because the dashboard lights up is a major mistake. The display requires less than one amp, while cranking needs over fifty amps.
Forgetting the Side Stand Switch
Many riders spend hours checking wires when their bike dies in gear, forgetting that a sticky side stand safety plunger is cutting the ignition automatically.
Overlooking the Clutch Switch
If you always start your motorcycle in gear, a tiny pebble trapped inside the clutch lever perch can stop the safety switch from engaging completely.
Skipping Air Filter Maintenance
Riders often focus entirely on fuel and spark while ignoring the air supply. A filter packed with thick dust blocks air, preventing the engine from catching fire.
Replacing Parts Before Testing
Throwing new parts at a bike hoping it fixes the issue gets expensive fast. Always use a meter or tool to prove a component is dead before buying a replacement.
Expert Advice From a U.S. Motorcycle Technician
Professional diagnostic work is built on accurate field testing rather than guessing. This clean habit saves time and prevents you from damaging new electrical parts.
“The KTM Duke 250’s EFI system depends on stable battery voltage. We see many bikes towed in for fuel system concerns when the real problem is a battery that collapses under load. Always test voltage while cranking before replacing electronic components.” — Mark Jensen, KTM-Certified Motorcycle Technician, Arizona
Why Battery Testing Comes First
Modern motorcycle computers require a stable minimum voltage floor to keep their digital circuits active. If the starter motor draws all the available current, the voltage drops too low. The computer shuts down instantly, stopping the spark plug from firing even if the engine is spinning over fast.
Real Workshop Example
On a hot Tuesday morning in Scottsdale, a rider brought in a bike with a suspected fuel injector failure because it would crank but never start. The battery showed a seemingly perfect 12.6 volts at rest on the workbench.
When we touched the starter button, the voltage dropped below 9 volts during cranking. The low voltage was turning off the main computer brain before it could open the injector. A new battery solved the issue immediately.
How to Prevent KTM Duke 250 Starting Problems
Consistently following a preventative maintenance routine keeps your starting system reliable and ready for daily travel.
Keep the Battery Charged
If you leave your motorcycle parked for more than a week, hook it up to a smart battery tender. This maintains the cell health and stops natural discharge cycles.
Use Fresh Premium Fuel
Always fill your tank with fresh high-quality fuel from high-volume stations. This lowers the chance of getting water or old sediment trapped inside your fuel system.
Replace the Spark Plug on Schedule
Do not wait for the engine to misfire before replacing your spark plug. Fresh plugs require less electrical energy to jump the gap, reducing strain on the coil.
Clean the Air Filter Regularly
Keep the airbox free of dirt, leaves, and water. A clean filter ensures a stable supply of air so the computer can calculate the perfect air-fuel mixture.
Inspect Electrical Connectors
Unplug the main wiring connections once a year. Spray them out with high-quality contact cleaner and apply a thin layer of dielectric grease to keep moisture out.
Protect the Bike From Excess Moisture
Use a high-quality breathable cover if you must store your motorcycle outside in the elements. This prevents rain from pooling inside deep engine cavities.
Follow the Factory Service Schedule
Check the valve clearances and fuel line connections at the exact mileage intervals listed in your owner’s manual to catch wear early.
When You Should Visit a KTM Dealer or Professional Workshop
Some advanced electrical and mechanical diagnostic jobs require industrial tools and specialized training to perform safely without damaging components.
ECU Communication Errors
If your diagnostic tool cannot connect to the bike’s brain or shows internal memory errors, you need a dealer scanner to reflash or reset the system software.
Persistent FI Warning Light
When the fuel injection light stays on after you check all the basic sensors, a factory technician can read live data feeds to find hidden wiring breaks.
Fuel Injector Failure
If the injector nozzle requires internal ultrasonic cleaning or calibration, it must be sent to a specialist shop with dedicated flow testing benches.
Wiring Harness Damage
Repairing a severely melted or shorted wiring harness requires specialized pinning tools and factory wiring diagrams to ensure the circuit resistance stays correct.
Internal Engine Problems
Low compression caused by worn piston walls, bent valves, or blown gaskets requires deep engine teardowns that are best handled by certified mechanics.
KTM Duke 250 vs Other KTM Models With Starting Problems
While KTM utilizes similar electronic fuel injection technology across its street line, specific models display unique design characteristics.
KTM 250 Duke vs KTM Duke 390
The larger Duke 390 features a higher compression engine that puts significantly more stress on its starter motor. A slightly weak battery might crank a Duke 250 well enough to start, but it will fail completely on the 390 model.
KTM Duke 250 vs KTM RC 250
The RC 250 uses a fully faired sportbike design that traps engine heat inside the plastic body panels. This extra heat can accelerate the aging of insulation on the ignition coil wires compared to the open naked frame design of the Duke.
KTM Duke 250 vs KTM Adventure 250
The Adventure version is built for off-road travel, meaning its safety switches face much more exposure to deep mud, river water, and heavy vibration. The side stand switch on the Adventure model fails far more often from grit accumulation.
Which EFI Starting Problems Are Shared Across KTM Street Models?
All these lightweight single-cylinder models share a high sensitivity to system voltage drops. They also share the exact same fuel pump design, making them equally vulnerable to blockages if you use low-quality fuel or let the bike sit idle for winter storage.
Frequently Asked Questions
Why is my KTM Duke 250 not starting even though the battery seems charged?
The battery might hold enough surface charge to power up the dash display while lacking the internal amps to turn the heavy starter motor. Always measure the voltage drop under load while cranking.
Why does my KTM Duke 250 only make a clicking sound?
A rapid chattering noise means the battery is too low to turn the motor. A single loud click points to a starter relay that is switching internally but failing to pass power to the starter.
Can a weak battery affect the EFI system?
Yes, if the voltage drops below 10 volts during cranking, the main computer brain turns off. It will not open the fuel injector or fire the spark plug, preventing the bike from running.
Why won’t my KTM Duke 250 start after rain?
Water often enters the deep spark plug well or gets trapped inside loose electrical plugs. This moisture shorts out the high-voltage ignition signal before it can reach the spark plug tip.
How do I know if the fuel pump has failed?
Turn the key on and listen closely to the gas tank. If you do not hear a clear two-second whirring sound, the pump is not running. Verify the fuel fuse is good before changing the pump.
Can the side stand switch stop the bike from starting?
The bike will start in neutral with the stand down. If the switch is broken or dirty, the engine will die instantly the moment you pull the clutch and click the gear shifter into first gear.
What does the FI warning light mean on the KTM Duke 250?
The Fuel Injection light means the main computer has detected an active sensor fault. It can indicate anything from a disconnected air sensor to a bad crankshaft position indicator.
How much does it cost to repair a KTM Duke 250 that won’t start?
A loose wire or blown fuse costs almost nothing to fix at home. A dead battery costs around seventy to one hundred dollars, while a new factory fuel pump assembly can run several hundred dollars.
Final Recommendation
Dealing with a bike that will not start is incredibly frustrating, but a calm approach saves time and money. Based on my years working with these lightweight single-cylinder systems, always spend your first five minutes checking the battery terminals and safety switches before touching anything else. Over ninety percent of no-start issues come down to a low battery or a loose ground wire rather than a broken computer or a failed fuel pump. Keep your connections clean, use a battery tender during winter storage, and your machine will stay reliable for your daily trips.

Ehatasamul Alom is a dedicated road hybrid bikes expert. With over 15 years of experience, he helps people find the perfect ride. He began his journey as a bike mechanic. He learned the ins and outs of every bike.
Ehatasamul Alom holds a Master's degree in Mechanical Engineering from a Brown University (Providence US 02912), where he specialized in material science and bicycle kinematics. His master's thesis focused on optimizing frame geometry for road hybrid bikes to improve rider comfort and efficiency.
Ehatasamul has an extensive professional background. He spent 10 years (2010-2020) as a Senior Bike Designer at "Urban Cycles," a leading bicycle manufacturer. In this role, he led the development of several award-winning road hybrid bikes, which are known for their durability and performance. He later served (2020-2024) as the Head of Product Development at "Gear Up," a company specializing in high-end cycling components. There, he developed innovative parts and accessories specifically for road hybrid bikes.
Over the years, Ehatasamul has become an authority on Roadhybridbikes. He understands their design and function. His work focuses on making bikes easy to use. Ehatasamul believes everyone should enjoy cycling. He writes guides that are simple to read. His passion for road hybrid bikes is clear. His goal is to share his knowledge with everyone. He wants to see more people on two wheels. His advice is always practical and easy to follow.
- Ehatasamul Alom

- Ehatasamul Alom
- Ehatasamul Alom

- Ehatasamul Alom



