
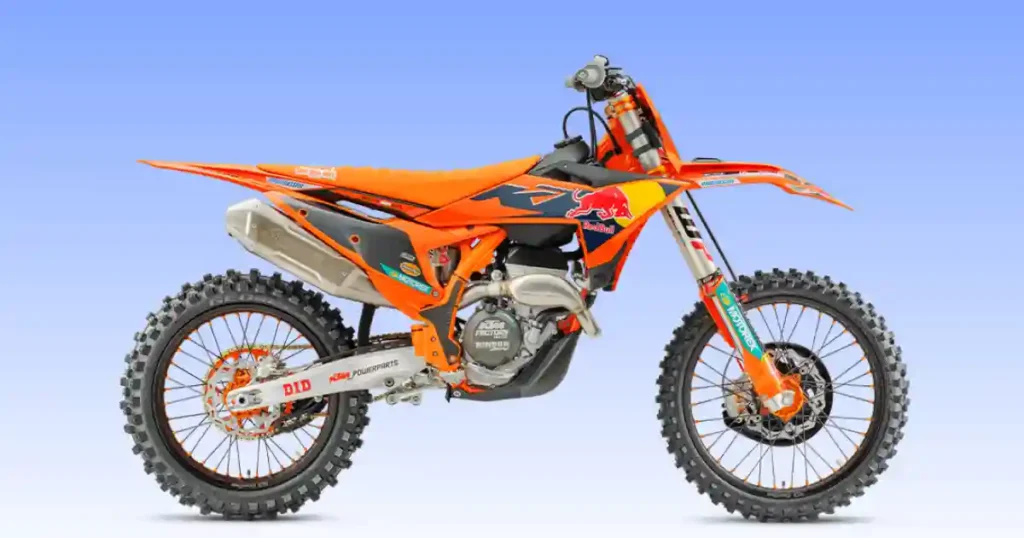
Kicking a dirt bike until your leg burns is a terrible way to spend a morning. This exact situation played out for a frustrated rider at a track in San Bernardino, who assumed his entire electrical system had failed. After a quick look, we discovered his spark plug cap had simply vibrated loose from the metal tip. Snapping it back on solved the issue in seconds. Dealing with a ktm 250 sx not starting can ruin a good riding day, but finding the root cause is straightforward. Let us look at the basic checks to get your two-stroke running strong again.
KTM 250 SX Not Starting? Check These Simple Things First
Most two-stroke starting issues look like a disaster but come down to minor details. Checking the most basic layout first saves you plenty of work.
What Happens When You Try to Start the Bike?
- Kick starter feels normal but engine won’t fire: The lever moves smoothly with proper resistance, yet the bike stays silent.
- Engine coughs once: You get a single brief pop from the exhaust pipe, but no continuous running.
- Engine backfires: A loud bang shoots out from the silencer while you are actively kicking the lever.
- Starts then stalls: The motor fires up for a few brief seconds and then dies out completely.
- Hard to start when cold: You must kick the bike dozens of times before it finally wakes up.
- Hard to restart when hot: The bike stalls out on the track and resists starting until it cools.
- No spark: The electricity fails to cross the plug gap when testing it against the engine block.
- Kick starter feels unusually easy or stiff: The lever drops with zero resistance or feels completely locked in place.
Five-Minute Pre-Ride Inspection Checklist
- Fuel level: Look down inside the plastic gas tank to verify you actually have gas.
- Fuel valve position: Ensure the petcock lever points straight down to the on position.
- Fresh premix fuel: Avoid using old fuel that has sat for more than a few weeks.
- Spark plug: Verify the metal tip is clean, dry, and properly gapped.
- Spark plug cap: Push down firmly to ensure it snaps onto the plug top tightly.
- Air filter: Check that the foam element is clean and not choked with thick dirt.
- Fuel line: Ensure the rubber tube is not kinked, stopping the path of gas.
- Kill switch: Confirm the button is not stuck or shorted against the aluminum handlebars.
- Compression feel during kick-start: Feel for that firm mechanical resistance as you push the lever down.
Warning Signs You Shouldn’t Ignore
- Fuel leaking from carburetor: Gas dripping from the overflow tubes means an internal valve is stuck open.
- Burning smell: Points to electrical insulation melting down inside the main frame harness.
- Excessive smoke: Thick white or blue smoke means the motor is burning internal transmission oil.
- Metal knocking noise: Internal components are hitting each other, indicating deep mechanical failure.
- Very low compression: The kick lever pushes down with your hand, signaling worn top end parts.
- Coolant leak: Puddles under the water pump mean the engine will overheat very quickly.
How the KTM 250 SX Starting System Works
A two-stroke machine is incredibly elegant because it lacks complex valves and electronic sensors. Understanding how the basic mechanical loop operates makes trackside diagnostics easy.
Main Components That Help the Engine Start
The heavy kick starter arm spins the crankshaft to draw the fuel mixture into the lower crankcase. Fuel and air blend inside the mechanical carburetor before traveling through the one-way reed valve assembly.
Electrical energy starts at the internal stator coils, which use the spinning flywheel to send raw power up to the CDI ignition box. This main control unit times the electrical release, forcing a high-voltage current through the ignition coil and down into the spark plug. The resulting combustion relies on the physical integrity of the aluminum piston and rings to compress the mixture within the cylinder walls, while a simple kill switch grounds the circuit to stop the motor.
What Happens During Starting?
- Kick starter rotates the crankshaft: Your physical effort moves the internal piston downward to create a vacuum.
- Carburetor supplies fuel-air mixture: Fine jets atomize raw gas into the incoming fresh air stream.
- Reed valve opens: The flexible carbon petals lift to let the fuel charge enter the crankcase.
- Stator generates electrical power: Magnets spinning past copper coils create immediate voltage.
- CDI triggers ignition: The brain determines the exact microsecond to release the stored energy.
- Spark plug ignites the mixture: A bright arc jumps the gap to set off the compressed gases.
- Engine starts: The cylinder fires continuously, sustaining the mechanical operation on its own power.
Most Common Reasons a KTM 250 SX Won’t Start
Isolating a starting issue means checking the main pillars of two-stroke operation. Let us break down the standard trouble areas.
Fouled Spark Plug
Carbon Fouling
A dull black layer of carbon coats the ceramic insulator tip. This carbon path steals the electrical energy, letting it leak safely to the metal body without creating a spark to ignite the fuel.
Oil Fouling
The plug tip looks wet and shiny from excessive two-stroke oil. This happens from running a rich oil ratio or putting along at low speeds without clearing out the cylinder.
Spark Test
Remove the plug from the cylinder head and place it back inside the cap. Hold the metal threaded body firmly against a raw engine bolt while pushing the kick lever down with your hand. Look for a bright blue spark.
Replacement Tips
Always carry two fresh spare plugs in your gear bag. Use a proper spark plug wrench to avoid stripping the soft aluminum threads inside the cylinder head.
Dirty Carburetor
Blocked Pilot Jet
The tiny passage inside the brass pilot jet is incredibly small. Old fuel can quickly leave a thin layer of varnish that blocks fuel from entering the engine at low starting speeds.
Stuck Float Needle
If the small rubber-tipped needle gets stuck in its seat, it stops fuel from refilling the bowl. If it gets stuck open, gas pours out of the vent tubes continuously.
Cleaning Procedure
Remove the bottom aluminum float bowl plug. Spray high-quality carburetor cleaner up into the brass jets, and use a thin copper wire to clear out any hard sediment blocking the pinholes.
Old or Incorrect Premix Fuel
Stale Fuel
Modern fuel begins to lose its volatile compounds within a few weeks. Stale gas resists catching fire, leaving you kicking a cold engine until your leg is completely sore.
Wrong Oil Ratio
Adding too much oil to your fuel mix thins out the actual gasoline content. This makes the bike incredibly difficult to start and causes the plug to foul almost immediately.
Clogged Fuel Line or Fuel Filter
Fuel Flow Test
Pull the rubber fuel line off the carburetor intake nozzle. Turn the petcock valve to the on position and ensure a steady, thick stream of gasoline pours out into a container.
Cleaning Steps
If the flow is weak, remove the petcock from the bottom of the tank. Clean the fine plastic mesh filter screen attached to the pick-up tubes to remove dirt.
Faulty Reed Valve
Broken Reed Petals
Look closely at the thin carbon fiber petals for chipped corners or frayed edges. Damaged petals cannot seal tightly against the rubber cage block.
Air Leaks
If the reeds do not close completely, air and fuel get pushed backward into the carburetor during the downward piston stroke, ruining the intake vacuum.
Weak Ignition Coil
Weak Spark
A failing coil cannot step up the voltage properly. You might see a faint yellow spark in a dark garage, but that spark will fail completely under tight engine cylinder pressure.
Resistance Test
Connect your digital multimeter to the primary and secondary tabs of the coil body. Compare the resistance numbers to the factory specifications to confirm the internal wires are healthy.
Bad Stator
No Spark Condition
If the copper charging source coils inside the ignition cover melt or break, the system creates zero electricity. The spark plug stays completely dead while kicking.
Output Testing
Set your meter to AC voltage and back-probe the wires coming directly out of the engine case. A healthy stator must flash a clear voltage signal on every fast kick.
Kill Switch Failure
Short Circuit
The small wires leading to the handlebar button can rub against the metal frame. This wears away the protective insulation and shorts the ignition circuit to ground permanently.
Wiring Inspection
Unplug the main bullet connector for the kill switch near the front number plate. If the bike starts up normally with the switch disconnected, the button housing is broken.
Low Engine Compression
Worn Piston Rings
Over time, the flexible metal rings lose their tension or wear down flat. This allows the compressed fuel charge to escape past the piston into the lower crankcase.
Cylinder Wear
Deep vertical scratches or gouges in the slick cylinder wall finish stop the rings from sealing properly, dropping the compression below the level needed to fire.
Compression Testing
Thread a mechanical gauge into the spark plug hole. Hold the throttle wide open and kick the lever hard five times. A healthy 250cc two-stroke needs high pressure to run.
Dirty Air Filter
Restricted Airflow
A foam element choked with thick dust or over-oiled during maintenance suffocates the intake tract. The engine cannot draw in enough fresh oxygen to match the fuel charge.
Cleaning and Oiling
Wash the dirty foam element in warm soapy water or dedicated filter cleaner. Let it dry completely before applying a even layer of sticky tacky filter oil.
KTM 250 SX Has Spark But Won’t Start
When you confirm a strong blue spark is present, you can rule out the CDI and stator components. The problem lives within your fuel routing or mechanical compression.
Check Fuel Flow
Ensure that fuel is actually transitioning from the plastic tank into the carburetor body. Turn the petcock off, open the bottom drain plug on the carburetor, and turn the valve back on. Gasoline must flow out continuously. If the bowl stays completely dry, a stuck float needle is blocking the entrance.
Inspect the Carburetor
Remove the main carburetor body from the rubber boots to inspect the internal brass pieces. Take out the pilot jet and hold it up to a bright light source. You must see a perfectly round pinhole through the center. If it looks foggy or blocked, clear it out with spray.
Verify Reed Valve Condition
Remove the intake manifold bolts to pull the reed cage out of the engine case. Hold the assembly up to the sky and look through the petals. You should see zero light passing through the sealing edges. If the carbon leaves look warped or bent open, replace them.
Measure Compression
Connect a high-quality compression gauge firmly to the cylinder head. Push the kick lever down forcefully several times with the throttle wide open until the needle stops moving. If the reading falls short of normal pressure, the engine cannot generate the heat needed to ignite fuel.
Check for Flooding
If you have kicked the bike repeatedly with the choke on, the crankcase may be flooded with raw fuel. Remove the spark plug, turn the bike upside down, and click it into gear. Rotate the rear wheel by hand to pump the excess wet fuel out of the open hole.
KTM 250 SX Starts Then Dies
An engine that fires up briefly on the first few kicks but stalls out moments later is failing to maintain its fuel supply or is drawing in unmetered air.
Pilot Jet Blockage
The engine can start using the extra fuel supplied by the choke bypass circuit. The moment you turn the choke knob off, the engine transitions to the main pilot jet circuit. If that tiny passage is blocked by dirt, the motor starves instantly and dies.
Air Leak Around Intake Boot
Inspect the rubber boot connecting the carburetor to the cylinder block. If the rubber is aged, cracked, or has a loose clamp, extra air enters the engine behind the carburetor. This creates a dangerously lean condition that stalls the motor.
Incorrect Idle Speed
The small thumb screw on the side of the carburetor body sets the mechanical height of the slide. If this screw is backed out too far, the slide drops completely down when you let go of the throttle grip, choking off the air and stalling the bike.
Fuel Flow Restriction
A partially clogged petcock screen or a pinched vent line allows fuel to trickle into the carburetor slowly. The bowl fills up while the bike sits, allowing it to start fine. Within ten seconds, the engine burns through that small pool and stalls out.
Float Valve Problems
If the internal float height is adjusted incorrectly, the fuel level inside the bowl stays too low. The main jets cannot draw a steady supply of fuel during operation, causing the motor to sputter and shut down the moment you tip the bike upright.
KTM 250 SX Won’t Start After Washing
High-pressure water from a garden hose or power washer can easily force its way past old rubber seals, shorting out the delicate low-voltage electrical lines.
Wet Spark Plug Cap
Water easily pools inside the deep rubber boot that covers the top of the spark plug. This damp path allows the high-voltage spark to jump directly to the outer cylinder head instead of traveling down through the internal plug core.
Moisture Around the Ignition Coil
The ignition coil sits tucked under the main frame backbone. If high-pressure water hits the small slide-on terminal spade connectors, it breaks the connection between the main wiring harness and the coil body, killing the spark.
Water Inside Kill Switch
The kill switch housing on the handlebars is not completely waterproof. Water can get trapped between the internal copper contact plates, creating a permanent short circuit that mimics someone holding the stop button down continuously.
Wet Air Filter
If you wash the motorcycle without using a dedicated plastic airbox wash cover, the foam filter element can absorb a massive amount of water. The engine will draw this water through the carburetor, wetting the plug and stopping the start cycle.
KTM 250 SX Won’t Start After Sitting
Leaving a high-performance two-stroke parked for months allows the volatile elements of gasoline to evaporate, leaving a thick, sticky varnish behind.
Old Premix Fuel
Two-stroke oil mixed with gasoline tends to separate over time, sinking to the bottom of the tank. This stale mixture loses its ability to combust easily, making it incredibly difficult to light with a standard spark plug arc.
Clogged Carburetor Jets
As the fuel inside the carburetor bowl slowly evaporates into the air, it leaves behind a thick, tacky film of green or yellow varnish. This crusty material completely plugs up the tiny metering holes inside your brass jets.
Sticking Float Valve
The dried fuel residue acts like a glue inside the float chamber. It can pin the float arms in the down position, causing fuel to pour out of the overflow lines onto your garage floor the moment you turn the fuel petcock on.
Dry Reed Valves
When a bike sits for an extended period, the thin carbon fiber reed petals can dry out and lose their natural flexibility. They may stick to the rubber seating surface or fail to seal quickly enough to create an initial intake vacuum.
Rodent Damage
Mice frequently build nests inside open motorcycle airboxes or silencer openings during the winter. They can chew through the foam filter material or damage the exposed wiring running along the frame rails.
Step-by-Step KTM 250 SX Troubleshooting Process
Following a clear, orderly process keeps you from making guessing errors. Always prove a system is working before moving on to the next section.
Step 1 – Verify Spark
Isolating the electrical system first prevents you from performing unnecessary carburetor adjustments. It gives you immediate clarity on the state of the ignition components.
Step 2 – Check Fuel Flow
Pull the rubber delivery line off the side of the carburetor intake barb. Turn the petcock valve to the on position. A clean, thick stream of gasoline must flow out immediately. If it drips slowly, check the tank vent cap line for blockages.
Step 3 – Inspect the Carburetor
Loosen the intake boot clamps and rotate the carburetor sideways to access the bottom plug. Remove the float bowl and pull the brass pilot jet out. Look through the center hole against a light to ensure it is completely clear of dirt.
Step 4 – Replace the Spark Plug
Even if an old plug shows a faint spark outside the engine, it can fail completely under true cylinder pressure. Thread a fresh, correctly gapped spark plug into the cylinder head by hand to avoid cross-threading the aluminum.
Step 5 – Check Compression
Thread your mechanical compression tester gauge into the empty spark plug hole. Twist the throttle grip wide open and kick the starter lever hard five times. Note the highest number on the face of the dial to judge top end sealing health.
Step 6 – Inspect Reed Valves
Remove the intake boot bolts and pull the reed block out of the engine case. Look for any visible chips, splits, or separation along the edges of the carbon petals. The leaves must lie completely flat against the rubber cage.
Step 7 – Test the Stator
Set your digital multimeter to read AC voltage. Connect the test leads to the output wires coming directly out of the engine ignition cover. Kick the engine over forcefully to see if the internal charging coils are putting out power.
Step 8 – Inspect the Kill Switch
Trace the thin wires from the handlebar button down to the main frame junction. Disconnect the plug to break the ground loop circuit. Try starting the motorcycle again to see if a shorted button was causing your no-spark condition.
KTM 250 SX No-Start Diagnosis Table
This symptom reference index helps match your physical observations to the most likely mechanical or electrical fault area.
A systematic approach keeps you from chasing phantom issues. Use this overview to judge if a repair requires advanced help or basic hand tools.
| Symptom | Most Likely Cause | DIY Difficulty | Usually Repairable at Home |
| No spark | Spark plug or stator | Medium | Yes |
| Hard cold starting | Pilot jet | Medium | Yes |
| Starts then dies | Carburetor | Medium | Yes |
| Won’t fire | Spark plug | Easy | Yes |
| Flooded engine | Too much fuel | Easy | Yes |
| Weak kick compression | Worn piston | Hard | No |
| Fuel leaking | Float valve | Medium | Yes |
| Backfires | Timing or reed valve | Hard | Sometimes |
Compression Test Reference Table
Two-stroke racing engines rely entirely on tight mechanical sealing to draw in and compress fuel. Use these values to judge top end life.
Perform this test with a warm engine if possible, keeping the throttle fully open during the kicks to ensure accurate air intake volume.
| Compression Reading | Condition | Recommended Action |
| 170–190 PSI | Excellent | Continue diagnosis |
| 150–170 PSI | Good | Normal |
| 130–150 PSI | Fair | Inspect piston |
| Under 130 PSI | Poor | Top-end inspection |
| Under 110 PSI | Severe wear | Rebuild recommended |
Carburetor Troubleshooting Table
Small variations in jetting or float position cause major starting issues. Use this diagnostic map to track down fuel circuit errors.
Keep your workplace completely clean when opening a carburetor, as a single grain of sand can block a newly cleaned brass jet circuit.
| Symptom | Possible Cause | First Check |
| Hard cold start | Pilot jet | Clean jet |
| Flooding | Float valve | Float height |
| Starts then stalls | Idle circuit | Pilot jet |
| Poor throttle response | Needle setting | Needle clip |
| Fuel leak | Float needle | Carburetor |
| Rich running | Jetting | Main jet |
Essential Tools for Diagnosing a KTM 250 SX
Having the correct mechanical tools on hand makes trackside and garage repairs smooth, preventing damage to soft brass and aluminum parts.
- Compression tester: Essential for getting an accurate measurement of your piston ring sealing ability.
- Spark tester: Provides a safe, visual way to check ignition system strength without shocking your hands.
- Digital multimeter: Used to check stator coil resistance and locate short circuits in the kill switch wire.
- Carburetor cleaner: Dissolves sticky fuel varnish and dried oil deposits inside brass passages instantly.
- Jet cleaning wires: Fine micro-wires used to clear hard debris out of small brass pilot jets safely.
- Socket set: Needed to quickly remove seat bolts, fuel tank mounts, and the outer ignition cover.
- Feeler gauge: Used to verify the exact air gap distance on the spark plug grounding electrode.
- Contact cleaner: Quick-drying spray that cleans oil and moisture out of electrical plug connections.
- Fuel line pliers: Helps remove stubborn rubber fuel lines from the fuel valve without tearing the material.
- Flashlight: Crucial for looking down into the dark cylinder bore or inspecting reed petals for light leaks.
Common Mistakes Riders Make
Kicking a stubborn bike when you are tired can lead to hasty choices. Avoiding these typical errors saves your engine from unnecessary wear.
Replacing the Stator Too Soon
Riders often assume a missing spark means the entire stator is ruined. Most of the time, the real cause is a simple fouled plug or a loose wire connection.
Ignoring Old Premix Fuel
Trying to start a high-performance racing machine on gas that has sat inside a plastic tank for three months will quickly foul your fresh spark plug.
Using the Wrong Starting Technique
Twisting the throttle grip wide open while kicking a cold two-stroke drops the intake vacuum, preventing the choke circuit from drawing fuel.
Forgetting to Check the Kill Switch
Many riders spend hours removing the carburetor, completely overlooking the fact that a wet kill switch button is grounding out the entire ignition system.
Skipping Carburetor Cleaning
Simply spraying aerosol cleaner down the intake throat will not clear a blocked internal jet passage. You must physically remove the jet to clean it.
Replacing Parts Without Testing
Buying expensive CDI boxes or coils before using a multimeter to confirm a failure wastes money and leaves the original issue unfixed.
Expert Advice From a U.S. Motocross Technician
Two-stroke racing machines are highly sensitive to fuel condition and electrical ground paths. Starting with basic steps prevents simple errors.
“On carbureted KTM 250 SX bikes, dirty pilot jets and fouled spark plugs are far more common than failed ignition components. Check spark, fresh fuel, and carburetor cleanliness before replacing expensive parts.” — Chris Morgan, Motocross Race Technician, California
Why Mechanics Always Check Spark First
Testing for a bright spark right away splits your diagnostic path cleanly in half. If spark is good, you can completely ignore the CDI, stator, and coil wiring, allowing you to focus your attention entirely on checking fuel delivery and mechanical engine compression.
Real Workshop Example
During a busy Sunday practice session at Glen Helen Raceway, a rider brought in a bike claiming his stator had died because the machine refused to fire up. He was ready to order an expensive replacement electrical assembly right there.
Instead of pulling the engine case apart, we removed the spark plug and found it was completely fouled with wet oil. After installing a fresh plug and clearing a tiny speck of dirt out of the pilot jet, the machine fired up easily on the second kick.
How to Prevent KTM 250 SX Starting Problems
Adhering to a strict maintenance routine after every track day keeps your high-performance two-stroke reliable and easy to start.
Use Fresh Premix Fuel
Only mix the amount of fuel you plan to burn during that specific weekend. Store your gas in clean, sealed containers to stop it from absorbing atmospheric moisture.
Clean the Carburetor Regularly
Drain the aluminum float bowl if the bike is going to sit for more than two weeks. This simple step prevents fuel from evaporating and forming sticky varnish inside the brass passages.
Replace the Spark Plug Before It Fails
Do not wait until your bike stops running to install a fresh plug. A new spark plug handles rich fuel mixtures much better during cold morning start cycles.
Clean and Oil the Air Filter
Never ride with a dry or dirty foam element. A properly oiled filter traps fine silt while allowing a steady, predictable stream of fresh air into the engine.
Inspect Reed Valves During Top-End Service
Every time you remove the cylinder to replace the piston rings, inspect the carbon reed petals for signs of fatigue or edge fraying.
Drain Fuel Before Long-Term Storage
Turn the fuel valve off and run the engine until it starves out completely before parking the bike for winter. This clears all fuel out of the internal carburetor circuits.
Follow KTM Service Intervals
Track your riding hours carefully using a digital hour meter. Perform top-end piston rebuilds at the exact intervals listed in your factory manual to maintain proper compression.
When You Should Visit a KTM Dealer or Professional Workshop
Certain electrical anomalies and deep mechanical wear require commercial tools and professional engine training to fix correctly without causing damage.
Suspected Stator Failure
Testing internal stator advance curves requires specialized electrical diagnostic equipment that can measure peak voltage outputs under fast cranking speeds.
Low Compression
When a cylinder bore loses its cross-hatch finish or wears out of round, it must be measured with precise micrometers and sent out for professional re-plating.
Crankshaft Seal Leak
If the rubber seal behind the ignition flywheel wears out, it draws outside air into the crankcase, causing an uncontrollable lean condition that burns pistons.
Internal Engine Damage
If an internal bearing fails and drops metal debris into the lower crankcase, the entire engine must be split open on a bench to clean the assembly safely.
Persistent No-Start Problems
When you have verified fuel, spark, and compression, yet the engine still refuses to run, a factory technician can check for rare ignition timing offset faults.
KTM 250 SX vs Other KTM Two-Stroke Models With Starting Problems
While KTM utilizes similar baseline engineering across their two-stroke platform, individual displacements present unique operating habits.
KTM 250 SX vs KTM 125 SX
The smaller 125cc engine spins at much higher RPM levels, meaning it fouls spark plugs at low speeds far faster than a 250cc engine. However, the 125 is much easier to kick over physically when the engine is cold.
KTM 250 SX vs KTM 300 XC
The 300 XC is designed for off-road trail use and features an electric starter system alongside a heavier flywheel. This heavy flywheel helps the bike maintain a smooth idle speed, making it less prone to stalling out on tight trails.
KTM 250 SX vs KTM 250 XC
The XC cross-country model uses a different carburetor setting and a wider ratio transmission. The SX version uses aggressive motocross porting that creates higher cylinder compression, demanding very high quality fuel to start cleanly.
Which Starting Problems Are Common Across KTM Carbureted Two-Strokes?
Every carbureted model in the lineup uses flexible carbon reed valves that wear out over time. They are also equally vulnerable to pilot jet blockages if left parked with old premix fuel sitting inside the carburetor bowl.
Frequently Asked Questions
Why is my KTM 250 SX not starting even though it has spark?
The engine might have a clogged pilot jet preventing fuel from reaching the cylinder, or the physical compression has dropped too low to ignite the mixture.
Why is my KTM 250 SX hard to start when cold?
A partially blocked pilot jet or an incorrect float level restricts fuel flow. The cold engine needs a rich mixture, which is why a clean pilot circuit is critical.
Can a weak battery affect the EFI system?
The carbureted KTM 250 SX does not use a battery or an EFI system. It relies entirely on a mechanical kick starter, carburetor circuits, and a stator to generate running power.
Can old premix fuel stop a KTM 250 SX from starting?
Yes, old fuel loses its volatility and the mixed oil can settle out. This stale combination resists ignition and will quickly coat your spark plug in wet oil.
Why won’t my KTM 250 SX start after washing?
Water easily enters the spark plug cap or pools around the kill switch housing. This creates an immediate short circuit that stops electricity from reaching the plug.
How do I know if the carburetor is clogged?
If the bike only fires with the choke pulled out but dies the instant you turn the knob off, your internal brass pilot jet is completely blocked with dirt.
What compression should a KTM 250 SX have?
A healthy engine must show between 170 and 190 PSI on a gauge. If the pressure drops below 130 PSI, the piston rings are too worn to start easily.
How often should I replace the spark plug?
Replace your spark plug every 5 to 10 riding hours on a two-stroke, or immediately if the tip looks heavily black, pitted, or coated in wet oil.
How much does it cost to repair a KTM 250 SX that won’t start?
A fresh spark plug costs under ten dollars and a clogged jet can be cleaned for free. A full top-end engine rebuild with a new piston costs a few hundred dollars.
Final Recommendation
Troubleshooting a two-stroke that refuses to start is simple if you avoid rushing into deep engine work. Based on long experience with these high-performance carbureted machines, always swap in a fresh spark plug and verify clean fuel flow before adjusting any other components. The vast majority of no-start issues come down to a fouled plug or a dirty pilot jet rather than a failed stator or a broken ignition box. Keep your fuel fresh, clean your carburetor after long storage, and your bike will start reliably on the second kick.

Ehatasamul Alom is a dedicated road hybrid bikes expert. With over 15 years of experience, he helps people find the perfect ride. He began his journey as a bike mechanic. He learned the ins and outs of every bike.
Ehatasamul Alom holds a Master's degree in Mechanical Engineering from a Brown University (Providence US 02912), where he specialized in material science and bicycle kinematics. His master's thesis focused on optimizing frame geometry for road hybrid bikes to improve rider comfort and efficiency.
Ehatasamul has an extensive professional background. He spent 10 years (2010-2020) as a Senior Bike Designer at "Urban Cycles," a leading bicycle manufacturer. In this role, he led the development of several award-winning road hybrid bikes, which are known for their durability and performance. He later served (2020-2024) as the Head of Product Development at "Gear Up," a company specializing in high-end cycling components. There, he developed innovative parts and accessories specifically for road hybrid bikes.
Over the years, Ehatasamul has become an authority on Roadhybridbikes. He understands their design and function. His work focuses on making bikes easy to use. Ehatasamul believes everyone should enjoy cycling. He writes guides that are simple to read. His passion for road hybrid bikes is clear. His goal is to share his knowledge with everyone. He wants to see more people on two wheels. His advice is always practical and easy to follow.
- Ehatasamul Alom

- Ehatasamul Alom
- Ehatasamul Alom

- Ehatasamul Alom



