
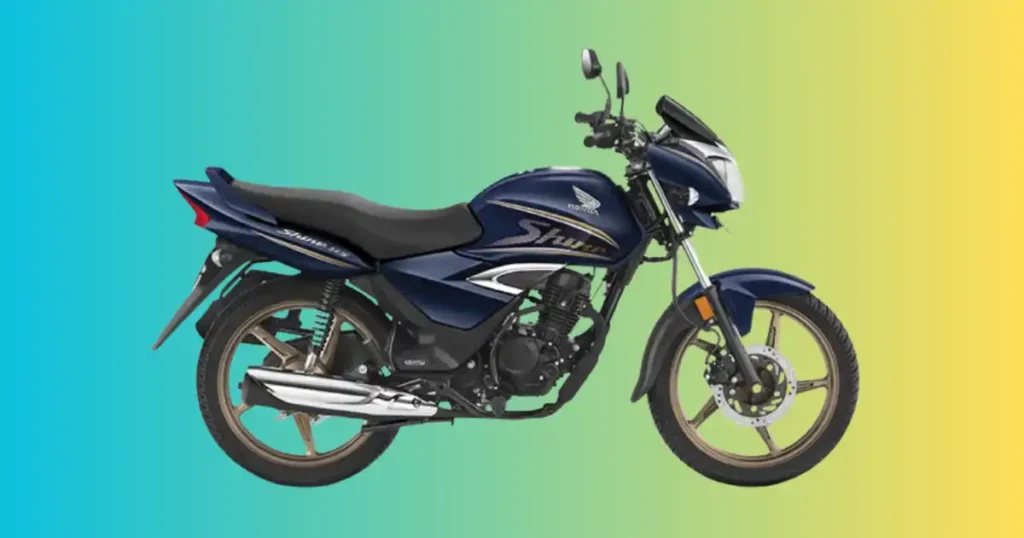
Pressing your starter button only to hear a dead click is incredibly frustrating. A few winters ago during a freezing week in Indianapolis, Indiana, a rider brought in a bike after trying to start it for an hour. The fix was just a tiny turn of a loose battery ground wire under the plastic cover. Minor electrical faults frequently mimic major engine failures on these simple commuter bikes. Before you pull your machine apart or spend hard-earned cash on a tow truck, let us walk through a clear diagnostic path. Finding the cause of your honda shine 125 not starting issue is easy when you test instead of guess.
Honda Shine 125 Not Starting? Check These Things First
Before replacing expensive parts, spend five minutes checking the basics. One foggy Monday morning in Indianapolis, Indiana, a rider was certain his Honda Shine 125 needed a new starter motor. The actual culprit was a loose battery ground cable after weeks of rough commuting. Tighten the connection, press the starter, and the bike fired right up. Sometimes motorcycles like to keep us humble.
What Happens When You Press the Starter?
- Nothing happens: The instrument panel stays pitch black, and the bike makes zero noise when you hit the button.
- Single clicking sound: You hear one solid click near the battery box, but the motor refuses to spin.
- Rapid clicking noise: A loud metallic chattering sound echoes from under the seat area as you press the switch.
- Engine cranks but won’t start: The starting motor turns the crankshaft vigorously, yet the engine never catches life.
- Starts then stalls: The motor fires up for a brief second but dies immediately when you try to ride.
- Slow engine cranking: The motor groans and turns over lazily, sounding tired and lacking necessary speed.
- Self-start works inconsistently: The button works fine sometimes but fails completely on other attempts.
- Kick start also fails: Pushing the mechanical foot lever does not make the engine run either.
Five-Minute Quick Inspection
- Check battery voltage: Use a simple meter to see if your power cell has enough energy stored inside.
- Verify fuel level: Shake the bike gently and look inside the tank to ensure you have fresh petrol.
- Confirm engine kill switch position: Ensure the red handlebar rocker switch is set down to the run icon.
- Check neutral indicator: Confirm the green light is glowing on your dash before attempting a crank.
- Pull the clutch lever: Squeeze the left handlebar lever completely to bypass the safety interlock circuit.
- Listen for the fuel pump (FI models): Listen closely for a soft two-second whirring buzz when you cycle the key.
- Inspect battery terminals: Look for loose lead bolts or white fuzzy corrosion build-up on the wire ends.
- Look for warning lights: Check if any unexpected dashboard lamps flash when you turn the key on.
Signs You Should Stop Riding Immediately
- Burning electrical smell: A sharp plastic odor means your wires are shorting out and melting their casing.
- Fuel leakage: Any wet spots under the tank or fuel lines mean you must turn off the key.
- Smoke from wiring: Visible smoke means a serious short circuit that can cause a dangerous vehicle fire.
- Loud grinding noises: Harsh internal crunching noises mean the starter gears are stripped or badly misaligned.
- Blown main fuse: If a fresh plastic fuse blows immediately after installation, a direct short is present.
- FI warning light remains on: A constantly glowing or flashing light warns of a severe electronic system error.
How the Honda Shine 125 Starting System Works
The Honda Shine 125 uses a dependable starting system that combines electrical, ignition, and fuel components. Understanding the sequence makes troubleshooting much easier.
Main Starting System Components
The electrical network relies on a strong twelve-volt battery to feed power directly through the main fuse. The safety loop includes a side stand switch, a clutch switch, and a neutral switch to ensure the bike cannot crank while in gear. On modern models, an electronic control unit (ECU) manages the Programmed Fuel Injection (PGM-FI) system. This setup includes an electric fuel pump and a precise fuel injector.
Older variants utilize a traditional mechanical carburetor instead. For cranking, a starter switch routes low current to a starter relay or starter solenoid, which links the battery to the heavy starter motor. A spinning stator works with a pulse generator to track engine position, telling the ignition coil exactly when to fire the spark plug.
How the Engine Starts
Turning the key on prompts the battery to power the electrical display instantly. The central ECU checks all your safety switch connections to verify the machine is safe to crank. On fuel-injected models, the electronic fuel pump whirs for two seconds to pressurize the line. Pressing the handlebar switch activates the starter relay, which passes high current down to the starter motor.
The starter motor spins the internal engine flywheel quickly. As the engine rotates, the pulse generator sends a position signal to coordinate the spark and fuel injection timing. Fresh fuel enters the combustion chamber, the ignition coil fires a hot spark across the plug gap, and the engine fires up into a steady idle.
Most Common Reasons a Honda Shine 125 Won’t Start
Most no-start problems come from the battery, ignition system, fuel delivery, or safety switches. Begin with simple checks before replacing expensive parts.
Weak or Dead Battery
Typical Symptoms
The horn sounds very weak, the turn signals blink lazily, and the dashboard display resets completely every time you press the starter button.
Battery Voltage Test
Attach a digital multimeter directly to the battery screws. A healthy resting motorcycle battery must read between twelve point eight and thirteen point zero volts with the key off.
Battery Load Test
Keep your meter leads connected while pressing the starter switch. If the voltage drops below ten volts during the engine crank, the battery lacks the capacity to hold a true load.
When Replacement Is Needed
If a battery cannot climb above twelve point four volts after a long night on a slow charger, its internal lead plates are spent and you need a new one.
Loose or Corroded Battery Connections
Voltage Drop
Vibrations from rough daily commuting can loosen the terminal bolts. A loose cable causes a sudden voltage drop that starves the electrical system of power.
Cleaning Battery Terminals
Disconnect the negative wire first, then open the positive side. Scrub away the white crusty powder using a stiff brush and warm water mixed with baking soda.
Faulty Starter Relay
Clicking Without Cranking
If you hear a single sharp click from under the seat whenever you press the button, but the motor refuses to turn, the relay contacts are likely burnt.
Relay Diagnosis
Locate the component and bridge the two main copper screw terminals using an old insulated wrench. If the starter spins, the relay is bad and needs a swap.
Starter Motor Failure
Slow Cranking
The starter motor utilizes internal carbon brushes that wear down after thousands of starting cycles, leading to slow engine cranking.
Bench Testing
Remove the starter motor from the engine block and connect it directly to a known good battery using jumper cables to see if it spins fast.
Fuel Delivery Problems
Fuel Pump Failure (FI Models)
If turning the ignition key produces total silence under the tank, your fuel pump is not spinning to build line pressure.
Dirty Fuel Injector
Small varnish deposits can easily clog the tiny holes in a fuel injector nozzle, preventing it from spraying fuel into the intake.
Carburetor Blockage (Older Models)
On older non-FI bikes, stale fuel left inside the float bowl turns into sticky green varnish, plugging up the internal jet passages completely.
Fuel Line Restrictions
A kinked or pinched rubber fuel line completely starves the engine. Trace the line from the tank down to the intake to check for sharp bends.
Dirty or Worn Spark Plug
Carbon Fouling
Frequent short trips prevent the plug from cleaning itself, leaving a thick layer of black carbon that shorts out the electrical path.
Oil Fouling
Worn valve stem seals or weak piston rings let engine oil seep onto the plug tip, coating it in wet sludge that stops the spark.
Incorrect Spark Plug Gap
The distance between the center electrode and the ground strap must be exactly zero point seven to zero point eight millimeters for a strong spark.
Ignition Coil Failure
Weak Spark
A failing coil breaks down internally when it gets warm, producing a faint orange spark that cannot ignite the compressed fuel mixture inside the cylinder.
Resistance Testing
Set your digital meter to ohms and measure the resistance across the primary input wires and the main spark plug lead wire to check for shorts.
Side Stand or Clutch Switch Problems
Safety Switch Inspection
These safety interlocks are highly exposed to dirt and rain. If the side stand switch plunger sticks open, it will cut off ignition power the moment you shift into gear.
ECU or Sensor Problems (FI Models)
FI Warning Light
When a major engine sensor breaks down, the amber dashboard fault light will flash a specific sequence of codes to reveal the problem circuit.
Crankshaft Position Sensor
If this vital sensor fails to send a timing signal, the ECU does not know the engine is turning and will refuse to supply spark or fuel.
Blown Fuse or Wiring Problems
Main Fuse Inspection
Locate the primary fuse block near the battery container. Pull the main fuse out and check the internal wire link. If it is broken, install a fresh fuse.
Ground Wire Checks
A loose or rusty main ground bolt on the engine case interrupts the entire electrical return path, leading to strange, erratic electrical behavior.
Honda Shine 125 Cranks but Won’t Start
If the engine cranks normally but refuses to run, concentrate on spark, fuel, and compression before replacing electrical parts.
Test Spark Quality
Remove the spark plug cap from the engine. Use a proper spark plug socket to unscrew the plug, then pop it back inside the rubber cap. Hold the metal threaded body firmly against a clean bolt on the engine block. Crank the engine while watching the tip closely. You want to see a bright, snappy blue spark. A weak yellow spark or no spark at all indicates a fault in your ignition coil, wire, or plug.
Check Fuel Delivery
If the spark looks strong, move on to checking the fuel system. On older carbureted models, loosen the tiny drain screw at the bottom of the float bowl to see if fresh petrol flows out. For fuel-injected bikes, check the quick-connect fuel line plug at the throttle body to verify that fuel is reaching the intake manifold area.
Listen for Fuel Pump Priming
Find a quiet spot away from traffic noise. Turn your ignition key to the run position while keeping your ear near the base of the petrol tank. You should hear a distinct, clear two-second whirring sound as the pump builds line pressure. Total silence means you need to look for a blown fuel system fuse or a disconnected wire plug under the tank shroud.
Inspect Injector or Carburetor
A dry spark plug after minutes of continuous cranking tells you that fuel is not entering the cylinder. For an injection model, unbolt the injector from the intake port while leaving its lines attached. Tap the starter button briefly to verify it sprays a fine, cone-shaped mist. If it drips or stays bone dry, the nozzle is completely clogged with dirt.
Perform Compression Test
An engine cannot combust fuel if it cannot trap and squeeze the air mixture inside the cylinder. Thread a standard compression tester gauge tightly into the empty spark plug port. Twist the handlebar throttle wide open and crank the motor for five seconds. A very low reading indicates tight valve clearances, worn piston rings, or a leaking head gasket.
Check the Air Filter
Engines need a free flow of clean air to match the fuel delivery. Remove the plastic side panel and open the air box cover to inspect the pleated paper element. If the filter is choked with thick dust, leaves, or engine oil blowout, it will suffocate the engine. Try starting the bike with the filter out to see if it fires up.
Honda Shine 125 Starts Then Stalls
Starting briefly before shutting off usually indicates a fuel delivery or idle control issue.
Fuel Pressure Problems
A failing fuel pump might manage to build enough pressure to start the bike initially. However, once the motor runs, the pump fails to keep up with continuous demand. This causes the line pressure to drop rapidly and starve the fuel injector, resulting in a sudden stall.
Dirty Injector
A partially clogged nozzle might allow a tiny bit of fuel to seep through while cranking. Once the engine fires and expects a precise, fast pulse of fuel to maintain idle speed, the restricted flow causes the mixture to run too lean, making the engine sputter and die.
Blocked Carburetor Idle Circuit
On older carbureted models, the tiny pilot jet manages fuel delivery when the throttle is closed. If a small speck of dirt or fuel varnish plugs this micro-passage, the bike will start with the choke on but die the instant you try to idle normally without touching the throttle grip.
Vacuum Leak
Any unmetered air entering the engine behind the throttle body alters the precise air-to-fuel ratio. Inspect the rubber intake manifold boot for fine cracks or loose hose clamps. A tiny tear draws in extra air, making the mixture too lean to sustain a steady idle.
ECU Sensor Fault
The computer relies heavily on data from the engine temperature sensor and the intake air sensor. If a sensor reports false information, the ECU might pull back the fuel mixture too early before the metal engine components have warmed up to operating temperature.
Honda Shine 125 Won’t Start After Sitting
Leaving the motorcycle unused for several weeks often leads to battery and fuel-related issues.
Battery Self-Discharge
Lead-acid batteries naturally lose their electrical charge over time when left sitting idle. Modern fuel-injected bikes also draw a tiny amount of continuous power for the ECU memory, which can drain a healthy battery down to a completely dead state in less than a month.
Stale Fuel
Modern pump gasoline starts to degrade and lose its volatile properties in as little as thirty days. The volatile elements evaporate away, leaving behind a stale, heavy liquid that resists spark ignition and smells like old household varnish or paint thinner.
Fuel Injector Deposits
As old fuel evaporates inside the warm tip of a fuel injector, it leaves behind hard lacquer deposits. These microscopic blockages stop the injector from atomizing fuel properly, leading to extended cranking sessions and dry spark plugs.
Carburetor Varnish
When a carbureted bike sits, the fuel inside the float bowl dries up completely. This evaporation leaves a sticky green coating that plugs up the fuel jets, sticking the float needle valve shut and stopping fuel flow.
Corroded Electrical Connectors
Moisture in the air attacks exposed copper wire terminals over time. A thin layer of green rust forms inside the ignition switch and wiring harness plugs, blocking the low-voltage signals needed to create a strong spark when you try to start the bike.
Honda Shine 125 Won’t Start After Rain
Rain and humidity can affect electrical components, especially if the motorcycle is parked outside.
Wet Spark Plug Cap
Heavy downpours or high-pressure bike washing can easily force water deep inside the rubber spark plug boot. The high-voltage ignition current will take the easiest path, leaping through the moisture to the engine head instead of firing across the plug gap.
Moisture Around Ignition Coil
The ignition coil uses small metal spade terminals to receive power from the wiring harness. When water coats these exposed metal clips, it creates a direct electrical short to the frame, preventing the coil from building up high voltage.
Damp Electrical Connectors
If the weather seals on your main wiring harness plugs are old or cracked, rainwater can seep into the metal pins. This creates temporary short circuits between separate wire lines, confusing the electronic brain and shutting down the ignition system.
Water Inside Handlebar Switches
Rainwater can drain straight down into the starter button or engine kill switch assembly. This moisture causes internal corrosion over time, blocking the physical contact plates from completing the circuit when you push the starter button.
Step-by-Step Honda Shine 125 No-Start Diagnosis
Professional mechanics work methodically instead of guessing. One rainy Friday in Charlotte, North Carolina, a rider was convinced the fuel injector had failed. A battery load test showed voltage dropping below 9 volts during cranking. A new battery solved the problem before the afternoon coffee break.
Step 1 – Check Battery Voltage
Set your digital multimeter to the DC voltage scale. Touch the red meter lead to the positive battery screw and the black lead to the negative post. Note the static reading with the ignition key off. A healthy battery must show at least twelve point eight volts.
Step 2 – Perform a Battery Load Test
Keep your meter leads pressed firmly against the battery posts. Pull in the clutch lever and push the starter switch while watching the display. If the number plummets below ten volts while the engine tries to spin, your battery lacks the capacity to power the bike.
Step 3 – Inspect Battery Cables
Give both the thick red positive cable and black negative wire a firm physical wiggle with your hand. The metal loop ends must be clamped perfectly tight to the battery terminals. Clean away any white crusty oxidation using a wire brush and warm water.
Step 4 – Check Main Fuse
Locate the primary fuse block near the starter relay housing. Pull the main fuse out of its holder and check the internal metal link inside the transparent plastic body. If the link is melted or broken, install an identical spare fuse.
Step 5 – Test Spark
Remove the spark plug from the cylinder head using a dedicated spark socket. Insert the plug back into its rubber cap and hold the threaded base against a bare metal engine bolt. Hit the starter button and look for a bright, snappy blue arc across the gap.
Step 6 – Verify Fuel Delivery
On fuel-injected models, listen for the two-second fuel pump hum when you turn the key on. For older carbureted models, pull the main line off the carburetor input tube and open the fuel tap valve to verify that fuel pours out in a steady stream.
Step 7 – Inspect Air Filter
Open the air box assembly to check the state of the air filter element. Tap out any loose dust or replace the paper element completely if it looks dark or oil-soaked. A severely clogged filter suffocates the engine by blocking airflow.
Step 8 – Compression Test
Thread a mechanical compression tester gauge into the empty spark plug hole. Twist the throttle handlebar wide open and crank the motor using the starter button for five seconds. Ensure the gauge rises quickly to meet the factory specification outlined in your manual.
Step 9 – Scan ECU Codes (FI Models)
If your engine light is flashing on the dashboard, count the pattern of blinks. Long slow flashes represent tens, while quick blinks indicate single numbers. Add them together to determine the fault code, which will tell you exactly which sensor circuit is broken.
Honda Shine 125 Starting Problems Diagnostic Table
Experienced technicians compare symptoms before replacing components. This simple process saves both time and unnecessary expense.
Experienced motorcycle mechanics use a systematic guide to match common symptoms with their primary causes. This process eliminates guesswork and saves valuable repair time in the workshop.
| Observed Symptom | Most Likely Cause | DIY Difficulty | Home Repair |
| Zero dashboard power or response | Dead battery or blown main fuse | Easy | Yes |
| One loud distinct click only | Burnt starter relay contacts | Easy | Yes |
| Rapid metallic clicking noise | Insufficient battery charge | Easy | Yes |
| Sluggish, very slow engine crank | Worn starter motor brushes | Medium | Sometimes |
| Healthy cranking but won’t fire | Wet spark plug or no fuel | Medium | Yes |
| Starts up briefly then dies out | Low fuel pressure or idle clog | Medium | Sometimes |
| Flashing amber FI warning light | Malfunctioning engine sensor | Hard | Dealer |
Battery Voltage Reference Table
A digital multimeter is one of the most useful tools for diagnosing starting problems on the Honda Shine 125.
Testing battery voltage under a starting load gives you a true indication of the internal cell health before you buy a new replacement.
| Voltage Reading | Battery Condition | Recommended Action |
| 12.8V to 13.0V | Excellent state of charge | Keep looking for non-battery faults |
| 12.5V to 12.7V | Satisfactory charge level | Perform a cranking load test to verify |
| 12.2V to 12.4V | Weak electrical capacity | Charge battery using a slow trickle charger |
| Below 12.0V | Poor internal condition | Attempt a deep charge or check for dead cells |
| Below 10.0V while cranking | Complete internal cell failure | Replace the battery with a fresh unit immediately |
Diagnose the Problem by Symptom
Different symptoms usually point toward different systems. Match the symptom before buying replacement parts.
Isolate starting faults quickly by grouping your observations into clear categories. Focus your efforts only on the systems related to your specific breakdown sign.
| Symptom Observed | Possible Cause | Check First |
| Single loud click sound | Defective starter relay | Check battery terminal bolt tightness |
| Fast chattering clicks | Discharged battery pack | Run a multimeter cranking voltage test |
| Starter completely silent | Interlock safety switch | Verify neutral light and pull clutch |
| Engine spins but won’t catch | Fuel starvation or dead spark | Pull plug to check tip color and wetness |
| Hard starting when cold | Fouled spark plug gap | Clean electrode or install a fresh plug |
| Fires up then stalls out | Fuel delivery pressure drop | Listen for consistent fuel pump humming |
Essential Tools Every Honda Shine 125 Owner Should Have
Most no-start issues can be diagnosed at home with a few affordable tools.
Recommended Workshop Tools
- Digital multimeter: Measures exact battery voltages and checks wire continuity across the harness circuits.
- Battery charger: A low-amperage smart maintenance charger that keeps your battery topped up during storage.
- Battery load tester: Applies a simulated starter load to reveal weak cells inside the battery casing.
- Spark tester: Connects inline to safely visually check the strength and color of your ignition spark.
- Compression tester: Screws into the spark plug port to evaluate the mechanical seal of your valves.
- Fuel pressure gauge: Plugs inline to confirm your electric fuel pump is meeting factory output specs.
- OBD scanner (FI models): Connects to the diagnostic port on FI models to read stored fault codes.
- Contact cleaner: A fast-drying spray that cleans grease, grime, and corrosion out of wire plugs.
- Basic socket set: A selection of metric sockets needed to remove body panels and engine covers easily.
- Torque wrench: Ensures engine components like spark plugs are tightened exactly to factory specs.
Common Owner Mistakes
Many repairs become expensive because the simplest checks are skipped.
Replacing the Starter Too Soon
Buying a costly new starter motor before checking your basic wiring is a frequent mistake. Most quiet starters are caused by a bad starter relay, a blown fuse, or a loose green ground wire on the engine case rather than a failed motor.
Ignoring Battery Load Tests
A battery can show a perfectly normal resting voltage of twelve point seven volts on a basic meter. If you skip a proper load test while cranking, you will completely miss internal plate damage that causes the voltage to collapse under load.
Forgetting Safety Switches
The side stand and clutch interlock switches exist to protect you, but they fail regularly due to road dirt. Forgetting to clean and test these simple buttons can lead to looking for complex engine faults that do not exist.
Ignoring FI Warning Lights
The flashing amber light on your dash is trying to tell you exactly where the problem is. Trying to adjust mechanical settings while the computer is actively warning you of a sensor circuit fault is a waste of time.
Using Old Fuel
Leaving pump gasoline sitting inside your fuel tank for six months and expecting the bike to start up smoothly is unrealistic. Modern fuel degrades quickly and will plug up tiny injector nozzles or carburetor jets with sticky varnish.
Skipping Ground Wire Inspection
A loose or rusty main ground bolt on the engine case disrupts the entire electrical return path. Owners often replace expensive components when the actual fault is a simple loose wire under the frame that costs nothing to tighten.
Expert Advice From a U.S. Motorcycle Technician
Reliable commuter motorcycles usually fail because of small electrical or fuel issues—not major engine damage.
“More than seventy percent of the Honda commuter bikes we diagnose with no-start complaints need battery, ignition, or fuel-system repairs rather than costly engine work. Always test before replacing parts.” — James Walker, Motorcycle Service Technician, Florida
Why Mechanics Always Begin With Battery Testing
Modern electronic control units and fuel injection systems are highly sensitive to clean, stable electrical power. If your system voltage dips too low while the engine is cranking, the central computer module will shut down temporarily to protect itself. It cannot calculate fuel delivery pulses or ignition timing arcs under those weak conditions. Even if the starter motor manages to turn the crankshaft slowly, the engine will never fire up if the ECU lacks the power to manage the system.
A Real Workshop Story
On a busy Tuesday morning, a customer brought in a modern commuter bike, absolutely convinced that the main ECU had failed. The dashboard screen turned on fine, and the owner was certain the battery was completely healthy. We skipped the assumptions and connected a digital load tester directly to the battery screws. The moment we pressed the starter button, the system power dropped down to five volts due to a hidden broken bridge inside the battery case. Installing a fresh, fully charged battery solved the starting issue immediately, saving the customer from buying an expensive computer module they did not need.
How to Prevent Honda Shine 125 Starting Problems
Routine maintenance is the easiest way to avoid unexpected starting issues.
Maintain Battery Health
Check your battery terminal screws every few thousand kilometers to ensure they have not vibrated loose on rough roads. If you do a lot of short city commuting, place the bike on an automatic smart charger once a month to top off the charge level.
Replace Spark Plugs on Schedule
Unscrew your spark plug every four thousand kilometers to check the electrode gap and clean away any minor carbon deposits. It is best practice to replace the spark plug completely every eight thousand kilometers to ensure reliable starting performance.
Keep Fresh Fuel in the Tank
Avoid letting your motorcycle sit with a nearly empty petrol tank, as temperature changes cause condensation that leaves water in your fuel. Always buy fuel from busy stations to ensure you are getting clean, moisture-free gasoline.
Clean the Fuel System
Remove the carburetor bowl annually on older models to clear away sediment. For modern fuel-injected variants, use a high-quality fuel system cleaner additive periodically to keep the injector nozzle tip free of sticky lacquer deposits.
Inspect Electrical Connections
Look over your main wiring harness every spring for signs of rubbing or cracked plastic insulation. Check that the rubber boots covering your ignition coil and starter relay are properly seated to keep out rain and road spray.
Follow Honda’s Service Schedule
Adhering to the factory service guidelines ensures that small maintenance items like valve clearance adjustments are performed on time. Keeping your engine within factory specifications prevents hard starting issues when the motor is hot.
When Should You Visit a Honda Dealer?
Some faults require dealer-level diagnostic equipment and factory repair procedures.
Persistent FI Warning Light
When an amber fuel injection warning light stays on after you have checked the basic connections, an internal wiring break deep inside the main harness loom is usually the cause, requiring an advanced diagnostic scan tool.
ECU Communication Errors
If your central electronic control module has suffered internal hardware damage or lost its software programming, it must be replaced and synced using a proprietary factory system link that only authorized dealers possess.
Fuel Injector Replacement
Replacing a faulty fuel injector nozzle requires clean workshop conditions and proper digital calibration to ensure the new part matches the fuel map parameters stored in your ECU memory.
Wiring Harness Damage
Fixing extensive wire damage caused by a rodent chew or a major frame short circuit requires professional diagnostic schematics and specialized splicing tools to prevent future resistance issues in sensitive data lines.
Low Engine Compression
If a compression gauge reveals that your cylinder cannot hold mechanical pressure, repairing worn piston rings or burnt valve seats requires deep engine teardown tools and precise measuring gear best left to professionals.
Honda Shine 125 Compared With Similar Honda Motorcycles
Shine 125 Honda commuter motorcycles share many electrical and fuel-system components, making troubleshooting methods very similar.
Honda Shine 125 vs Honda SP125
The modern SP125 features an updated engine design paired with an advanced silent start system that utilizes an alternating current generator. Unlike the traditional starter motor and starter relay layout found on the older Honda Shine 125, the SP125 spins the crankshaft silently without mechanical gear engagement, altering the electrical fault-tracing path completely.
Honda Shine 125 vs Honda CBF125
The CBF125 is tailored more toward global commuter styling but shares a very similar electronic fuel injection foundation with modern Shine variants. When troubleshooting a no-start issue, both models rely on an identical fuel pump priming sequence, meaning a failure to hum when the key turns points to the same relay circuits.
Honda Shine 125 vs Honda CB125F
The CB125F utilizes a highly efficient engine chassis engineered for city delivery work. While the Shine 125 often features a traditional mechanical choke arrangement on its carbureted model years, the CB125F relies strictly on its automated ECU parameters to enrich the fuel mixture during freezing cold starts.
Common Starting Problems Across Honda 125cc Motorcycles
Across this entire 125cc commuter family, the most frequent reason for an unexpected breakdown remains safety switch failure caused by road grime entering the exposed side stand switch housing. Regular cleaning of this lower pivot point keeps all these separate models starting reliably throughout the rainy season.
Frequently Asked Questions
Why is my Honda Shine 125 not starting?
The most frequent causes are a weak or dead battery, loose terminal connections, a blown main fuse, a stuck safety interlock switch, a fouled spark plug, or stale fuel blocking your fuel delivery system.
Why does my Honda Shine 125 only click when I press the starter?
A rapid clicking sound indicates that your battery charge is too low to spin the motor. A single loud click usually points to a faulty starter relay or a starter motor with worn internal carbon brushes.
Why does my Honda Shine 125 crank but not start?
This shows that your starting mechanics are turning the engine fine, but the combustion chamber is missing either a strong electrical spark, a proper mix of fresh fuel, or sufficient cylinder compression.
Can a weak battery still power the lights but prevent starting?
Yes, your headlights and dash indicators require very little current to illuminate. Spinning the heavy internal components of an engine requires massive electrical amperage that a weak battery cannot provide.
What does the FI warning light mean?
The Fuel Injection light means your engine computer has detected an active electrical fault within a sensor circuit. The ECU flashes the light in specific patterns to help you identify the broken component.
How do I know if the starter relay is faulty?
If your battery is perfectly healthy and you hear a single click when pressing the button, bridge the two main relay terminals with an insulated tool. If the engine spins, your relay contacts are bad.
Why won’t my Honda Shine 125 start after several weeks of storage?
The fuel left inside the system dries up over time, leaving behind a thick sticky varnish that plugs the brass jets or injector tips. The battery will also naturally discharge and lose its starting power.
How much does it cost to repair a Honda Shine 125 that won’t start?
Simple repairs like tightening a loose battery cable bolt cost nothing at all. A fresh spark plug or replacement fuse is very inexpensive, while a new fuel pump or ECU module will require a larger financial budget.
Final Recommendation
Dealing with a non-starting motorcycle can be a frustrating experience, but over my years of working on these legendary machines, I have learned that the fix is almost always incredibly simple. My ultimate recommendation is to avoid the temptation to buy new parts the moment your engine fails to fire up. Instead, take a deep breath and spend ten minutes checking the basic foundations: verify your fuel flow, check your battery voltage with a simple meter, and confirm you have a bright blue spark. Keeping your system clean and your battery properly charged will ensure your Honda Shine 125 remains completely dependable for every single journey.

Ehatasamul Alom is a dedicated road hybrid bikes expert. With over 15 years of experience, he helps people find the perfect ride. He began his journey as a bike mechanic. He learned the ins and outs of every bike.
Ehatasamul Alom holds a Master's degree in Mechanical Engineering from a Brown University (Providence US 02912), where he specialized in material science and bicycle kinematics. His master's thesis focused on optimizing frame geometry for road hybrid bikes to improve rider comfort and efficiency.
Ehatasamul has an extensive professional background. He spent 10 years (2010-2020) as a Senior Bike Designer at "Urban Cycles," a leading bicycle manufacturer. In this role, he led the development of several award-winning road hybrid bikes, which are known for their durability and performance. He later served (2020-2024) as the Head of Product Development at "Gear Up," a company specializing in high-end cycling components. There, he developed innovative parts and accessories specifically for road hybrid bikes.
Over the years, Ehatasamul has become an authority on Roadhybridbikes. He understands their design and function. His work focuses on making bikes easy to use. Ehatasamul believes everyone should enjoy cycling. He writes guides that are simple to read. His passion for road hybrid bikes is clear. His goal is to share his knowledge with everyone. He wants to see more people on two wheels. His advice is always practical and easy to follow.
- Ehatasamul Alom

- Ehatasamul Alom
- Ehatasamul Alom

- Ehatasamul Alom



