
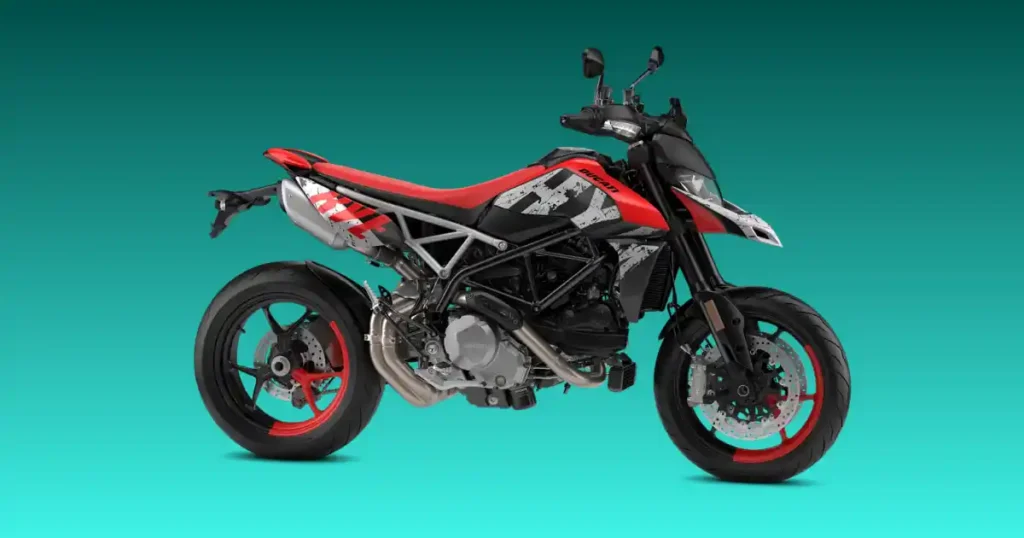
Hear your Italian twin roar or face total silence. Last summer in Denver, my buddy stood by his bike with a frown. He pressed the ignition button but nothing happened. A ducati hypermotard not starting can ruin a perfect morning. Let us fix this problem together right now. My years in the garage will help you save time. You will get back on the road fast.
Quick Answer: Why Is Your Ducati Hypermotard Not Starting?
Many starting issues come down to a handful of common problems. Begin here before reaching for expensive replacement parts. Review this list to find the most common faults:
- Weak or discharged battery
- Loose battery terminals
- Faulty starter relay
- Failed starter motor
- Engine stop (kill) switch engaged
- Side stand or clutch safety switch fault
- Fuel pump not priming
- Dirty fuel injectors
- Fouled spark plugs
- Immobilizer or key recognition issue
- Blown fuse
- Crankshaft position sensor failure
- ECU fault
- Charging system problem
Start With These Easy Checks First
The simplest inspections often reveal the real problem. Many Ducati owners solve a no-start issue in less than ten minutes. Do not strip the bike before trying these small steps.
Confirm the Battery Has Enough Voltage
Grab your digital meter to check the cell. Touch the leads to the metal battery posts. A healthy system reads above 12.6 volts. Low numbers mean you must charge the unit.
Verify the Kill Switch Position
Look at the right handlebar control pod. The red slider must be in the run position. Riders often flip this off by accident while cleaning. Push it to the center position.
Make Sure the Bike Is in Neutral
Look for the bright green light on your screen. The safety system blocks the starter if a gear stays engaged. Roll the bike a bit to click into neutral.
Check the Side Stand Safety Switch
Make sure the kickstand swings all the way up. Road grime can jam the small spring pin down low. Clean the switch body to let the pin slide out freely.
Listen for the Fuel Pump Priming
Turn the key to the on position. Put your ear close to the fuel tank area. You need to hear a clear two second buzzing sound. No sound means the pump lacks power.
Look for Dashboard Warning Lights
Check the screen for any bright red symbols. The onboard computer flashes icons when a vital circuit breaks down. Note the symbols to track down the error location.
Try Your Spare Key
Electronic keys can lose their internal code over time. Grab your second factory key from your home drawer. Try it in the ignition switch to bypass transponder issues.
Ducati Hypermotard Starting Symptoms and Their Likely Causes
Experienced technicians often diagnose motorcycles by matching symptoms with likely failures. This comparison table makes troubleshooting much faster. Match what you see to the correct repair path.
The following data guide links typical mechanical signs to their source parts. Use this log to plan your weekend repair work safely.
Symptoms vs Possible Causes
| Symptom | Most Likely Cause | DIY Difficulty | Repair Priority |
| No lights | Dead battery | Easy | High |
| Single click | Weak battery or relay | Easy | High |
| Rapid clicking | Battery voltage too low | Easy | High |
| Cranks but won’t fire | Fuel or spark issue | Medium | High |
| Starts then stalls | Fuel delivery problem | Medium | High |
| Immobilizer warning | Key recognition issue | Medium | Medium |
| Intermittent starting | Loose electrical connection | Medium | High |
| No fuel pump sound | Fuel pump or fuse | Medium | High |
Battery Problems That Prevent the Ducati Hypermotard From Starting
A healthy battery powers both the starter and Ducati’s sophisticated electronics. Even a slightly weak battery can prevent the engine from starting. The electrical brain protects itself by locking out low power.
Battery Voltage Too Low
Low juice stops the digital brain from waking up. The screen might flicker but the engine will remain silent. You need steady electrical pressure to move the starter.
Normal battery voltage
A fully charged cell shows 12.6 to 12.8 volts at rest. When the engine idles, the charging system pushes this up to 14.2 volts. Check these metrics with a good digital tool.
Low battery symptoms
You might notice dim dashboard lights when you turn the key. The horn will sound weak and raspy instead of loud. The bike will fail to turn over at all.
Load testing the battery
Press the starter button while watching your voltmeter screen. If the reading drops below 10 volts, the cell is bad. A surface charge cannot crank a heavy twin motor.
Loose Battery Connections
Vibration from rough roads can back out the small terminal screws. A loose wire halts high current flow. The system will drop power the second you try to crank.
Corroded Battery Terminals
White powdery scale grows on lead terminals over time. This layer acts like a wall to electricity. Clean the metal blocks with a stiff brush and clean water.
Battery Older Than Four Years
Lead plates inside the casing degrade as they age. They lose the surface area needed to hold a strong charge. Swap out old packs to keep your rides safe.
Charging System Failure
The bike must rebuild its own power while you zip down the highway. If this parts group dies, you run on reserve power until the motor stalls.
Faulty regulator/rectifier
This finned aluminum block sheds heat to convert raw power. If it shorts out, it will drain your battery or fry it with high voltage. Replace it if it gets burning hot.
Weak stator output
The internal stator coils produce current using engine rotation. Burnt copper insulation drops the total output down to nothing. Test the yellow wires for continuous loop resistance.
Fuel System Problems
If the engine cranks normally but never starts, the fuel system deserves your attention. The high compression engine demands precise fuel delivery to fire up.
Fuel Pump Not Priming
Silence from the fuel tank points to an electrical break. Check the fuel system fuse in the plastic side block. A bad wire harness can also starve the pump motor.
Clogged Fuel Filter
Debris from old gas pumps blocks the internal filter element. This restriction starves the engine of needed volume. The bike might sputter for a second and then die.
Dirty Fuel Injectors
Tiny electronic nozzles mist gas into the intake path. Sticky varnish plugs these small spray holes over time. Clean nozzles create a fine fog that lights up easily.
Old or Contaminated Fuel
Gas spoils if it sits inside the tank for months. Water from damp air can also pool at the low bottom. Drain out old yellow fuel and add fresh premium gas.
Fuel Pressure Problems
A split line inside the fuel tank drops system pressure. The pump runs but gas leaks back inside the cell. You need high line pressure to feed the cylinders.
Ignition System Faults
Fuel alone won’t start an engine. Strong spark at the right time is equally important. Without a bright flash, the fuel mix just wets the spark plugs.
Fouled Spark Plugs
Too much fuel coats the ceramic tips in black carbon soot. This wet layer stops the spark from jumping the gap. Pull the plugs to dry them out.
Worn Ignition Coils
Coils multiply low power into thousands of volts for the spark. Micro cracks in the plastic casing allow electricity to leak out. Hot weather makes these failures worse.
Damaged Spark Plug Caps
Rubber caps seal the plug wells from rain and road wash. If water sneaks past, it shorts the spark out to the metal cylinder head. Keep these boots dry.
ECU Ignition Timing Issues
The main computer triggers the spark at a precise crank angle. A glitched sensor signal scrambles this timing loop completely. The bike will crank but never catch fire.
Starter Motor and Starting Circuit Problems
Sometimes the battery is healthy, but electrical power never reaches the starter motor. You must inspect the high current path to find where the power stops.
The guide below shows you how to check the heavy electrical parts. Use these steps to trace power drops safely.
Starter Circuit Inspection Guide
| Component | Signs of Failure | How to Test | Replace? |
| Starter relay | Clicking only | Voltage test | Sometimes |
| Starter motor | No crank | Direct power test | Usually |
| Starter cable | Hot or corroded | Visual inspection | If damaged |
| Ground cable | Random starting issues | Resistance test | If faulty |
| Main fuse | No electrical power | Fuse inspection | Yes |
Starter Relay Failure
This magnetic switch links the battery directly to the starter. Internal copper contacts can burn out from high heat. You will hear a single click but no rotation.
Starter Motor Wear
Internal carbon brushes rub against the spinning armature to pass power. They grind down to dust after years of starting duty. Tap the starter case gently to test it.
Starter Solenoid Issues
A stuck solenoid piston stops the starter gear from locking in. The motor will spin fast with a high whine but will not turn the engine.
Poor Ground Connection
The main ground strap links the frame back to the battery. Paint or rust at the frame bolt blocks the circuit. Clean the contact spot down to shiny bare metal.
Safety Switch Problems
Ducati includes multiple safety systems that can stop the engine from starting if one sensor fails. These interlocks protect you from starting in gear accidentally.
Side Stand Switch
A small switch down by the stand tracks its physical position. If the plunger sticks open, the safety loop stays broken. The engine cuts out the second you select a gear.
Clutch Switch
The little plastic switch sits under the left hand lever perch. It lets you start the bike in gear if you pull the lever. Check for broken plastic tabs here.
Neutral Switch
This sensor threads into the aluminum transmission cases. It lights up the green dash bulb when gears disengage. If it fails, the computer thinks the bike is in gear.
Engine Stop Switch
Rain water can seep inside the right handlebar toggle assembly. This causes green corrosion on the copper slides. Spray electrical cleaner inside the slit to restore contact.
ECU, Immobilizer and Electronic Problems
Modern Hypermotard models rely heavily on electronics. A single faulty sensor can interrupt the starting sequence. Digital glitches require patient checking.
Immobilizer Not Detecting the Key
An antenna ring around the key slot reads the transponder chip. If this wire loop cracks, it locks the ignition system. The dash will show a lock symbol.
ECU Software Fault
Digital brains can freeze up due to power surges. Disconnect the main battery for ten minutes to force a full hard reset. This clears out temporary software errors.
Crankshaft Position Sensor Failure
This magnetic pickup tracks the speed of the engine flywheel. If it dies, the computer goes blind to piston position. It will stop all fuel and spark.
Camshaft Position Sensor Problems
The cam sensor tells the brain which engine stroke is active. A weak sensor makes cold starts take a very long time. The bike might backfire through the intake.
CAN Bus Communication Errors
Digital wires link the dash screen to the main computer brain. A pinched wire bundle breaks this high speed data link. The screen will read error or disconnect.
Cold Weather Starting Problems
Cold mornings often expose weak batteries, tired spark plugs, and charging problems that stay hidden during warmer months. Low temperatures change how everything functions.
Thick Engine Oil
Cold air turns synthetic motor oil thick like honey. This adds massive mechanical drag to the internal moving parts. The starter struggles to spin the heavy flywheel.
Reduced Battery Performance
Freezing temperatures slow down the chemical exchange inside the battery cells. A battery that works fine in July can lose half its power in January.
Moisture in Electrical Connectors
Warm engine cool downs pull damp air into plastic wire plugs overnight. This water forms tiny shorts that confuse low voltage sensors. Use dielectric gel to seal plugs.
Fuel Condensation
Cold fuel does not vaporize easily inside cold metal intake tracts. The gas droplets stick to the metal walls instead of mixing with air. This makes the initial fire up tough.
Step-by-Step Ducati Hypermotard Troubleshooting Checklist
Professional mechanics follow a logical diagnostic routine instead of replacing random parts. This checklist keeps you on the right path. Follow these steps in order.
The table below outlines the exact testing sequence used by expert mechanics. Work through each point to isolate the fault.
Complete Diagnostic Flow
| Step | Inspection | Expected Result | Next Step |
| 1 | Check battery voltage | 12.6V or higher | Continue |
| 2 | Turn ignition ON | Dashboard lights | Continue |
| 3 | Listen for fuel pump | Two-second prime | Continue |
| 4 | Press starter | Engine cranks | Check spark |
| 5 | Verify spark | Strong blue spark | Check fuel |
| 6 | Measure fuel pressure | Within specification | Scan ECU |
| 7 | Read fault codes | Identify fault | Repair |
Common Ducati Hypermotard Fault Codes Related to Starting
Fault codes help narrow the search before replacing expensive components. A simple code scanner points you right to the broken sensor wire.
Immobilizer Errors
Codes like 30.4 mean the antenna ring cannot read your key. Check the small wire routing around the lock cylinder for breaks or sharp pinches.
Crankshaft Sensor Codes
This error means the computer lost the main timing signal. Look for a bad sensor tip or a wire that melted against the hot rear exhaust pipe.
Fuel Injection Errors
These faults show up when an injector coil wire snaps. The computer shuts down fuel delivery to protect the catalytic converter from raw unburnt fuel damage.
Ignition Coil Codes
An error code here means the computer detects a shorted spark circuit. You will notice a rough idle if the bike managed to start up on one cylinder.
ECU Communication Errors
These faults mean the main modules have stopped talking to each other. Check the massive multi pin plugs on the computer body for bent metal prongs.
Maintenance Tips to Prevent Starting Problems
Regular maintenance keeps your Hypermotard reliable and reduces unexpected breakdowns. Small habits prevent major headaches out on remote canyon roads.
Keep the Battery on a Smart Charger
Plug a tender into your bike lead when you park for winter. Smart chargers monitor cell health without boiling the internal fluid. This keeps the plates fresh.
Replace Spark Plugs on Schedule
Screw in fresh spark plugs at the factory service steps. Clean electrodes require less electrical voltage to throw a bright spark. This helps starting speed.
Inspect Electrical Connectors
Unplug the main body connections once a year during deep cleans. Spray them with contact cleaner to wash out road grit and salt residue.
Clean Battery Terminals
Scrape the battery connections clear during your regular oil oil changes. Smear a thin layer of grease over the clean bolts to block oxygen.
Use High-Quality Premium Fuel
Buy high octane fuel from stations that stay busy all week. Fresh gas burns clean and prevents sticky gel from building up inside fuel paths.
Check Charging Voltage Regularly
Hold your digital meter to the battery while revving the warm engine. The screen must show stable power near 14 volts. This proves the system is healthy.
Store the Motorcycle Properly During Winter
Drain the fuel bowls or add stabilizer to a full gas tank. Keep the tires off freezing concrete floors and keep the chassis dry under a breath cover.
When DIY Repairs Are No Longer Enough
Some issues require dealer-level diagnostic tools or internal engine inspection. Know when to drop the tools and seek professional mechanical backup.
ECU Programming Problems
Corrupted computer files require factory diagnostic software to reinstall. A dealer must hook the bike up to their global network to patch code.
Compression Loss
Wear on piston rings or valves lets air leak out of the cylinder. Finding this requires special pressure gauges and mechanical engine teardown skills.
Internal Engine Damage
Stop cranking if you hear harsh grinding sounds from the engine cases. Forcing a jammed mechanical assembly to turn can break expensive engine castings.
Repeated Starting Failure After Multiple Repairs
If you have new fuel, fresh spark, and good power but nothing works, stop. A pro can run deep diagnostic scoping to find hidden wire fractures fast.
Expert Advice From a U.S. Motorcycle Technician
Testing your parts first saves a lot of money and time in the long run. Many riders jump to conclusions too fast when their bike stays quiet.
“One mistake I see every week is replacing the starter before testing battery voltage under load. Ducati motorcycles need stable voltage to wake up the ECU properly. Five minutes with a multimeter can save hundreds of dollars.” — Mike Allen, Arizona
Real-World Garage Story
Last Sunday morning in Scottsdale, Arizona, a rider planned a breakfast ride through the desert roads. The Ducati Hypermotard only produced rapid clicking. It felt like a major electrical failure. The culprit? A four-year-old battery that showed normal voltage until a load test revealed it collapsed under starter demand. A fresh battery had the bike roaring back to life before the coffee even cooled.
Frequently Asked Questions
Why does my Ducati Hypermotard click but not start?
A fast clicking sound means your battery lacks the amps to flip the starter. The relay engages but the voltage collapses instantly under heavy mechanical load.
Can a weak battery still power the dashboard?
Yes, the digital display takes very little energy to illuminate. The starter motor requires hundreds of times more power to turn over the heavy pistons.
Why does my Hypermotard crank but never fire?
This happens when the motor spins but lacks fuel or a clean spark. Listen for the fuel pump buzz when you cycle the ignition key.
Can bad gasoline prevent starting?
Yes, old fuel loses its volatile compounds over time. It struggles to ignite in cold chambers and leaves sticky deposits inside your injectors.
Does the immobilizer stop the starter motor?
Yes, the security system cuts power to the starter circuit if it rejects the key. The dashboard will show a lock code or warning flag.
How long should a Ducati battery last?
A quality motorcycle battery lasts three to five years. Keeping the cell on a smart tender during down times will extend this lifespan.
Can a faulty side stand switch stop the engine from starting?
Yes, a broken stand sensor kills the ignition loop to keep you safe. The bike will refuse to turn over if it thinks the stand is down.
What battery voltage is too low for starting?
Anything under 12.4 volts at rest is considered too weak. If the voltage drops below 10 volts during cranking, the computer will shut down.
Should I replace the starter relay first?
No, always test battery health under load before buying a relay. Most clicking relays are just responding to low system voltage from a weak cell.
When should I visit a Ducati dealer?
Go to a dealer if you face deep electronic errors or CAN bus faults. They have specific computer interfaces to read proprietary engine data.
Tools You’ll Need for DIY Diagnosis
Having a few basic tools makes troubleshooting safer, faster, and more accurate. These items belong in every rider’s garage tool chest.
The list below outlines the simple gear needed to perform all the basic steps in this guide. Invest in good tools to protect your bike.
Recommended Diagnostic Tools
| Tool | Purpose | Essential? |
| Digital multimeter | Battery and voltage testing | ✅ Yes |
| Battery load tester | Battery health check | Recommended |
| OBD diagnostic scanner | Read Ducati fault codes | Recommended |
| Spark tester | Verify ignition spark | Yes |
| Fuel pressure gauge | Test fuel delivery | Optional |
| Basic socket set | Remove covers and battery | Yes |
Final Recommendation
Fixing a ducati hypermotard not starting requires a patient check of the basics. My years working on Italian bikes show that simple battery drain causes most issues. Never buy expensive replacement components until you run a real load test on your current cell. Keep all your heavy wire leads clean and tight against the metal posts. Utilizing a smart tender when parked will preserve your battery life and keep your machine ready to hit the road.

Ehatasamul Alom is a dedicated road hybrid bikes expert. With over 15 years of experience, he helps people find the perfect ride. He began his journey as a bike mechanic. He learned the ins and outs of every bike.
Ehatasamul Alom holds a Master's degree in Mechanical Engineering from a Brown University (Providence US 02912), where he specialized in material science and bicycle kinematics. His master's thesis focused on optimizing frame geometry for road hybrid bikes to improve rider comfort and efficiency.
Ehatasamul has an extensive professional background. He spent 10 years (2010-2020) as a Senior Bike Designer at "Urban Cycles," a leading bicycle manufacturer. In this role, he led the development of several award-winning road hybrid bikes, which are known for their durability and performance. He later served (2020-2024) as the Head of Product Development at "Gear Up," a company specializing in high-end cycling components. There, he developed innovative parts and accessories specifically for road hybrid bikes.
Over the years, Ehatasamul has become an authority on Roadhybridbikes. He understands their design and function. His work focuses on making bikes easy to use. Ehatasamul believes everyone should enjoy cycling. He writes guides that are simple to read. His passion for road hybrid bikes is clear. His goal is to share his knowledge with everyone. He wants to see more people on two wheels. His advice is always practical and easy to follow.
- Ehatasamul Alom

- Ehatasamul Alom
- Ehatasamul Alom

- Ehatasamul Alom



