
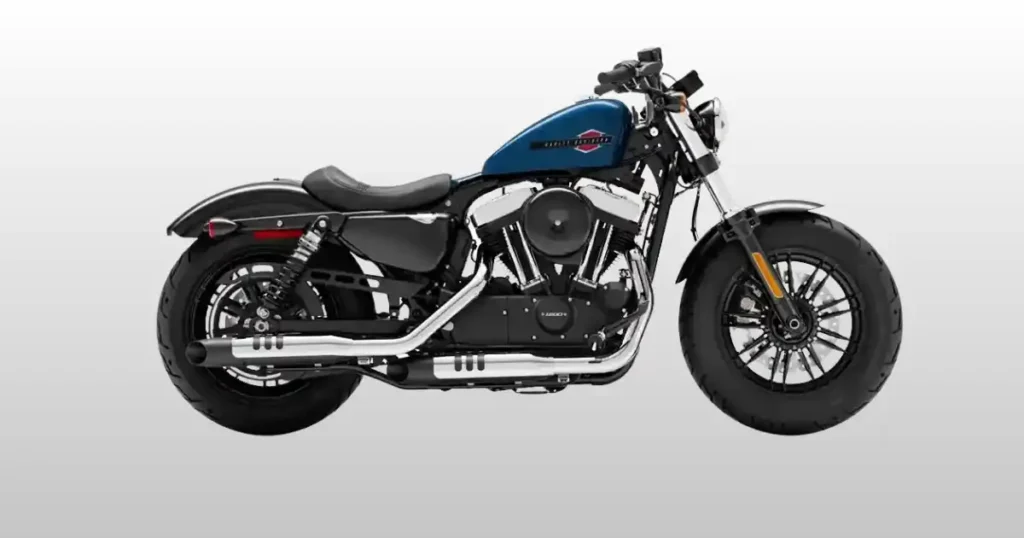
Few things sting quite like the metallic click of a dead motorcycle when you are ready to ride. There you are, geared up and eager to hit the road, but your bike refuses to cooperate. It happens to the best of us, and it often occurs at the worst possible time. Just last month, a close friend faced a sudden harley davidson 48 not starting issue right outside a quiet diner in Boston, Massachusetts. His sleek bike sat totally dead under the morning sun while our whole riding group looked on. We fixed it right there in the parking lot using a few basic steps. This guide will help you fix your own bike with total confidence.
Harley-Davidson 48 Not Starting? Start With These Quick Checks
Before replacing expensive parts, spend five minutes checking the basics. I’ve seen riders in Sturgis, South Dakota, miss an entire morning ride because a battery cable worked itself loose after hundreds of highway miles. The fix took less time than ordering breakfast. Sometimes motorcycles have a funny sense of humor.
Always look at the simple things first. A bumped switch or a loose wire can mimic a major failure. You do not need to be a professional mechanic to run through these items.
What Does Your Harley-Davidson 48 Do When You Press the Starter?
Pay close attention to the sounds and lights. Your bike speaks to you through these signs.
Nothing happens
The bike acts like the battery is missing. No lights turn on, and the starter button feels totally disconnected.
One loud click
You hear a sharp, single metallic thud. This usually means electrical power reaches the starter, but the motor cannot turn.
Rapid clicking
A machine-gun chattering sound fills the air. The lights usually flash along with the sound, indicating a low voltage state.
Engine cranks but never starts
The motor spins fast and free, but it never fires up. It sounds healthy but lacks the spark or fuel to run.
Engine starts then stalls
The V-Twin fires up for a brief second, sputters, and dies right away.
Slow cranking
The engine groans and turns over very slowly. It sounds like it is fighting through thick mud.
Lights dim while cranking
The main headlight or gauge cluster fades to black the moment you push the start button.
Security light flashes
A small red icon stays lit on your speedometer dial, showing the security system is locked.
Five-Minute No-Start Checklist
Run through these simple diagnostic checks right now.
- Check battery voltage: Use a small pocket meter to see if the battery holds a charge.
- Verify fuel level: Open the gas cap and physically shake the bike to see if you have fuel.
- Confirm engine stop switch position: Make sure the handlebar switch is set to the RUN position.
- Make sure the bike is in neutral: Ensure the green N light glows bright on your console.
- Check side stand position: Flip the stand up completely to clear the built-in safety switch.
- Listen for the fuel pump: Turn the key and listen for a two-second high-pitched hum.
- Inspect battery terminals: Wiggle the thick wires to ensure they are tight.
- Look for warning lights: Check for an active red key icon or a yellow engine light.
Signs the Problem May Be Serious
Watch out for these danger signs while you check the motorcycle.
Burning smell
An odor like burnt plastic means an electrical wire is melting. Stop testing immediately.
Smoke near wiring
Visible smoke around the seat or battery means a major short circuit is occurring.
Grinding starter noise
A harsh metal scraping sound means the starter gears are stripped or broken.
Fuel smell without starting
A strong odor of raw gas indicates the engine might be severely flooded.
Check Engine light remains on
A solid yellow engine light means the computer has stored a hard diagnostic fault code.
How the Harley-Davidson 48 Starting System Works
Understanding how the starting system works makes troubleshooting much easier. The Forty-Eight depends on several electrical and fuel components working together.
Components That Help Your Harley Start
Every part must do its job for the bike to roar to life.
- Battery: The main reservoir of 12-volt chemical energy for the entire bike.
- Starter relay: A small cube switch that routes low control currents to high power lines.
- Starter solenoid: An electromagnet that pushes the starter gear into the engine flywheel.
- Starter motor: A powerful electric motor that mechanically spins the heavy internal flywheels.
- ECU: The main digital brain that calculates fuel timing and spark delivery.
- Fuel pump: An electric pump inside the gas tank that pressurizes the fuel lines.
- Fuel injectors: Tiny electronic valves that spray a fine mist of gasoline.
- Ignition coil: A transformer that boosts low battery power into high-voltage current.
- Spark plugs: Small ceramic plugs that create an electric arc inside the combustion chamber.
- Crankshaft position sensor: A sensor that tells the computer exactly when to fire the spark.
- Bank Angle Sensor: A safety safety switch that shuts the bike down if it drops on its side.
- Side stand switch: A sensor that cuts power if you try to ride with the stand down.
- Harley security system: An anti-theft module that checks for your proximity key fob.
What Happens When You Press Start?
The entire process happens in a fraction of a second.
- ECU wakes up: Turning the key sends power to the main digital engine computer.
- Fuel pump primes: The pump runs for two seconds to build high pressure in the fuel line.
- Safety switches are checked: The computer verifies the bike is safe to crank.
- Starter relay closes: Small electrical signals tell the high-power relay to click shut.
- Starter motor turns the engine: Heavy current flows into the starter to spin the motor.
- Fuel injectors spray fuel: Timed pulses of fuel enter the warm intake ports.
- Spark plugs ignite the mixture: High-voltage arcs light the fuel inside the cylinders.
- Engine starts: The internal explosions take over and the bike runs on its own power.
Most Common Reasons a Harley-Davidson 48 Won’t Start
Nearly every no-start condition falls into four groups: battery, starter system, fuel system, or ignition. Following this order keeps troubleshooting simple.
Weak or Dead Battery
A weak battery is the number one cause of starting failures.
Common Symptoms
You will notice dim dash lights, a rapid clicking sound, or a complete lack of response when pushing the button.
Battery Voltage Test
Set your digital meter to DC volts. Touch the probes to the clean metal posts to read the resting charge.
Battery Load Test
Watch the meter screen while you press the start button. The number must stay above 9.6 volts during cranking.
When Replacement Is Better Than Charging
If a battery drops below 9 volts under a load, internal damage means it can no longer hold power safely.
Loose or Corroded Battery Cables
Loose connections stop electricity just like a broken wire.
Signs of Bad Connections
You might see white powdery crust around the terminals or notice the bike loses all power when it vibrates.
Cleaning the Terminals Properly
Remove the negative cable first, scrub the metal with a wire brush, and coat them with protective grease.
Faulty Starter Relay
This small black box sits inside the side fuse panel.
Clicking Sound Explained
A bad relay clicks softly but fails to pass the heavy electrical current down to the starter motor below.
Easy Relay Test
You can swap the system relay with the cooling fan or secondary relay to see if the bike cranks over.
Bad Starter Solenoid
The solenoid sits directly on top of the starter housing.
Common Symptoms
You will hear one single loud thud when you hit the button, but the engine will not move an inch.
Voltage Drop Testing
Attach your meter to the solenoid input and output posts to see if power gets lost inside the connection.
Worn Starter Motor
The starter motor handles the heavy mechanical lifting.
Slow Cranking
Internal wear makes the motor drag, turning the big V-twin engine over very slowly while getting very hot.
Current Draw Test
A shop tool measures how many amps the motor pulls. High amp draw means internal parts are binding up.
Fuel Pump Failure
Your fuel-injected Sportster needs high fuel pressure to run.
No Priming Noise
If you turn the key and hear absolute silence from the gas tank, the pump is not running.
Fuel Pressure Test
Hook a pressure gauge to the check-valve under the tank to see if it hits the required specification.
Dirty Fuel Injectors
Tiny passages inside the fuel injectors can clog easily.
Clogged Injector Symptoms
The engine may crank normally, sputter slightly, cough through the intake, or run very rough before dying.
Cleaning Options
You can pour high-grade injector cleaner into the tank or remove them for ultrasonic professional cleaning.
Fouled Spark Plugs
Spark plugs live in a harsh environment inside the combustion chamber.
Carbon Fouling
Heavy black soot coats the ceramic tip, which shorts out the electrical spark before it can light the gas.
Wet Spark Plugs
Too much fuel can soak the plugs, preventing the electrical arc from jumping across the small metal gap.
Correct Replacement Interval
Change your spark plugs every two years or ten thousand miles to keep the ignition path perfectly clean.
Ignition Coil Failure
The coil sends high voltage down the thick plug wires.
Weak Spark Symptoms
A failing coil causes a weak yellow spark instead of a bright, snapping blue arc that lights fuel easily.
Coil Resistance Test
Use your meter to check the internal wire loops for shorts or broken connections inside the coil body.
Harley Security System Problems
The factory anti-theft system can lock out the ignition.
Dead Key Fob Battery
A weak coin cell battery inside your key fob prevents the bike from recognizing you as the owner.
Immobilizer Issues
The security light will flash rapidly on the dash, and the bike will refuse to activate the starter line.
Bank Angle Sensor Problems
This safety switch cuts all fuel if the bike tips over.
Tip-Over Sensor Reset
Turn the key fully off, cycle the run switch, and turn the key back on to clear a false tip alarm.
Inspection Tips
Ensure the main sensor housing is mounted tightly to the frame and is not shaking loose while riding.
Wiring Harness Damage
Vibration can cause wires to rub against the metal frame.
Broken Grounds
A loose ground wire under the seat can cut all electrical flow to the computer in an instant.
Loose Connectors
Plastic plugs can click loose over time, breaking the connection to critical engine sensors.
Harley-Davidson 48 Cranks But Won’t Start
If the engine turns over normally but refuses to fire, focus on spark, fuel, and compression before replacing major components.
Check for Spark
Remove a spark plug, ground it against the engine cylinder engine block, and look for a bright blue flash while cranking.
Listen for Fuel Pump Priming
Listen closely to the fuel tank area. A clear humming sound must appear for two seconds when you flip the key.
Verify Fuel Injector Operation
Use a mechanic stethoscope or a small screwdriver pressed to your ear to listen for a steady clicking sound while cranking.
Measure Fuel Pressure
Attach a mechanical gauge to the fuel port. A healthy system must show steady pressure while the motor spins.
Inspect the Air Filter
Pop the round air cleaner cover off to ensure no dirt or debris blocks the airflow into the throttle throat.
Perform a Compression Test
Thread a pressure gauge into the spark plug hole to verify the pistons are sealing well enough to squeeze fuel.
Harley-Davidson 48 Starts Then Dies
When the bike starts but stalls after a few seconds, the problem usually involves fuel delivery, idle control, or an ECU input.
Fuel Pressure Loss
The pump might start strong but lose its pressure immediately due to a split fuel line inside the tank.
Dirty Fuel Injectors
Restricted fuel flow allows the engine to catch a brief prime but starves it the moment it needs more gas.
Vacuum Leak
Unmetered air entering through cracked rubber intake boots leans out the fuel mixture until the engine dies.
Idle Air Control Problems
A stuck idle control valve fails to provide bypass air when you let go of the starter button.
Faulty Sensors
A confused engine sensor can send bad temp data to the computer, causing it to cut fuel right after startup.
Harley-Davidson 48 Won’t Start After Winter Storage
Long storage creates its own list of problems. Weak batteries, stale gasoline, and moisture are the usual suspects.
Weak Battery
Sitting for months drains the small battery cells. A simple surface charge won’t give it the deep power needed to crank.
Old Fuel
Modern gasoline spoils in less than three months, turning into a sticky varnish that clogs internal passages.
Sticking Fuel Pump
Dried fuel residue can mechanically lock the small spinning impellers inside the pump assembly during storage.
Dirty Injectors
Old fuel sitting inside the tiny injector ports leaves behind solid deposits that completely block fuel delivery.
Rodent Damage
Mice love to chew on the sweet soy-based wire coatings, leaving behind chewed wires and broken circuits.
Harley-Davidson 48 Won’t Start After Rain
Water rarely ruins components, but moisture inside connectors can interrupt the electrical system just enough to stop the engine from starting.
Wet Spark Plug Boots
Water pooling inside the deep spark plug holes shorts out the high voltage spark before it reaches the cylinder.
Moisture Around ECU Connectors
Water inside the main computer plug bridges delicate pins together, confusing the digital brain completely.
Corroded Starter Relay
Moisture can creep into the side fuse block, causing green rust to grow across the relay terminals.
Water in Electrical Connectors
Wet handlebar switches can short out the run circuit, making the bike think you flipped the stop switch.
Step-by-Step Harley-Davidson 48 Troubleshooting Process
This is the same process many experienced Harley technicians use. I followed these exact steps one chilly Monday morning outside Nashville when a rider believed his fuel pump had failed. It turned out the battery dropped to 8.8 volts under load. The new battery fixed everything, and yes, he owed his riding buddies coffee.
Step 1 – Test Battery Voltage
Touch your digital meter to the battery posts. A healthy battery should read over twelve volts when sitting cold.
Step 2 – Perform a Battery Load Test
Watch the meter screen while you crank the bike. If the number plunges below nine volts, replace the battery.
Step 3 – Inspect Battery Connections
Grab the thick black and red wires and shake them. Clean away any corrosion and tighten the loose bolts down.
Step 4 – Check the Main Fuse
Locate the large forty-amp fuse behind the side cover. Look through the clear plastic window to see if the wire is blown.
Step 5 – Listen for the Fuel Pump
Flip the handlebar switch to run. Listen for the distinct two-second hum of the pump building line pressure.
Step 6 – Inspect Spark Plugs
Pull the plugs out with a deep socket. Check the tips for wet fuel or dark carbon buildup.
Step 7 – Test the Starter Relay
Pull the small cube relay from its socket. Check the pins for green rust or burn marks on the plastic base.
Step 8 – Measure Fuel Pressure
Connect a pressure gauge to the fuel system loop to ensure the fuel delivery is constant.
Step 9 – Check Engine Compression
Verify the mechanical health of the cylinders by checking if they hold enough pressure to burn fuel.
Harley-Davidson 48 No-Start Diagnosis Table
Diagnosing an issue is much faster when you use a clear guide. This table matches common symptoms with their primary causes so you can choose the right tool for the job without guessing.
| Symptom | Most Likely Cause | DIY Difficulty | Home Repair? |
| No response | Battery or fuse | Easy | Yes |
| Rapid clicking | Weak battery | Easy | Yes |
| One click | Starter relay | Easy | Yes |
| Cranks but won’t start | Fuel or ignition | Medium | Yes |
| Starts then dies | Fuel delivery | Medium | Sometimes |
| No fuel pump sound | Fuel pump | Medium | Sometimes |
| Security light flashing | Immobilizer | Medium | Sometimes |
| Slow crank | Starter motor | Medium | Sometimes |
Battery Voltage Reference Table
A simple digital meter reading tells you a lot about your electrical health. Use this reference chart to see if your battery can actually start a heavy V-twin engine.
| Voltage | Battery Condition | Recommended Action |
| 12.8–13.0V | Excellent | Continue testing |
| 12.5–12.7V | Good | Recharge if needed |
| 12.2–12.4V | Weak | Perform load test |
| Below 12V | Poor | Recharge or replace |
| Under 10V | Failed | Replace battery |
Harley-Davidson 48 Troubleshooting by Symptom
Starting problems leave clues behind based on how the bike acts. Use this quick symptom guide to target the exact area that needs your attention first.
| Symptom | Likely Cause | Check First |
| Single click | Starter relay | Battery voltage |
| Rapid clicks | Weak battery | Battery load |
| Cranks only | Fuel or spark | Spark plugs |
| Starts then dies | Fuel pressure | Fuel pump |
| Security light | Immobilizer | Key fob |
| Slow crank | Starter motor | Voltage drop |
Essential Tools Every Harley 48 Owner Should Have
Having the right gear on hand makes garage work simple and stress-free. These basic tools will help you track down almost any starting fault at home.
Recommended Tools
- Digital multimeter: A digital meter used to measure volts, ohms, and circuit shorts easily.
- Battery charger: A basic charger used to restore deep power to a flat battery safely.
- Smart battery tender: A smart device that maintains a healthy charge while your bike sits.
- Battery load tester: A specialty tool that tests battery power under a realistic starting load.
- Spark tester: A clear gap tool used to visually verify ignition health safely.
- Fuel pressure gauge: A mechanical gauge used to read line pressure from the pump system.
- Compression tester: A screw-in gauge used to measure internal mechanical cylinder pressure.
- Motorcycle scan tool: A digital code reader used to look at active engine diagnostic codes.
- Basic socket set: A collection of common sockets needed to remove brackets and body panels.
- Contact cleaner: A fast-drying spray used to clean oil and dirt out of electrical plugs.
- Flashlight: A bright light used to look into dark corners of the frame rails.
Common Mistakes Harley 48 Owners Make
Avoiding these common pitfalls will save you a lot of time and money. Many riders overcomplicate simple issues.
Replacing Parts Before Testing
Throwing new parts at a bike before testing is expensive. Always verify the root fault with a meter first.
Ignoring Battery Load Testing
A battery can show twelve volts on a screen but drop to zero under a load. Never trust static voltage alone.
Forgetting the Ground Cable
Riders often clean the positive post but forget the negative frame ground. A loose ground stops all power.
Using Stale Fuel
Trying to start a bike on year-old gas will foul the plugs. Always drain old fuel completely.
Skipping Spark Plug Inspection
Plugs tell the story of your engine health. Skipping this step leaves you blind to fuel or spark issues.
Ignoring Warning Lights
The dash lights are there to help you. Checking the stored codes first pointedly saves hours of manual work.
Expert Advice From a U.S. Harley Technician
Experienced technicians don’t guess. They verify every step with a meter before recommending repairs.
“Nearly seven out of ten no-start motorcycles that arrive at our shop have battery or cable issues, not failed starter motors. Always load-test the battery before replacing expensive components.” — Steve Anderson, Harley-Davidson Master Technician, Wisconsin
Why Battery Testing Always Comes First
The modern engine computer requires steady voltage to function. If the power drops even slightly, the computer turns off, stopping the fuel injectors and spark from working.
Real Workshop Example
- Saturday morning before a charity ride
- Rider suspected a failed starter
- Battery measured 12.6 volts at rest
- Voltage dropped below 9 volts during cranking
- Battery replacement solved the problem immediately
How to Prevent Harley-Davidson 48 Starting Problems
Small maintenance habits make a huge difference. Most starting problems are preventable.
Keep the Battery on a Smart Tender
Plug your bike into a smart charger whenever you are not riding. This simple habit doubles the lifespan of your battery.
Replace Spark Plugs on Time
Put in fresh plugs every two years to ensure you always get a clean, hot spark to light the fuel.
Ride the Bike Regularly
Short storage periods can hurt a bike. Regular rides keep the fuel moving and the internal engine parts coated in fresh oil.
Clean Battery Connections
Scrub your battery posts clean at least once a year to prevent corrosion from blocking the electrical current path.
Use Fresh Fuel
Always buy top-tier high-octane gasoline, and add a fuel stabilizer if you plan to let the bike sit for a month.
Protect Electrical Connectors
Apply a small dab of clear dielectric grease to open plugs to keep rain water and road grime out of the copper pins.
Follow Harley-Davidson Service Intervals
Stick to the factory maintenance schedule to catch small wear issues before they turn into a frustrating roadside breakdown.
When It’s Time to Visit a Harley-Davidson Dealer
Some faults require factory diagnostic equipment. If the basic tests don’t reveal the problem, professional diagnosis can save time and prevent unnecessary repairs.
ECU Communication Errors
If your digital scan tool cannot talk to the engine computer, a dealer must check the internal software maps.
Persistent Check Engine Light
A yellow light that returns after a reset means a sensor is broken or out of factory operating range.
Fuel Injector Failure
Replacing or balancing internal fuel injection bodies requires special tools that ensure proper fuel distribution.
Internal Engine Problems
Low cylinder compression means it is time for a professional shop teardown to inspect the piston rings or valves.
Wiring Harness Damage
Tracking down a broken wire deep inside the factory main harness bundle requires advanced tracing tools and factory schematics.
Harley-Davidson 48 vs Other Sportster Models
The Forty-Eight shares many components with other Sportster motorcycles, but each model develops its own maintenance patterns over time.
Harley-Davidson Forty-Eight vs Harley-Davidson Iron 883
The Forty-Eight runs a larger twelve-hundred V-Twin engine which requires more battery power to turn over than the smaller iron eight-eight-three motor.
Forty-Eight vs Harley-Davidson Nightster
The Nightster has a different seat and fender layout, meaning the path to access the main battery terminals varies slightly.
Forty-Eight vs Harley-Davidson Sportster S
The newer Sportster S uses a liquid-cooled engine with completely different electronics, fuses, and computer modules than the classic Evolution motor.
Common Starting Problems Across Sportster Models
All traditional Sportsters share a compact battery box location that gets cramped, making loose or rubbing ground cables a common headache for owners.
Frequently Asked Questions
Why is my Harley-Davidson 48 not starting even though the battery seems charged?
A battery can look good on a static test but fail completely when the starter asks for heavy cranking amps.
Why does my Harley 48 only click when I press the starter?
A single click means the solenoid engaged but the starter cannot turn. Rapid clicking means the battery is too low.
Can a weak battery prevent fuel injection from working?
Yes, if the voltage drops below ten volts, the engine computer shuts off, disabling the fuel injectors instantly.
Why won’t my Harley 48 start after sitting all winter?
Old fuel can gum up the injectors, or the battery may have slowly discharged down to a dead state over the cold months.
How do I know if the starter relay is bad?
If your lights stay bright but you hear nothing from the starter line when pushing the button, the relay is likely bad.
Can the Harley security system stop the motorcycle from starting?
Yes, if the security system does not see your key fob, it locks out the starter circuit and flashes the dash lights.
Why does my Harley 48 crank but never fire?
This happens when the motor spins but lacks fuel or a spark. Check for a humming fuel pump or fouled spark plugs.
What does it usually cost to repair a Harley-Davidson 48 that won’t start?
A loose wire costs nothing to tighten. A new battery runs around one hundred dollars, while a new starter can cost more.
Final Recommendation
When your bike refuses to fire up, do not panic or rush to buy expensive parts. My long experience with these machines shows that a simple loose wire or low battery is almost always the true culprit. Grab a basic digital meter, run through the voltage tests carefully, and ensure your connections are bright and tight. Taking care of these small maintenance details at home keeps your bike running strong and ensures you never get stranded on the road.

Ehatasamul Alom is a dedicated road hybrid bikes expert. With over 15 years of experience, he helps people find the perfect ride. He began his journey as a bike mechanic. He learned the ins and outs of every bike.
Ehatasamul Alom holds a Master's degree in Mechanical Engineering from a Brown University (Providence US 02912), where he specialized in material science and bicycle kinematics. His master's thesis focused on optimizing frame geometry for road hybrid bikes to improve rider comfort and efficiency.
Ehatasamul has an extensive professional background. He spent 10 years (2010-2020) as a Senior Bike Designer at "Urban Cycles," a leading bicycle manufacturer. In this role, he led the development of several award-winning road hybrid bikes, which are known for their durability and performance. He later served (2020-2024) as the Head of Product Development at "Gear Up," a company specializing in high-end cycling components. There, he developed innovative parts and accessories specifically for road hybrid bikes.
Over the years, Ehatasamul has become an authority on Roadhybridbikes. He understands their design and function. His work focuses on making bikes easy to use. Ehatasamul believes everyone should enjoy cycling. He writes guides that are simple to read. His passion for road hybrid bikes is clear. His goal is to share his knowledge with everyone. He wants to see more people on two wheels. His advice is always practical and easy to follow.
- Ehatasamul Alom

- Ehatasamul Alom
- Ehatasamul Alom

- Ehatasamul Alom



