
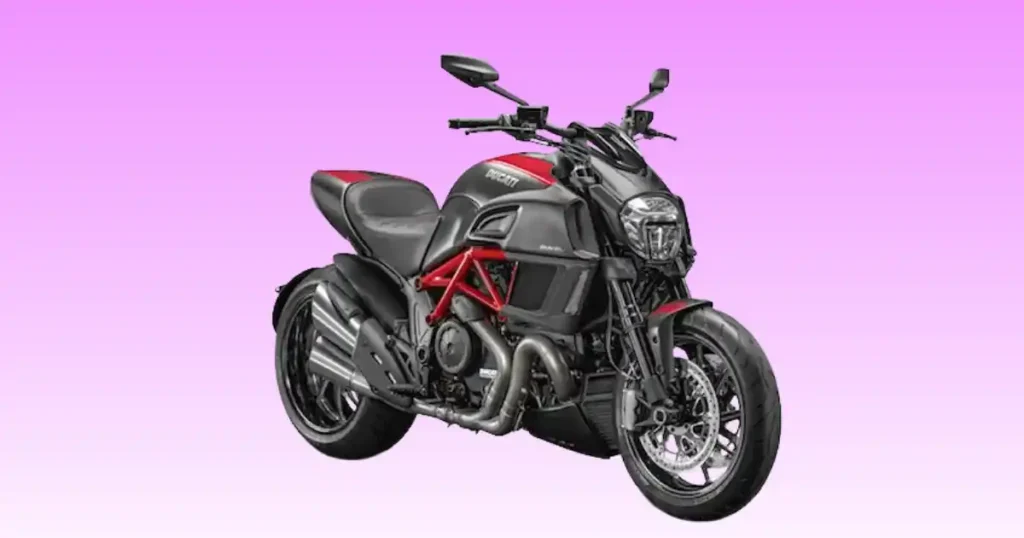
Hearing absolute silence when you press the starter button on a premium machine is a stressful experience. This complete diagnostic walkthrough helps you fix the issue safely. One chilly Sunday morning in Denver, Colorado, a Diavel owner thought the starter motor had failed after the bike stayed silent outside a café. Turns out, the battery terminal had loosened from vibration during a weekend ride through the Rockies. Tightened it, hit the starter, and that unmistakable Testastretta growl returned. Minor issues often mimic major component failures on these bikes. Let us walk through the process of diagnosing a ducati diavel not starting using simple tools.
First Things to Check When Your Ducati Diavel Won’t Start
Before assuming the worst, start with the simple stuff. Italian electronics require clean power connections and exact safety signals. A tiny fault in a basic circuit can lock out the ignition system entirely. By isolating what happens when you try to crank, you save hours of unnecessary work.
What Happens When You Press the Starter?
- No response at all: The bike acts dead, which means a main fuse blew or the battery is completely out of juice.
- One clicking sound: The starter relay engages, but there is not enough electrical current to turn the motor.
- Rapid clicking noise: The battery voltage is too low to hold the main starting circuit closed under load conditions.
- Slow engine cranking: The engine turns over sluggishly due to terminal resistance or high internal starter wear.
- Engine cranks but won’t fire: The rotating assembly spins fine, pointing to a lack of fuel or ignition spark output.
- Starts briefly then stalls: The engine catches but dies instantly from a vacuum leak or low fuel pump pressure.
- Dashboard lights stay on but engine won’t crank: The screen works perfectly, but a safety switch blocks the high-current relay path.
- Immobilizer warning appears: The system fails to read the security transponder key signal, locking out the main ECU.
Five-Minute Safety Inspection
- Confirm battery voltage: Connect a digital multimeter across the battery leads to verify a strong resting charge.
- Check fuel level: Open the gas cap to look inside rather than relying on a low fuel warning light.
- Verify engine kill switch: Make sure the handlebar switch is set to the run position before pressing the start button.
- Ensure side stand position: Flip the stand up completely to clear the safety interlock line for testing.
- Pull in the clutch lever: Disengage the clutch fully to rule out any drag or microswitch position faults.
- Check neutral indicator: Confirm the green dashboard light is active, which indicates the transmission drum is in neutral.
- Inspect battery terminals: Check the positive and negative screws under the seat for loose threads or corrosion crust.
- Listen for fuel pump priming: Turn the ignition on and listen for a brief high-pitched buzz from the tank.
Stop Troubleshooting Immediately If You Notice
- Burning electrical smell: Turn the key off right away to avoid melting the primary wire harness loom insulation.
- Smoke from wiring: Disconnect the negative battery post instantly to prevent a severe electrical fire in your garage.
- Fuel leaking onto the engine: Stop cranking immediately to avoid a catastrophic fire from a loose fuel line fitting.
- Grinding starter noises: Stop testing before the starter clutch teeth strip out and drop metal chips into the oil.
- Repeated blown fuse: Do not install a larger fuse; find the direct short circuit in the wiring loom first.
- Severe engine knocking: Loud metal clatter while cranking means mechanical timing wear, so stop turning the motor over.
Understanding the Ducati Diavel Starting System
The Diavel utilizes a highly integrated electrical architecture where multiple modules talk to each other over a digital network. Knowing how these parts interact prevents you from changing parts randomly.
Major Components in the Starting System
- Battery: The electrical core that supplies steady direct current to the computer networks and starter motor.
- ECU: The engine control unit engine management computer that commands spark and injector pulse width timing.
- Immobilizer: An anti-theft module that reads the security key transponder chip before enabling the spark coils.
- Smart key: A wireless key fob that passes an encrypted digital token to the hands-free receiver ring.
- Starter relay: An electromagnetic switch that allows a low-current button signal to move high-current battery power safely.
- Starter solenoid: An internal device that pushes the starter drive gear into mesh with the flywheel ring.
- Starter motor: A high-torque electric motor that physically spins the crankshaft assemblies to start combustion.
- Fuel pump: An electric high-pressure unit submerged inside the fuel tank to feed the injector rails.
- Fuel injectors: Solenoid valves that spray a mist of atomized premium fuel into the intake runners.
- Ignition coils: Compact high-voltage transformers mounted directly above or near the spark plug caps.
- Spark plugs: Electrodes that extend into the combustion chamber to ignite the compressed fuel air mix.
- Crankshaft position sensor: A magnetic pickup that tracks engine rotation speed and piston location for the ECU.
- Side stand switch: A safety sensor that prevents the motorcycle from moving if the kickstand is down.
- Clutch safety switch: A microswitch on the lever perch that confirms the clutch plates are separated.
- Neutral switch: A contact switch on the gearbox case that reads when the bike is out of gear.
- Main fuse: A heavy-gauge safety link that protects the main power distribution grid from current overloads.
- Stator: An internal multi-phase AC generator that charges the battery while the engine runs.
- Regulator/rectifier: A cooling fin block that converts raw AC stator current into smooth 14-volt DC power.
How the Starting Sequence Works
- Battery powers the ECU: Turning the key or waking the hands-free switch boots up the control modules.
- Immobilizer verifies the key: The security antenna ring authenticates the close-range transponder chip or smart key code.
- Safety switches are checked: The computer verifies the side stand, clutch, and gear position sensors are safe.
- Fuel pump primes: The pump runs for two seconds to build full working pressure in the lines.
- Starter relay activates: Pressing the starter button triggers the relay coil, closing the heavy high-amp copper contacts.
- Starter motor cranks engine: High-current power flows into the motor brushes, turning the crankshaft and moving pistons.
- ECU delivers spark and fuel: The computer reads the crank sensor and commands the coils and injectors to fire.
- Engine starts and idles: The combustion process takes over, the starter clutch overruns, and the engine idles smoothly.
Common Reasons a Ducati Diavel Is Not Starting
Most issues stem from battery health, connection resistance, or safety interlocks. Finding the root cause requires methodical inspection rather than guesswork.
Weak or Dead Battery
Typical Symptoms
The dashboard screen may flicker or go completely blank when you hit the start button. You might hear a clicking sound while the instrument needles sweep back and forth erratically.
Battery Voltage Test
Switch your digital multimeter to DC volts. Touch the red meter probe to the positive post and the black probe to the negative post. A healthy battery at rest should read 12.8 volts.
Battery Load Test
A battery can show high static voltage but drop to nothing under load conditions. Leave your meter connected while pressing the starter button; if the number dips below 10 volts, it lacks cranking power.
Battery Replacement Signs
If the battery refuses to stay above 12.4 volts after hours on a smart battery tender, its internal lead plates are sulfated. Swap it out for a fresh unit.
Loose or Corroded Battery Connections
Ground Cable Inspection
Follow the heavy negative cable down to where it bolts onto the engine case. If this connection point is dirty or loose, the starter circuit will lose its ground return path.
Cleaning Battery Terminals
Remove the negative cable first to prevent short circuits. Clean away any white powdery corrosion using a wire brush, spray with contact cleaner, and tighten the hardware firmly with a wrench.
Starter Relay Failure
One Loud Click
If you hear one solid click from under the seat but the starter motor does not budge, the internal relay contacts may be burned out.
Relay Testing
You can check a relay by jumping its two heavy copper posts with an insulated tool. If the engine cranks when you bridge them, the starter motor is fine, but the relay or its trigger wire is bad.
Faulty Starter Motor
Slow Engine Cranking
When the battery is strong but the engine turns over with a heavy groan, the starter motor may have excessive internal resistance.
Internal Motor Wear
Over time, copper brush dust fills the gaps inside the starter housing, causing an internal short circuit. This reduces torque and makes the starter draw too much current.
Immobilizer or Key Recognition Failure
Dashboard Warning Messages
If the key icon stays lit, the hands-free antenna is failing to read your smart key fob token. This locks out the ignition circuit.
Testing with a Spare Key
Place your plastic active spare key directly against the dashboard antenna sweet spot. If the bike wakes up immediately, your main smart key battery is dead or its transmitter is broken.
Fuel Pump Failure
No Priming Noise
If you turn on the bike in a quiet garage and hear no pump whistle from the fuel tank, the pump motor is stuck or its power relay has failed.
Fuel Pressure Diagnosis
Connect a mechanical pressure gauge to the delivery line outlet. When you cycle the system, the fuel pump must reach full operating pressure instantly to feed the fuel injection valves.
Dirty or Clogged Fuel Injectors
Fuel Delivery Problems
Old fuel can deposit a sticky varnish inside the microscopic passages of a fuel injector tip. This distorts the spray pattern, preventing proper fuel delivery to the cylinders.
Injector Cleaning
Minor buildup can be cleared by adding a high-quality concentrated injector cleaner to a fresh tank of premium fuel. Severe clogs require removal for professional ultrasonic cleaning.
Worn Spark Plugs
Weak Spark
As spark plugs age, the metal electrodes wear down, creating a gap that is too wide for a clean spark snap. This results in weak combustion.
Fouled Electrodes
Short cold starts can leave a layer of black carbon soot on the plug tips. This carbon conducts electricity away, grounding out the spark before it can jump the gap.
Ignition Coil Failure
Coil Resistance Test
Use your digital multimeter to check the resistance values across the primary and secondary coil windings. If the numbers do not match factory specs, the coil has an internal short.
Misfire Symptoms
A failing ignition coil usually causes a rough idle, a flashing check engine light, or a clear misfire under heavy throttle load before dying completely.
Side Stand or Clutch Switch Problems
Safety Switch Diagnosis
These microswitches operate in areas exposed to road grime and grease. If the clutch safety switch sticks open, the ECU assumes the clutch is engaged and blocks the starter relay from closing.
Charging System Failure
Bad Stator
A burnt stator stop producing AC current, forcing the bike to draw all its running power from the battery until the cell drains flat on the highway.
Faulty Regulator/Rectifier
When a regulator fails, it can stop charging entirely or allow voltage spikes to damage sensitive digital dash displays and blow main fuses.
ECU or Sensor Issues
Crankshaft Position Sensor
The ECU requires a clean signal from this sensor to know engine speed. If the pickup fails, the computer cuts all spark and fuel injector operations out of safety.
ECU Fault Codes
Plug an OBD scanner tool into the diagnostic port under the seat to read any stored error codes. This pinpoints failing engine sensors instantly.
Ducati Diavel Cranks but Won’t Start
If the engine turns over normally but refuses to fire, the problem usually involves fuel, spark, or compression. You can isolate the problem by systematically checking each core input using standard tools.
We can save time by matching our troubleshooting steps to the core mechanical requirements of the engine. Use this structured reference guide to check each system component in order.
| Priority | Test Sequence | Expected Result |
| Step 1 | Check for Spark | Clear blue spark jumping the plug gap |
| Step 2 | Test Fuel Pump Pressure | Steady fuel line holding pressure |
| Step 3 | Inspect Fuel Injectors | Fine atomized mist during engine cranking |
| Step 4 | Verify Air Intake | Clear airbox paths and clean air filter element |
| Step 5 | Perform Compression Test | Equal, high pressure across both cylinders |
| Step 6 | Scan ECU Diagnostic Codes | Clear display screen with no active fault numbers |
Check for Spark
Remove a spark plug and push it into its wire boot. Hold the plug threads against a bare metal spot on the engine block while cranking. Look for a bright blue snap at the tip.
Test Fuel Pump Pressure
Tap a fuel pressure gauge into the high-pressure fuel line fitting. Cycle the run switch to ensure the fuel pump builds and holds pressure without dropping back down.
Inspect Fuel Injectors
Pull the injector modules out of the throttle bodies while leaving the fuel lines attached. Crank the engine briefly to verify that a fine, symmetrical mist sprays from the nozzles.
Verify Air Intake
Open the bodywork panels to access the main intake ducts. Ensure that road debris or storage nests have not blocked the air filter element, starving the engine of oxygen.
Perform Compression Test
Thread a mechanical compression tester into the spark plug hole. Crank the engine with the throttle wide open until the gauge needle stops rising to check internal valve seating.
Scan ECU Diagnostic Codes
Connect your OBD diagnostic scanner to the factory reading port. Check the menu for any active codes related to the crankshaft sensor or ignition system lines.
Ducati Diavel Starts Then Dies
When the motorcycle starts for a second before shutting off, fuel delivery or sensor issues are often responsible.
Fuel Pressure Problems
The pump might have enough strength to prime the lines for an initial fire, but fail to maintain flow under continuous running conditions. A clogged internal fuel filter limits volume, causing the engine to starve for fuel and stall out.
Dirty Injectors
Restricted injector tips might allow enough fuel through during cold-start fuel enrichment cycles but fail to sustain a smooth idle once the ECU thins out the mixture for normal running temperatures.
Idle Control Issues
Modern engines use an electronic idle bypass system to meter air at a stop. If this bypass valve gets gummed up with carbon oil vapor, the engine will die the moment you let go of the throttle.
Vacuum Leaks
Cracked rubber intake boots or loose vacuum hoses let unmetered air enter behind the throttle plates. This leans out the fuel mixture drastically, causing a rough idle that quickly stumbles and stalls.
ECU Sensor Malfunctions
If the air temperature or manifold pressure sensors send incorrect data to the ECU, the computer will calculate the wrong fuel mix, causing the engine to die as soon as it tries to settle into an idle.
Ducati Diavel Won’t Start After Storage
Long periods without riding can affect both the battery and fuel system.
Battery Self-Discharge
Even when the key is off, the hands-free security system draws a small standby current. This continuous draw can pull a premium battery down to a completely dead state within a few weeks of storage.
Fuel Breakdown
Modern premium pump fuel starts losing its volatile compounds within thirty days. It turns into a stale liquid that resists clean ignition and leaves sticky lacquer behind in the tank.
Moisture in Connectors
Ambient temperature swings cause condensation to form inside unsealed electrical plugs during storage. This dampness shorts out weak low-voltage sensor signals back to the main ECU.
Corroded Battery Terminals
As a motorcycle sits idle, airborne moisture reacts with the lead and copper battery connections. This forms a layer of high-resistance oxide that blocks heavy starter current from flowing.
Fuel Injector Deposits
The tiny amount of fuel left inside an injector nozzle evaporates during storage, leaving behind hard varnish solids. These solids stick the internal needle valve shut, blocking fuel flow.
Ducati Diavel Won’t Start After Rain
Water and electronics rarely get along. Moisture can interfere with ignition and electrical connections.
Wet Ignition Components
Heavy rain can force water past body panels onto the ignition coil packs. High-voltage current always takes the path of least resistance, jumping down the wet frame instead of going through the spark plug tip.
Water Around Spark Plug Wells
The deep spark plug wells on these cylinder heads can trap water if the small cast drain holes get plugged with road grime. This grounds out the spark plug cap completely.
Moisture Inside Handlebar Switches
Water can easily work its way past the plastic seams of your handlebar starter switch housing. This corrodes the tiny copper contact pads, cutting off the button signal to the starter relay.
ECU Connector Inspection
If the main harness plug seals are old or out of position, moisture can creep into the computer pins. This causes false sensor readings and intermittent no-start faults until the pins dry out.
Step-by-Step Ducati Diavel No-Start Diagnosis
Professional mechanics don’t guess they test. One rainy Tuesday in Portland, Oregon, a rider feared his fuel pump had failed because the engine only clicked. After a quick load test, the battery voltage dropped below 9 volts under load. A fresh battery solved everything before lunch. Sometimes the simplest answer really is the right one. Follow this clear sequence to find the issue without wasting time.
1.Measure Battery Voltage: The foundation of all electrical troubleshooting.
Connect your digital multimeter to the battery posts. Ensure you see at least 12.6 volts before trying to crank the engine.
2.Perform a Battery Load Test: Watch the meter face during a crank attempt.
Press the starter button while watching the display. Verify that the voltage stays above 10 volts while the starter spins.
3.Inspect Battery Connections: Verify both power and ground lines.
Check the heavy main ground wire connection on the engine case to make sure it is clean, bright, and bolted down tight.
4.Check the Main Fuse: Look for an open circuit path.
Pull the primary high-amp fuse from its holder and inspect the internal metal link for a clean break.
5.Verify Immobilizer Operation: Confirm the security handshake is successful.
Watch the dashboard display screen to ensure the security key icon clears after the system completes its initial boot cycle.
6.Listen for Fuel Pump Priming: Listen closely near the fuel tank area.
Turn the run switch on and listen for a distinct two-second high-pitched whistle from inside the fuel tank shell.
7.Test Ignition Spark: Check for high-voltage ignition output.
Ground a spare spark plug against a bare cylinder head bolt and check for a strong blue flash during cranking.
8.Perform Compression Test: Rule out internal mechanical wear issues.
Thread a mechanical gauge into the spark plug ports to confirm the pistons and valves develop normal working compression.
9.Read ECU Error Codes: Read the stored digital memory bank.
Plug an OBD diagnostic scanner tool into the factory connector port to see exactly what sensor is flagging an error.
Ducati Diavel Starting Problems by Symptom
After working on Italian motorcycles for years, one pattern becomes clear: the symptom often points directly to the fault. This table will help you quickly link what you see to what you need to fix, helping you save valuable diagnostic time in your home garage.
| Symptom | Likely Cause | Difficulty | DIY Repair |
| No crank | Dead battery | Easy | Yes |
| Single click | Starter relay | Easy | Yes |
| Rapid clicking | Weak battery | Easy | Yes |
| Slow cranking | Starter motor | Medium | Sometimes |
| Cranks but won’t start | Fuel or spark | Medium | Yes |
| Starts then dies | Fuel delivery | Medium | Sometimes |
| Immobilizer light | Key recognition | Medium | Sometimes |
Ducati Diavel Battery Voltage Guide
A quality digital multimeter tells you more than guesswork ever will. This reference chart outlines exactly what your voltage readings mean for standard 12-volt motorcycle battery health.
| Voltage | Battery Health | Recommended Action |
| 12.8V–13.0V | Excellent | Continue standard diagnosis |
| 12.5V–12.7V | Good | Perform a battery load test |
| 12.2V–12.4V | Weak | Recharge battery on a smart charger |
| Under 12V | Poor | Plan to replace the cell soon |
| Below 10V while cranking | Failed | Replace the battery immediately |
Diagnose the Problem Faster
The quickest repairs usually begin with the right diagnosis instead of random parts swapping. Use this fast reference guide to isolate the most likely component fault based on specific motorcycle behavior.
| Problem | Most Likely Cause | First Inspection |
| Dashboard dead | Main fuse or battery | Static voltage test across posts |
| Single click | Faulty starter relay | Check battery terminal tightness |
| Engine cranks | Fuel delivery fault | Listen for fuel pump priming buzz |
| No spark | Ignition coil failure | Inspect spark plugs for carbon fouling |
| Warning light | Immobilizer lockout | Try starting with the plastic spare key |
| Starts then stalls | Fuel injector clog | Run a fuel pump system pressure test |
Ducati Diavel Preventive Maintenance Schedule
Preventive maintenance is far less expensive than emergency repairs. This schedule keeps your high-performance cruiser starting reliably through all riding seasons.
| Component | Service Interval | Action to Take |
| Battery inspection | Monthly | Check static voltage and look for case swelling |
| Battery terminals | Every 6 months | Clean away copper sulfate oxide and tighten bolts |
| Spark plugs | Ducati service interval | Check electrode wear gap and clean off carbon |
| Air filter | Major service | Inspect element for restriction or airbox debris |
| Fuel injectors | 12,000–15,000 miles | Run a dedicated fuel system cleaner through fresh gas |
| Charging system | Yearly | Measure battery charging voltage at 4,000 RPM |
| Electrical connectors | Annual inspection | Spray critical plugs with electrical contact cleaner |
Essential Tools for Diagnosing Starting Problems
Most starting issues can be diagnosed at home with a handful of quality tools. Building a solid diagnostic kit saves money and helps you understand your machine’s electrical system configuration.
Recommended Workshop Tools
- Digital multimeter: Necessary for tracing voltage drops, wire continuity, and charging system health accurately.
- Battery charger: A dedicated smart tender that monitors cell voltage and maintains peak charge during storage.
- Battery load tester: Applies a true carbon pile load to verify if a battery has real internal cranking power.
- OBD diagnostic scanner: Connects directly to the factory computer line to pull active check engine fault codes.
- Spark tester: Allows you to safely look at ignition spark strength without removing the fuel injection lines.
- Compression tester: Measures internal engine pressure to verify valve adjustments and piston ring seating.
- Fuel pressure gauge: Inline tester that monitors fuel pump output to rule out delivery restrictions or line leaks.
- Contact cleaner: Fast-evaporating spray that clears grease, oil, and moisture out of multi-pin wire plugs.
- Metric socket set: Standard sizes needed to quickly remove seats, body fairing panels, and battery mounting trays.
- Torque wrench: Ensures engine case grounds and high-current relay terminals are tightened to factory specifications.
Common Mistakes Ducati Owners Make
Many expensive repairs begin with replacing parts before confirming the real problem. Tracing faults methodically keeps repair bills manageable.
Ignoring Battery Load Testing
Riders often assume a battery is perfect because the multimeter shows 12.6 volts at rest. A cell with an internal short will read fine on a voltmeter but drop to nothing the instant the starter button demands heavy current.
Replacing the Starter Too Soon
Do not buy a new starter motor just because the bike clicks. Most clicking sounds mean the starter relay is doing its job, but a weak battery or bad ground connection is blocking the high-current flow.
Forgetting the Side Stand Switch
It is easy to spend hours checking fuel injection lines while forgetting that a sticking side stand microswitch will cut the ignition path instantly when you drop the bike into gear.
Ignoring Immobilizer Warnings
If the yellow padlock or key error is flashing on your dash screen, the computer will crank the engine but never allow spark. Check your dash lights before pulling fuel lines apart.
Using Stale Fuel
Leaving a bike sitting for six months over winter without stabilizer ruins fuel quality. Trying to start the engine on old fuel will lacquer up your injector screens very quickly.
Skipping Ground Cable Inspection
The heavy negative lead bolts directly to the engine case to complete the high-current starter loop. If this bolt loosens from chassis vibration, the starting system will act completely dead.
USA Motorcycle Expert Advice
Experienced technicians agree that testing beats guessing every time. Taking a systematic approach prevents throwing money at good components.
“On Ducati motorcycles, nearly half of no-start complaints are traced to weak batteries, charging faults, or loose electrical connections. Verify battery voltage under load before replacing expensive components.” — Michael Thompson, European Motorcycle Technician, California
Why Professional Diagnosis Starts with the Battery
The digital modules on a modern Italian cruiser are very sensitive to voltage quality. A battery that drops just below a specific threshold during cranking can cause the ECU to reset mid-cycle, cutting off spark delivery even though the engine appears to be spinning over normally.
Real Workshop Experience
On a busy Friday afternoon, a rider had his machine towed into the shop, convinced the engine control module had failed completely. The dash lit up, but hitting the switch resulted in erratic error messages. While the battery read fine on a basic static test, our load tester exposed a fractured internal cell plate that collapsed under load. Installing a fresh battery solved the problem instantly, getting the rider back on the road before the weekend.
How to Prevent Ducati Diavel Starting Problems
Small maintenance habits can prevent major repair bills and unexpected roadside frustration.
Keep the Battery on a Smart Charger
If your motorcycle sits for more than five days without being ridden, hook it up to a smart battery tender. This counteracts the constant background draw from the hands-free key security module.
Ride the Motorcycle Regularly
Short three-mile trips do not give the charging system enough time to replenish the heavy electrical energy used to start the large engine cylinders. Take the bike on longer highway runs to keep the cells topped up.
Use Fresh Premium Fuel
Always fill up with high-quality, high-octane fuel from busy service stations to minimize the risk of water contamination. Fresh fuel keeps the internal injection components free of gummy fuel deposits.
Inspect Battery Connections
Every six months, take off the seat and make sure the terminal bolts are snug. High-performance cruisers produce heavy chassis pulses that can slowly back out battery hardware over time.
Test the Charging System Every Year
Hold your digital multimeter across the battery posts while revving the engine to 4,000 RPM. Verify that you see between 14.0 and 14.5 volts, showing the stator and regulator are functioning perfectly.
Follow the Ducati Maintenance Schedule
Sticking to factory service intervals ensures items like valve adjustments and spark plug changes happen on time. This maintains high compression and clean ignition characteristics for easy starting.
When Should You Visit a Ducati Dealer?
Some faults require factory diagnostic equipment and specialized software that standard home workshop tools cannot match.
Immobilizer Programming Issues
If the hands-free system completely loses track of your smart key fobs, a certified dealer must use proprietary factory software to code new transponder chips to the digital dashboard mainframe.
ECU Communication Errors
When a professional scan tool reports a total lack of communication over the CAN-bus network, a factory technician needs to trace data lines or flash the base firmware files.
Fuel Pump Replacement
Changing out the internal high-pressure fuel pump assembly involves specialized locking ring tools and specific sealing steps to avoid dangerous high-pressure fuel leaks above the engine cylinders.
Wiring Harness Damage
If a main wire loom rubs through against the steel trellis frame tubes, expert pin soldering or a complete factory harness swap is required to protect sensitive low-voltage sensor circuits.
Low Engine Compression
If a compression gauge shows low pressure in a cylinder, a dealer needs to use advanced bore scopes to check for tight valve clearances or internal cylinder wall wear.
Ducati Diavel Compared with Similar Power Cruisers
Many modern performance cruisers share similar electronic ignition and fuel injection systems, making troubleshooting methods surprisingly consistent.
Ducati Diavel vs Harley-Davidson Breakout
The Harley-Davidson Breakout uses a large American V-twin engine that requires massive cranking current from its battery. While its electrical system is simpler and lacks the advanced ride-by-wire controls of the Ducati Diavel, its heavy starter components are highly prone to connection failure from engine vibration.
Ducati Diavel vs Triumph Rocket 3
The massive three-cylinder engine in the Triumph Rocket 3 relies on a heavy-duty starting system to move its large displacement pistons. The Rocket 3 uses a complex modern electronics package similar to the Diavel, meaning both bikes are highly sensitive to slight voltage drops during cold morning starts.
Ducati Diavel vs Yamaha VMAX
The legendary Yamaha VMAX utilizes a high-revving V4 engine architecture with Japanese switchgear that is highly resilient against rain and moisture infiltration. However, its compact fuel system layout makes accessing the fuel injectors for cleaning much more difficult than on the exposed frame lines of the Diavel.
Common Starting Problems Across High-Performance Cruisers
Across all high-performance muscle bikes, battery neglect remains the primary cause of starting issues. These engines use high-compression cylinders that demand perfect electrical current to turn over, meaning any corrosion on main ground cables or old battery cells will stop them from starting immediately.
Frequently Asked Questions
Why is my Ducati Diavel not starting?
The most common reasons include a low battery charge, loose terminal hardware under the seat, a sticking side stand safety microswitch, or an immobilizer system that fails to read your smart key signal.
Why does my Ducati Diavel click but not start?
A quick clicking sound means the battery lacks the current needed to hold the starter relay closed under heavy engine load. A single solid click points to a failing relay switch or a locked starter motor shaft.
Why does my Ducati Diavel crank but won’t fire?
If the engine turns over normally but will not catch, the issue is usually a lack of fuel delivery from a dead fuel pump or a missing ignition spark caused by fouled spark plugs.
Can a weak battery power the dashboard but prevent starting?
Yes, the digital display screen needs very little power to turn on, while the high-compression starter motor requires massive high-current delivery to physically spin the crankshaft assemblies.
What does the immobilizer warning light mean?
It means the anti-theft computer cannot verify the digital security code from your smart key fob. The system will safely lock out the ignition and fuel injection systems until a valid key is read.
How do I know if my starter relay has failed?
If your battery passes a load test but bridging the two large copper terminals on the starter relay with an insulated tool causes the engine to spin instantly, the relay is bad.
Why won’t my Ducati Diavel start after winter storage?
The battery has likely self-discharged from the constant security module background draw, or the fuel inside the tank has degraded and gummed up the internal fuel injector ports.
How much does it cost to repair a Ducati Diavel that won’t start?
Simple fixes like tightening a loose ground bolt or cleaning off corroded terminals cost nothing at home. A quality replacement battery costs around 100 to 180 dollars, while complex electronic faults can cost more for dealer diagnostics.
Final Recommendation
Dealing with a motorcycle that refuses to fire up can be highly frustrating, but a methodical approach solves the issue nearly every time. Based on my extensive experience troubleshooting these Italian performance cruisers, the vast majority of starting failures come down to basic battery maintenance and clean electrical ground connections.
Before assuming a major computer or fuel system failure has occurred, always perform a reliable battery load test and ensure your smart key fob battery is fresh. Keeping your primary power paths clean and using a high-quality smart battery tender during storage periods is the most effective way to protect your machine’s electrical system and ensure a reliable start on every single ride.

Ehatasamul Alom is a dedicated road hybrid bikes expert. With over 15 years of experience, he helps people find the perfect ride. He began his journey as a bike mechanic. He learned the ins and outs of every bike.
Ehatasamul Alom holds a Master's degree in Mechanical Engineering from a Brown University (Providence US 02912), where he specialized in material science and bicycle kinematics. His master's thesis focused on optimizing frame geometry for road hybrid bikes to improve rider comfort and efficiency.
Ehatasamul has an extensive professional background. He spent 10 years (2010-2020) as a Senior Bike Designer at "Urban Cycles," a leading bicycle manufacturer. In this role, he led the development of several award-winning road hybrid bikes, which are known for their durability and performance. He later served (2020-2024) as the Head of Product Development at "Gear Up," a company specializing in high-end cycling components. There, he developed innovative parts and accessories specifically for road hybrid bikes.
Over the years, Ehatasamul has become an authority on Roadhybridbikes. He understands their design and function. His work focuses on making bikes easy to use. Ehatasamul believes everyone should enjoy cycling. He writes guides that are simple to read. His passion for road hybrid bikes is clear. His goal is to share his knowledge with everyone. He wants to see more people on two wheels. His advice is always practical and easy to follow.
- Ehatasamul Alom

- Ehatasamul Alom
- Ehatasamul Alom

- Ehatasamul Alom



