
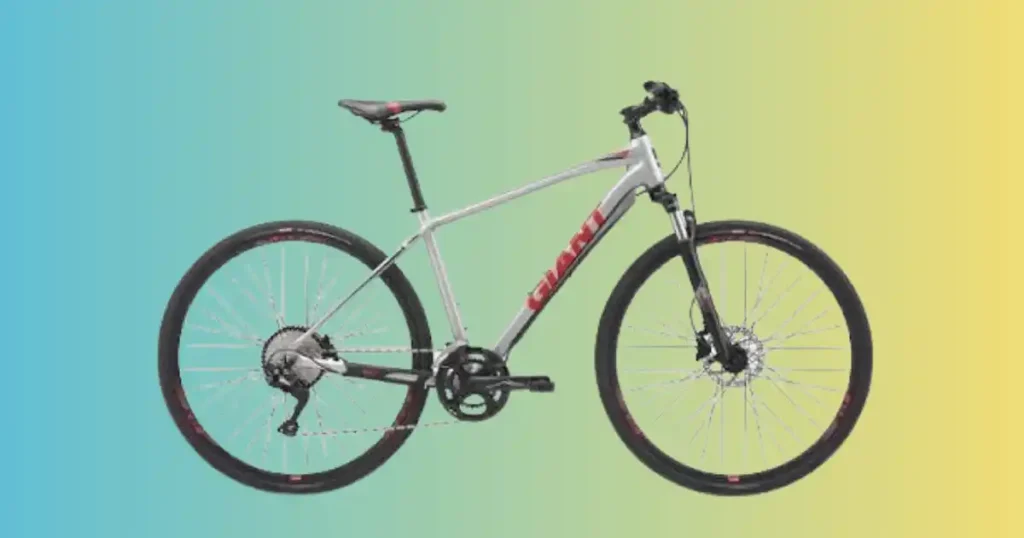
Your Roam sits in the garage, ready for a Seattle morning ride, and it just will not budge. Take a breath first, since a Giant Roam 1 Disc not starting almost never means the bike is broken. There is no ignition and no starter here, so “not starting” really means the bike will not move, pedal, roll, or send power to the rear wheel. If you are new to hybrid bikes, our guide on how a road hybrid bike works is a helpful place to start, especially if you rely on this bike for commuting. Riders often reach straight for the derailleur, but that is rarely the fix. Start with the wheels and brakes instead, then work through the tyres, chain, drivetrain, crank and bearings in order. This guide walks through all nine fixes in plain, simple steps.
What Does “Giant Roam 1 Disc Not Starting” Mean?
The phrase can describe several different faults, and each one points to a different part of the bike. Identifying the exact symptom first makes the rest of the diagnosis much quicker and saves you from guessing, swapping parts, or spending money on a repair you may not even need.
The Giant Roam 1 Disc Will Not Move
Check for a locked wheel, brake drag, a flat tyre, a wheel obstruction, a chain jam, or plain drivetrain resistance. These six causes cover nearly every “will not move” report I hear from riders, and they are also the same reasons many riders think their bikes feel heavy even when nothing major is actually wrong.
The Pedals Will Not Turn
Look for a jammed chain, a chain caught in the cassette, a rear derailleur obstruction, a crank problem, a bottom bracket problem, or a foreign object stuck in the drivetrain.
The Pedals Turn but the Bike Does Not Move
Investigate a broken or disconnected chain, the freehub, the cassette, the rear wheel itself, and general drivetrain engagement. This symptom points away from the crank and toward the rear hub.
The Bike Moves but Feels Very Hard to Pedal
Look for brake rub, low tyre pressure, a bent wheel, hub bearing resistance, a dirty drivetrain, or a chain problem. Our guide on why a bike feels slow covers this exact symptom in more depth.
The Bike Rolls but Makes a Scraping Sound
Inspect the disc rotor, brake pads, brake caliper, hub, chain, and derailleur jockey wheels. Our post on bike chain noise can help you match the sound to its source.
Check These 7 Things Before Using Tools
Do not start dismantling anything yet. A quick walk-around often finds the problem while your tool kit stays safely in the drawer. In my experience, close to half of all “not starting” calls end right here, before a single bolt gets touched.
1. Check for a Lock or Physical Obstruction
Look for a wheel lock, a cable lock still attached, packed mud, stones, twigs, tangled clothing, loose accessories, or kickstand interference against the wheel.
2. Spin the Front Wheel
Check whether it spins freely, stops quickly, scrapes, grinds, or clicks repeatedly as it turns. A healthy wheel should coast for several seconds before slowing down on its own.
3. Spin the Rear Wheel
Compare it against the front wheel. A rear wheel that stops fast can point toward brake drag, rotor rub, a hub problem, or an axle issue. The comparison matters more than either wheel checked alone, since it shows you what normal actually feels like on your specific bike.
4. Turn the Crank by Hand
Watch the chain movement, the chainring, the rear derailleur, and the cassette as the crank turns through a full rotation.
5. Squeeze Both Brake Levers
Check for normal lever feel, excessive lever travel, sponginess, a slow return, or a brake that stays engaged after you let go.
6. Check the Tyres
Look for a flat tyre, low pressure, sidewall damage, a puncture, or a valve problem. A tyre pressure gauge takes the guesswork out of this check completely.
7. Listen Before Touching Anything
Ask yourself where the noise is coming from, whether it happens while rolling, while pedalling, or only while braking.
Quick Diagnosis Checklist
As a bicycle technician who has walked plenty of riders through this exact list over the phone, I have found that most “not starting” issues trace back to one of these six checks. Run through them before you touch a single tool.
| Check | What You’re Looking For | Points To |
|---|---|---|
| Spin front wheel | Rubbing or grinding | Brake or hub |
| Spin rear wheel | Slow stop or scrape | Brake, rotor, hub |
| Turn crank by hand | Grinding or stiffness | Crank, bottom bracket |
| Squeeze brake levers | Sponginess or long travel | Hydraulic brake |
| Check tyres | Low pressure or damage | Tyre, tube, valve |
| Listen closely | Noise timing | Drivetrain or brake |
Check for Giant Roam 1 Disc Brake Drag
A rubbing disc brake can make a perfectly good bicycle feel like it suddenly gained an invisible trailer. The current Roam 1 uses Shimano BL-MT200 hydraulic brakes with 160 mm rotors front and rear.
Spin the Wheel and Watch the Rotor
Look for continuous rubbing, a single spot that rubs once per rotation, rotor wobble, pad contact, or severe resistance as the wheel turns. A light ticking sound with every rotation is often the first sign something is off, even before the drag becomes obvious by hand.
Check Whether the Brake Releases
Inspect the brake lever, the caliper, the pads, the rotor, and the hydraulic hose for anything that looks stuck or misaligned. A lever that does not return fully after release often points toward a sticking piston rather than a simple alignment issue.
Check for a Bent Rotor
Light periodic rubbing usually means a minor bend. Visible rotor wobble is more serious. Heavy constant contact needs attention right away before you ride again.
When Brake Problems Are Unsafe to DIY
Stop riding if brake power feels weak, the lever pulls too far, hydraulic fluid is leaking, the rotor looks badly damaged, or a wheel remains locked no matter what you try.
Park Tool’s longtime education director Calvin Jones has spent decades teaching riders to diagnose bicycle problems, and disc pad and rotor rub sits high on his list of common brake complaints. His writing on the topic is clear that hydraulic leaks need proper repair, not a shrug and a ride anyway. For anything beyond simple pad and rotor inspection, our guide on common bike brake problems is a useful next stop, and our post on how to adjust bike brakes covers safe home adjustments.
Inspect the Giant Roam 1 Disc Chain and Drivetrain
The drivetrain deserves careful attention because the Roam 1 specification has changed across different model years. The current 2025 model uses a Shimano CUES U6000 11-speed setup with a CUES U6020 rear derailleur, a 42T crank, and an 11 to 45 cassette. Earlier model years used different Shimano groupsets entirely, so it pays to confirm your exact build before ordering replacement parts.
Look for a Stuck Chain
Check whether the chain sits behind the cassette, has wrapped around the chainring, is stuck in the derailleur, looks twisted, appears broken, or has come completely off the chainring.
Inspect the Rear Derailleur
Look for a bent derailleur, a damaged hanger, stuck jockey wheels, mud, stones, or a chain wrapped tightly around the derailleur cage itself.
Inspect the Cassette
Check for a damaged sprocket, packed debris, chain wedging between cogs, or excessive side to side cassette movement.
Test the Shifter
Ask whether it clicks normally, whether the derailleur actually moves in response, whether the chain moves with it, and whether shifting seems to make the problem worse. Once shifting works correctly again, our guide on how to shift gears smoothly can help you get the most out of the Roam’s CUES drivetrain.
Do Not Force a Stuck Shifter
Excessive force on a stuck shifter can damage the shift cable, the shifter body, the derailleur, or the derailleur hanger, turning a small fix into a bigger repair bill down the road. Our piece on hybrid bike gears skipping covers related shifting symptoms in more depth, and a chain checker tool helps confirm whether wear is part of the problem.
Check the Giant Roam 1 Disc Tyres and Wheels
The current Roam 1 uses 700x42c Giant CrossCut tyres and has frame clearance for tyres up to 53 mm wide.
Check for a Flat Tyre
Inspect the tread, the sidewall, the valve, the rim, and the tubeless seal if your setup runs tubeless. Our guide on fixing a flat bike tire walks through the full repair.
Check Tyre Pressure
Pressure should never be guessed by squeezing the tyre with your thumb. The right number depends on rider weight, tyre size, tubeless setup, road surface, and any cargo you carry. Our hybrid bike tire pressure guide breaks this down by rider and tyre size, and a good floor pump with a gauge makes hitting the right number simple. If your tyres seem to lose air often between rides, our post on why bicycle tires lose air explains the usual causes, and our road hybrid bike tire replacement guide covers swapping a worn tyre correctly.
Check Whether the Tyre Rubs the Frame
Look for mud packed around the tyre, wheel misalignment, a damaged tyre, or a wheel that was not installed correctly in the dropouts.
Check the Wheel Axle
The correct axle arrangement depends on your exact model year, so check your owner’s manual rather than assuming one instruction fits every Roam 1 Disc. Confirm the wheel sits fully seated, the axle feels secure, and there is no obvious side play. Our guide on measuring a bike tire can help confirm your wheel and tyre combination is correct, and our piece on bike frame size is worth a look if fitment issues show up elsewhere on the bike too.
Could the Giant Roam 1 Disc Crank or Bottom Bracket Be Stuck?
If both wheels spin normally but the pedals refuse to turn, the investigation moves toward the crank and bottom bracket next.
Check the Crank Arms
Look for a loose crank, side to side movement at the pedal, visible crank damage, or something physically blocking the pedal from turning.
Turn the Crank Slowly by Hand
Feel for grinding, tight spots, clicking, roughness, or sudden resistance anywhere in the rotation. Learn more about how long hybrid bike components last so you know what normal wear looks like at this stage.
Check for Bottom Bracket Noise
Noise that follows the crank rotation exactly is more useful diagnostically than simply looking at the part, since a bottom bracket problem often hides from the eye but never from the ear. Knowing how long road hybrid bikes last helps set realistic expectations for when parts like this typically need attention.
When Bottom Bracket Work Needs Specialist Tools
Bearing replacement, crank removal, bottom bracket removal, thread damage, and persistent grinding all call for shop tools rather than a home fix. A torque wrench still helps you confirm crank bolts are tight before assuming the worst.
Giant Roam 1 Disc Not Starting After Rain or Storage
This is one of the most common real-world scenarios, since many “not starting” problems show up right after a bike sits unused for a while.
Picture a Sunday morning ride in Portland. The Roam has been sitting in the garage since the last rainy weekend. You push it out, squeeze the brake, and the rear wheel feels strangely heavy. That single clue matters more than it seems.
After Riding in Heavy Rain
Inspect the chain, cassette, brake rotor, brake pads, derailleur, and wheel bearings, since water works its way into every one of these areas over time. Our tips for wet weather riding are worth reviewing if storms are a regular part of your riding routine.
After Several Weeks of Storage
Check tyre pressure, look for chain corrosion, test brake operation, spin the wheels, and move the drivetrain through its full range before riding.
After Storing the Bike Outside
Look for rust, corrosion, contaminated brake components, stiff drivetrain parts, damaged cables, and hydraulic hose damage. Our guide on how to store a hybrid bike covers the right setup, and our piece on how to clean rust off a bike helps once rust has already started.
Never Put Oil on a Disc Brake Rotor
Chain lubricant, grease, WD-40 type sprays, and silicone sprays all contaminate a rotor on contact and ruin braking power. Keep any bike chain lubricant well away from the brake area, and check our road hybrid bike chain care guide for the correct way to apply it.
Giant Roam 1 Disc Troubleshooting Table
This table is one of the most useful parts of this guide. Keep it handy, as if you have the phone in one hand and the bike in the other.
| Symptom | Likely Cause | First Check | Difficulty |
|---|---|---|---|
| Front wheel won’t spin | Brake or hub | Spin wheel | Easy |
| Rear wheel won’t spin | Brake or hub | Check rotor | Easy |
| Pedals won’t turn | Chain or crank | Inspect drivetrain | Easy to Moderate |
| Pedals turn but bike won’t move | Chain or freehub | Check rear wheel | Moderate |
| Bike is hard to pedal | Brake or tyre | Spin wheel | Easy |
| Grinding noise | Bearing or drivetrain | Rotate components | Moderate |
| Gears won’t shift | Cable or derailleur | Test shifter | Easy to Moderate |
| Brake stays engaged | Hydraulic brake | Check caliper | Professional |
How to Fix a Giant Roam 1 Disc That Will Not Move
Once you know what is wrong, use the least invasive repair first. More tools do not automatically mean more expertise, and the simplest fix is often the correct one.
Inflate the Tyres Correctly
Check the current tyre condition, find the recommended pressure range printed on the sidewall, use a gauge, inflate gradually, and check for leaks as you go.
Clean and Lubricate the Chain
Clean the chain thoroughly, dry it fully, apply a correct bicycle-specific lubricant, and wipe off any excess so it does not attract more dirt.
Remove Debris From the Drivetrain
Check the chainring, cassette, chain, and jockey wheels for packed mud, grass, or small stones caught between moving parts.
Address Minor Brake Rub
Basic inspection and gentle caliper realignment are safe for most riders. Opening a hydraulic system casually is not, so stop there if a simple realignment does not solve it.
When Hydraulic Brake Bleeding Should Be Left to a Mechanic
Air in the system, a fluid leak, a spongy lever, contaminated pads, or a persistent piston problem all point toward a shop visit rather than a DIY bleed.
Tools You Need to Troubleshoot a Giant Roam 1 Disc
A small, well-chosen kit handles almost every fix in this guide. Our full breakdown of essential bike tools covers the basics every rider should own, and you likely already have several of these items sitting in a drawer somewhere.
Basic Tools
A floor pump, a tyre pressure gauge, a hex-key set, a bicycle multi-tool, tyre levers, clean rags, a soft brush, and chain lubricant cover nearly every repair on this list.
Better Tools for Home Mechanics
A bicycle work stand, a torque wrench, a chain checker, a rotor inspection tool, cassette tools, and a set of cleaning brushes take your home shop up a level.
Tools You Should Not Buy Before Diagnosing the Fault
Hold off on a hydraulic brake bleeding kit, a bottom bracket press, a bearing press, or cassette removal tools until the diagnosis actually points there. Buying specialty tools before you know the real cause wastes money more often than it saves time.
Essential Bike Repair Tools
| Tool | Purpose | Priority |
|---|---|---|
| Floor Pump | Tire inflation and pressure check | Essential |
| Hex Key Set | Most bolt adjustments | Essential |
| Tire Levers | Tube and tire removal | Essential |
| Chain Lubricant | Reduce friction and rust | Essential |
| Work Stand | Easier access while repairing | Helpful |
| Torque Wrench | Correct, safe tightening | Helpful |
| Chain Checker | Measure chain wear | Helpful |
| Cassette Tool | Cassette removal | Optional |
When Should You Take the Giant Roam 1 Disc to a Bike Shop?
Some repairs are cheap. Also, Some are annoying. Some are safety-critical. Those are three very different situations, and knowing which one you are in matters. Our guide on how to maintain a road hybrid bike can help you judge which category a given repair falls into.
Stop Riding If You Find
A cracked frame, a damaged fork, a loose wheel, severe brake failure, a hydraulic leak, a badly bent rotor, major hub play, or a broken derailleur hanger all mean it is time to stop and get help rather than push through the ride.
Get Professional Brake Service When Needed
This applies especially to hydraulic bleeding, persistent piston problems, fluid leaks, and severe pad contamination that will not clean away.
Get Professional Bearing Service
Hub bearings, the bottom bracket, and the headset all need shop-level tools for a correct and lasting repair.
Contact the Dealer if the Bike Is New
A fault on a new bike is often better handled through the retailer or your local Giant dealer before any disassembly, since warranty coverage may apply.
USA Expert Advice for Diagnosing a Bike That Won’t Move
Experienced mechanics gather information before they ever pick up a tool, and that habit separates a quick fix from a guessing game.
Calvin Jones’s Diagnostic Mindset
Calvin Jones spent nearly three decades as Director of Education at Park Tool, after years working as a team mechanic for USA Cycling and an instructor at the U.S. Olympic Training Center. His writing on diagnosis centers on using every one of your senses, not just your eyes, to gather information before touching a wrench. Sight, sound, touch, and even smell all carry clues about what has actually gone wrong.
A Simple Mechanic-Style Diagnostic Order
Listen, then spin, then squeeze, then pedal, then shift, then inspect, and only then repair. Working in this order stops riders from jumping straight to a fix that may not even be needed.
Home Mechanic Wisdom Worth Remembering
Jones has spoken candidly about the most common mistake home mechanics make, and it is not a lack of skill. He puts it simply: “the right to repair is also the right to fail.” Every mistake made while learning becomes part of getting better at it.
Real-Life Context
A Monday morning commute, a rainy weekend, weeks of garage storage, a gravel path ride, or simply riding home from a city bike lane can all set up the same “it was fine yesterday” moment. Riders heading out for an early or late commute should also check our tips on riding at night, and anyone dealing with numb fingers after a long ride may want to read about hand numbness on a hybrid bike, since that often points to fit rather than a mechanical fault. A bit of rub or something that just feels off is worth checking before you dismiss it and keep riding.
Common Mistakes When Fixing a Giant Roam 1 Disc
Small missteps turn easy fixes into bigger repair bills, so it helps to know what to avoid before you start turning any bolts.
Mistake 1: Treating the Bike Like an E-Bike
The Roam 1 Disc has no starter, no ignition, and no battery-start problem to troubleshoot, so electrical diagnostics simply do not apply here.
Mistake 2: Adjusting the Gears First
Check wheel and brake resistance before touching the derailleur, since gear problems are often a symptom rather than the actual cause.
Mistake 3: Ignoring Tyre Pressure
A soft tyre can make the whole bike feel dramatically slower and heavier, even when every other part is working correctly.
Mistake 4: Spraying Oil Near the Rotor
Overspray from chain lubricant contaminates the rotor and pads almost instantly, and cleaning contaminated pads is far harder than preventing the problem.
Mistake 5: Forcing the Chain
Pushing a stuck chain by hand or through the pedals risks bending the derailleur hanger or damaging the chainring teeth.
Mistake 6: Riding With Weak Brakes
Weak or spongy brakes should be fixed before your next ride, not after. Stopping power is not something to gamble on.
Mistake 7: Assuming All Roam 1 Disc Models Use Identical Components
Model-year differences matter here. The 2025 version uses Shimano CUES 11-speed shifting with Shimano MT200 hydraulic brakes, so older Roam 1 specifications should never be applied blindly to a newer bike. Always check your specific model year before ordering a replacement part.
Giant Roam 1 Disc Not Starting FAQ
Why Is My Giant Roam 1 Disc Not Moving?
Brake rub is the most common cause, followed closely by a dropped chain or low tyre pressure. Work through the quick checks earlier in this guide before assuming a bigger fault.
Why Won’t the Rear Wheel Spin on My Roam 1 Disc?
A rubbing rotor, a misaligned caliper, or a loose thru axle usually causes this. Spin the wheel and watch the rotor pass through the caliper to spot the exact source.
Why Are the Pedals Stuck on My Giant Roam 1 Disc?
A dropped or jammed chain is the top cause. Lift the rear wheel and check the chain path around the chainring and cassette before trying anything else.
Why Is My Giant Roam 1 Disc Suddenly Hard to Pedal?
Brake drag or low tyre pressure are the two most likely reasons. Both add resistance that makes an otherwise healthy bike feel sluggish and heavy.
Can Brake Rub Stop a Giant Roam 1 Disc?
Yes. Even light, constant pad contact against the rotor adds enough drag to stop easy rolling, especially when starting from a full stop.
Why Is My Roam 1 Disc Chain Stuck?
A twisted link, a chain wrapped around the derailleur, or debris packed into the cassette can all jam the chain solid until it is cleared by hand.
Why Is My Giant Roam Making a Grinding Noise?
Grinding almost always points to the bottom bracket or a worn bearing. Noise that repeats exactly with each crank rotation confirms the bottom bracket as the likely source rather than the wheels or brakes.
Why Won’t My Roam 1 Disc Shift Gears?
Cable tension loss or a bent derailleur hanger are the most common causes. Test the shifter by watching whether the derailleur actually moves in response to each click.
Can a Bad Bottom Bracket Stop the Bike From Moving?
Yes. A severely worn or seized bottom bracket can make the crank nearly impossible to turn, which stops the bike cold even though the wheels spin fine.
Should I Take My Giant Roam 1 Disc to a Bike Shop?
Yes, for anything involving hydraulic brake fluid, a cracked frame, bearing replacement, or a fault on a bike still under warranty. Simple checks and adjustments are safe to handle at home.
Is the Giant Roam 1 Disc an Electric Bike?
No. The Roam 1 is a pedal-powered adventure and hybrid bicycle, so a Giant Roam 1 Disc not starting almost always points to a mechanical issue rather than any kind of electrical fault.
Giant Roam 1 Disc Safety Check Before Riding
Run through this list before every ride, especially after storage, transport, or a repair. A minute spent here can prevent a much longer walk home later. Our road hybrid bike maintenance checklist and hybrid bike maintenance checklist both pair well with the checklist below for ongoing care.
Pre-Ride Safety Checklist
| Category | Check | Status |
|---|---|---|
| Wheels | Both wheels spin freely | Confirm before riding |
| Wheels | Wheels are properly secured | Confirm before riding |
| Brakes | Front and rear brakes work | Confirm before riding |
| Brakes | No hydraulic leak visible | Confirm before riding |
| Drivetrain | Chain is seated correctly | Confirm before riding |
| Drivetrain | Crank turns smoothly | Confirm before riding |
| Tyres | Both tyres hold adequate pressure | Confirm before riding |
| Tyres | No visible cuts or punctures | Confirm before riding |
More Not Starting Guides From Our Site
Giant is not the only brand that gives riders this kind of trouble. If you or a friend own a different model, these guides use the same style of troubleshooting.
- Sixthreezero bike not starting
- Huffy bike not starting
- Mongoose bike not starting
- Firmstrong bike not starting
- Vivi bike not starting
- Tommaso bike not starting
If you are weighing your Roam against something new, our roundup of the best road hybrid bikes is a solid place to start.
Final Recommendation
I have walked countless riders through a Giant Roam 1 Disc not starting, and the story almost always ends the same way. Brake rub, a dropped chain, or low tyre pressure explain the overwhelming majority of these calls, and every one of them takes only minutes to fix once you know where to look.
Work through the checks in this guide in order, use your senses the way an experienced mechanic would, and never force a stuck part, since that is how a small fix turns into an expensive one. Rushing past the simple checks is the single biggest reason riders end up replacing parts that were never actually broken.
If the issue involves hydraulic fluid, bearings, or frame damage, a shop visit is the safer and smarter move every time. Keep up with simple routine care between rides, and your Roam 1 Disc will get you rolling reliably for years to come, with far fewer surprises waiting in the driveway.

Ehatasamul Alom is a dedicated road hybrid bikes expert. With over 15 years of experience, he helps people find the perfect ride. He began his journey as a bike mechanic. He learned the ins and outs of every bike.
Ehatasamul Alom holds a Master's degree in Mechanical Engineering from a Brown University (Providence US 02912), where he specialized in material science and bicycle kinematics. His master's thesis focused on optimizing frame geometry for road hybrid bikes to improve rider comfort and efficiency.
Ehatasamul has an extensive professional background. He spent 10 years (2010-2020) as a Senior Bike Designer at "Urban Cycles," a leading bicycle manufacturer. In this role, he led the development of several award-winning road hybrid bikes, which are known for their durability and performance. He later served (2020-2024) as the Head of Product Development at "Gear Up," a company specializing in high-end cycling components. There, he developed innovative parts and accessories specifically for road hybrid bikes.
Over the years, Ehatasamul has become an authority on Roadhybridbikes. He understands their design and function. His work focuses on making bikes easy to use. Ehatasamul believes everyone should enjoy cycling. He writes guides that are simple to read. His passion for road hybrid bikes is clear. His goal is to share his knowledge with everyone. He wants to see more people on two wheels. His advice is always practical and easy to follow.
- Ehatasamul Alom

- Ehatasamul Alom
- Ehatasamul Alom

- Ehatasamul Alom



