
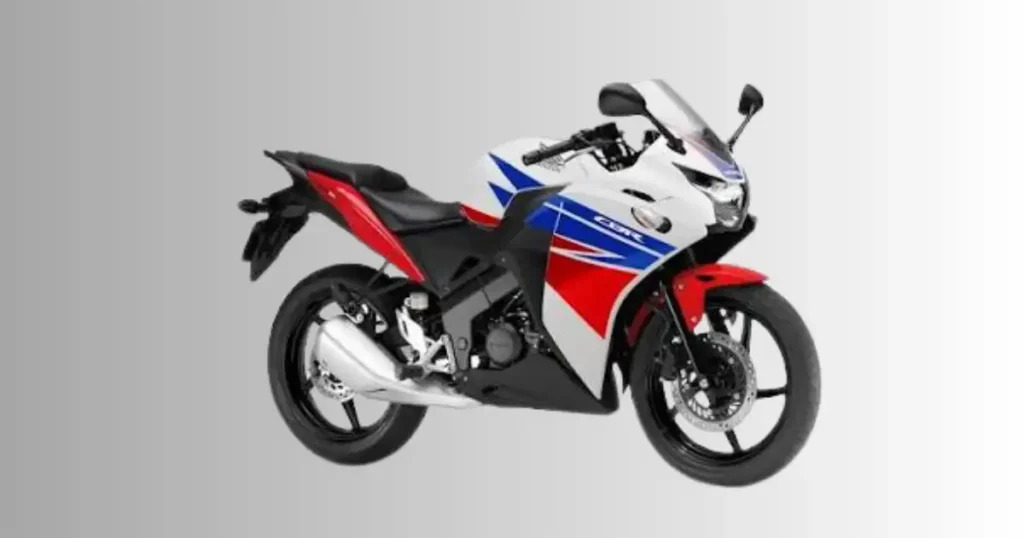
I stood in my driveway in Denver last week, eager to take a quick spin on a clear day. I turned the key, squeezed the lever, but the bike stayed quiet and cold. There is nothing worse than a honda cbr 125 not starting when you want to feel the wind in your face. As an old track coach, I know how these small engines work inside and out. Do not sweat it, because this cold engine stall usually comes down to one tiny trick. Let us check the easy parts now and get you back on two wheels today.
Honda CBR 125 Not Starting? Check These Things First
Your motorcycle key turns on. You press the button. Absolute silence fills the garage. Finding your honda cbr 125 not starting can ruin your entire morning plan.
I faced this exact issue last year while working out of Denver, Colorado. A local rider brought me his sport bike. He felt sure his starter motor had completely failed. We pulled the seat off together. I noticed a loose battery terminal bolt. A simple turn of a wrench fixed the problem instantly.
What Happens When You Press the Starter?
Nothing happens
The engine makes zero sound. The lights might stay bright or go dark. This issue points to a flat battery or a bad safety switch.
Single clicking sound
You hear one sharp click when you push the button. This sound means your starter relay is working. The issue lies with your starter motor or low voltage.
Rapid clicking noise
A fast clicking sound means your battery lacks power. The relay tries to engage but fails. Your battery needs an immediate charge.
Starter turns slowly
The engine turns over but sounds very weak. It lacks the speed to catch fire. A dying battery or thick engine oil causes this issue.
Engine cranks but won’t start
The starter motor spins fast and normal. However, the engine will not ignite. This scenario means you lack fuel or spark.
Engine starts then stalls
The motor fires up for a few brief seconds. Then it immediately dies out. Look for fuel delivery issues or a vacuum leak.
Dashboard lights work but engine won’t crank
Your screen displays normal lights. The starter button does absolutely nothing. A faulty clutch switch or neutral safety sensor causes this layout.
FI warning light stays on
The fuel injection light glows bright on your dash. Your main engine control unit detects an active sensor error. Read the diagnostic code.
Five-Minute Quick Inspection
Check battery voltage
Grab a simple digital multimeter tool. Attach the leads to the battery posts. Look for a clean reading above twelve volts.
Confirm fuel level
Open your fuel gas cap. Shake the motorcycle gently to hear the fluid. Do not rely solely on your dash gauge.
Verify engine stop switch
Look at your right handlebar control block. Ensure the red kill switch sits in the run position. This step saves massive time.
Ensure the bike is in neutral
Shift down into first gear. Then click up half a step. Confirm the green dashboard light glows bright.
Pull the clutch lever fully
Some model years require this safety step. Squeeze the lever tightly against the handlebar grip. This completes the electrical path.
Inspect battery terminals
Look under the rider seat panel. Check for loose metal screws or white fuzz. Clean connections pass power much better.
Listen for the fuel pump priming
Turn your key to the on position. Listen closely near the gas tank. You should hear a clear two-second buzzing noise.
Check dashboard warning lights
Turn the ignition key forward. Watch the digital display carefully. Look for any active red warning lights or flashing symbols.
Stop Troubleshooting If You Notice These Signs
Burning electrical smell
A sharp smoky scent means your wires are melting. Disconnect the main battery ground wire right away. Avoid hitting the starter button.
Fuel leak
Puddles under the bike mean raw gasoline is escaping. High voltage sparks can ignite fuel vapors instantly. Stop work and clean it.
Smoke from wiring
Visible smoke means a direct short circuit exists. Your wiring harness is taking heavy damage. Pull the main fuse out immediately.
Loud grinding noise
A harsh metal sound means gears are slipping. Your starter clutch teeth might be broken. Continued cranking will damage the internal engine.
Blown fuse repeatedly
If a new fuse pops immediately, stop testing. Your system has a hard electrical short to ground. You must trace the wire.
Oil warning combined with unusual engine noise
A low oil light with loud ticking indicates mechanical failure. Internal engine components lack lubrication. Do not turn the motor over.
How the Honda CBR 125 Starting System Works
Your light sport motorcycle relies on teamwork. Multiple small parts pass power in a specific order. Understanding this pathway prevents you from buying unneeded parts.
Main Starting System Components
Battery
The battery stores chemical energy for electrical tasks. It provides the initial juice to spin the heavy metal engine components.
Starter relay
This high current switch connects the battery directly to the starter. It protects your small handlebar button from melting under load.
Starter motor
A powerful electric motor that turns the engine flywheel. It forces the internal piston up and down to start combustion.
ECU (fuel-injected models)
The central electronic computer brain of your machine. It manages the complex PGM-FI fuel injection system data and timings.
Fuel pump
An electric pump sits inside the gas tank reservoir. It pushes fuel under high pressure toward your electronic fuel injector nozzle.
Fuel injector
A microscopic electronic valve that sprays a fine mist of gasoline. It mixes with air inside the intake tract perfectly.
Ignition coil
This component turns twelve volts into thousands of volts. It creates enough high voltage pressure to jump the spark plug gap.
Spark plug
A small ceramic plug screwed into the cylinder head. It creates the physical spark to ignite your compressed air fuel mixture.
Crankshaft position sensor
This magnet tracks the exact position of your engine piston. It tells the ECU when to fire the spark plug.
Side stand switch
A safety sensor located near your kickstand pivot point. It cuts power if you try to ride away with the stand down.
Clutch switch
A small button built into the left handlebar clutch perch. It proves you have disconnected the transmission gears from the motor.
Neutral switch
An internal gear sensor located inside the aluminum crankcase. It signals the computer when the transmission rests safely in neutral.
Main fuse
A protective green metal link rated at thirty amperes. It guards your main wiring loom against total electrical fire damage.
Charging system
Consists of an internal spinning magnetic rotor and copper stator coils. It generates fresh alternating current electricity while the engine runs.
Regulator/rectifier
This aluminum box changes alternating current into smooth direct current. It keeps your battery charged without boiling the internal fluid.
How the Starting Process Works
Battery supplies power
You turn your physical ignition key. Clean twelve-volt current flows from the lead plates out into the main fuse panel wire.
Safety switches are verified
The computer checks the position of your neutral switch. It verifies the side stand and clutch handle positions are completely safe.
ECU activates
The main electronic control unit boots up instantly. It samples ambient air pressure and engine temperature data to calculate fuel needs.
Fuel pump primes
The computer grounds the fuel pump power relay line. You hear a buzz as fuel lines reach full operating pressure.
Starter relay closes
You press the right handlebar start button firmly. Small current triggers a heavy magnetic coil inside the starter relay housing.
Starter motor rotates engine
Heavy gauge wire carries massive current to the starter motor. The motor spins the crankshaft to create internal cylinder suction.
Injector supplies fuel
The ECU triggers the fuel injector nozzle at the right moment. A timed mist of gasoline enters the open intake valve.
Spark ignites mixture
The ignition coil fires high voltage down the thick plug wire. A bright blue spark jumps across the plug ground electrode.
Engine starts
The air and fuel mixture explodes with great force. The piston drives downward on its own power. The starter motor disengages.
Most Common Reasons a Honda CBR 125 Won’t Start
Many starting faults boil down to basic maintenance issues. Checking these common failure areas first will save you significant shop diagnostic money.
Weak or Dead Battery
Common Symptoms
Your dashboard display screen looks very dim or completely blank. When you press start, you hear a loud buzzing or clicking noise.
Battery Voltage Test
Connect your digital multimeter tool directly across the battery posts. A healthy resting battery must show over twelve point six volts.
Battery Load Test
Leave your multimeter leads attached to the battery. Press your starter button and watch the numbers drop. Voltage must stay above ten volts.
When Replacement Is Needed
If your battery drops below nine volts during cranking, it has failed. The cell plates can no longer hold a heavy charge.
Loose or Corroded Battery Connections
Voltage Drop
Vibrations can back out the small terminal screws over time. A loose bolt creates high electrical resistance, blocking heavy starter current.
Cleaning Battery Terminals
Remove the black negative cable first, then the red positive wire. Scrub away white corrosion using a stiff wire brush and baking soda.
Faulty Starter Relay
Single Clicking Noise
You press the ignition button and hear a distinct loud click behind the fairing. The engine does not rotate even one fraction.
Relay Testing
Use an insulated screwdriver to bridge the two large copper posts on the relay. If the starter spins, your relay is bad.
Starter Motor Failure
Slow Cranking
The starter motor groans and turns the engine very slowly despite a fully charged battery. The motor body may feel extremely hot.
Internal Wear
Carbon brushes inside the starter motor wear out over thousands of starts. They stop making contact with the internal spinning commutator bar.
Fuel Pump Problems
No Priming Sound
You turn the key on but hear total silence from the gas tank. The typical high pitch hum is completely missing.
Fuel Pressure Test
Tee a professional pressure gauge into the main fuel delivery line. The fuel pump must build steady pressure instantly.
Dirty Fuel Injector
Injector Blockage
Microscopic debris or old fuel lacquer can clog the tiny injector nozzle holes. This blocks gasoline from entering the engine cylinder.
Professional Cleaning
Remove the injector fuel body from the intake manifold. Use a dedicated ultrasonic cleaner tank to restore proper fuel spray patterns.
Worn or Fouled Spark Plug
Carbon Deposits
Black carbon soot can coat the ceramic insulator tip over time. This soot grounds out the spark before it can fire.
Incorrect Gap
Use a wire feeler gauge tool to measure the spark plug gap. Adjust the ground arm to match exact factory specification sheets.
Ignition Coil Failure
Weak Spark
A failing coil produces a dim yellow spark instead of a crisp blue line. The engine will struggle to ignite cold fuel.
Resistance Testing
Set your multimeter tool to measure ohms resistance. Check both the primary input tabs and the secondary high tension plug lead.
Side Stand or Clutch Switch Failure
Safety Switch Diagnosis
A broken side stand switch tells the ECU your kickstand is down. It cuts ignition power instantly to prevent a riding crash.
ECU or Sensor Problems
FI Warning Light
The dash light flashes a specific pattern of long and short blinks. This code points directly to the failed engine sensor.
Crankshaft Position Sensor
If this small magnetic pickup fails, the computer loses track of engine timing. It will refuse to fire the spark plug.
Blown Fuse or Wiring Fault
Main Fuse Inspection
Pull the green thirty amp fuse out of its plastic holder. Look closely at the metal bridge element inside the clear window.
Ground Wire Checks
Trace the heavy black battery cable down to the aluminum engine case. Ensure this frame connection is clean and tightly bolted.
Honda CBR 125 Cranks but Won’t Start
When your starter motor spins the engine fast but nothing fires, you face a different puzzle. The engine has mechanical rotation but lacks life.
Check Spark
Remove the spark plug from the cylinder head using a deep socket. Pop the plug back into its black rubber cap. Hold the metal threads firmly against a bare engine bolt. Crank the engine over and look for a bright blue spark jumping the gap.
Verify Fuel Delivery
Pull the main fuel line off the injector body carefully. Turn the ignition key to the on position for two seconds. Fuel should squirt out with strong force into a clean container. If no fuel appears, check your pump circuit.
Listen for Fuel Pump Operation
Put your ear directly against the metal fuel tank shell. Turn the key switch forward. You must hear a smooth, high-pitched whirring sound. If you hear a rough clicking or absolute silence, your pump motor is stuck.
Test Injector Function
Unbolt the injector from the intake tract while leaving wires attached. Aim the nozzle into a safe catch pan. Crank the engine over briefly. Watch for two distinct, fine misty sprays of gasoline. Wet dripping means the nozzle is broken.
Perform Compression Test
Screw a mechanical compression gauge into the empty spark plug hole. Twist your handlebar throttle wide open. Crank the engine until the gauge needle stops rising. A healthy engine needs over one hundred and twenty pounds of pressure.
Inspect the Air Filter
Remove the plastic body panels to access the airbox cover. Pull the paper filter element out into the light. Look for packed dirt, leaves, or water blocking the intake holes. A choked engine cannot breathe enough oxygen.
Honda CBR 125 Starts Then Stalls
This annoying issue means your bike has the basics to run but cannot sustain the combustion cycle. The problem usually gets worse as the engine warms up.
Fuel Pressure Loss
The fuel pump may start fine but lose pressure under continuous load. If internal pump seals leak, fuel pressure drops off quickly. The engine starves for gasoline within a few seconds of firing up and dies.
Dirty Fuel Injector
A partially clogged injector may flow enough fuel for a quick start. However, it cannot deliver a steady stream at smooth idle speeds. The engine runs lean, stumbles heavily, and cuts out when you release the throttle.
Vacuum Leak
Unmetered air can enter the engine through cracked rubber intake boots. This extra air leans out the mixture balance heavily. The small single cylinder motor cannot handle this incorrect ratio and stalls out at stop signs.
Faulty Idle Control
The engine uses a small bypass valve to manage air at idle. If carbon soot clogs this valve passage, the engine chokes out. It will die the instant you close the handlebar throttle twist grip.
Sensor Failure
A bad engine coolant sensor might tell the computer the motor is already warm. The ECU will fail to provide a rich cold-start mixture. The bike fires briefly on vapor then dies from lack of fuel.
Honda CBR 125 Won’t Start After Sitting
Leaving a motorcycle parked in a shed for months creates specific chemical problems. Fuel degrades and battery power slowly drains into the air.
Battery Self-Discharge
Lead-acid batteries naturally lose energy over time even when disconnected. Chemical reactions inside the cells drain power every single week. After two months of sitting, the battery lacks the amps needed to spin the motor.
Old Fuel
Modern gasoline begins to spoil after about thirty days. Light chemical compounds evaporate out of the fuel tank venting system. The remaining thick fluid resists catching fire from a spark plug, leading to extended cranking.
Fuel Injector Deposits
As old fuel sits inside the warm fuel injector tip, it turns into sticky varnish. This varnish glues the internal needle valve completely shut. The electronic magnet cannot open the frozen valve when you press start.
Corroded Battery Terminals
Moisture in stagnant air reacts with the different metals on battery posts. This creates a layer of green lead sulfate crust. This crust acts like a blanket, blocking electrical current from leaving the battery.
Moisture Inside Connectors
Temperature changes cause morning dew to form inside plastic wire plugs. Over months, this water oxidizes the copper pins inside. Electrical signals from safety switches get lost before reaching the main computer brain.
Honda CBR 125 Won’t Start After Rain
Water is a highly effective electrical conductor. A heavy downpour can route precious ignition voltage away from the spark plug and straight into the frame.
Wet Spark Plug Cap
Heavy rain can bypass thin rubber seals on the spark plug boot. Water fills the deep spark plug well in the cylinder head. The high voltage electricity jumps through the water to the engine block instead of firing the plug.
Damp Ignition Coil
The ignition coil sits underneath the front plastic fairing panels. Road spray from the front tire can drench the coil housing. If the plastic casing has tiny hairline cracks, water enters and shorts out the internal copper windings.
Water in Electrical Connectors
Wind can drive rain deep into the handlebar switch housings. Water bridges the contacts inside your right starter button or kill switch. This confuses the circuit, making the bike think you are not pressing the button.
Moisture Around ECU Connectors
The main wiring harness plug connects directly to the computer body. If water gets past the outer rubber boot, it bridges multiple pins together. This corrupts sensor data and causes the computer to shut down safety systems.
Step-by-Step Honda CBR 125 No-Start Diagnosis
Follow this professional diagnostic path to find your starting fault quickly. Avoid jumping around or skipping steps to ensure accurate testing.
Step 1 – Measure Battery Voltage
Set your digital meter to the DC voltage scale. Place the red probe on positive and black on negative. Note the exact screen value.
Step 2 – Perform Battery Load Test
Watch the meter screen while pushing the start button. If the numbers plunge below ten volts, your battery requires a deep charge or replacement.
Step 3 – Inspect Battery Cables
Grab the thick battery wires with your fingers. Wasp nest debris or loose nuts cause issues. Wiggle them hard to ensure they stay solid.
Step 4 – Check Main Fuse
Locate the starter solenoid plastic case near the battery. Pull the master fuse out. Look through the clear plastic for a broken metal line.
Step 5 – Test Spark
Ground the spark plug body against the clean cylinder head metal. Crank the motor in a dark room. Watch for a bright blue flash.
Step 6 – Verify Fuel Pressure
Connect a mechanical pressure gauge to the fuel line. Cycle the key to activate the pump. Check that pressure meets factory specifications.
Step 7 – Inspect Air Intake
Open your plastic airbox lid assembly. Ensure no shop towels or mouse nests block the main intake tube. Check for a dry filter element.
Step 8 – Compression Test
Thread your compression tool into the spark plug port. Spin the motor over five times with open throttle. Read the total pressure value.
Step 9 – Scan ECU Fault Codes
Locate the red diagnostic data link connector. Read the flash patterns on your dashboard light. Match these flashes to your factory manual chart.
Honda CBR 125 No-Start Troubleshooting Table
This quick reference chart helps you match starting symptoms to their logical repair paths. Use it to determine if you can complete the fix at home.
Before starting any repair work, check your tools. Having the right gear saves hours of frustration in your home garage workshop.
| Symptom | Most Likely Cause | DIY Difficulty | Repair at Home |
| No response | Battery | Easy | Yes |
| One click | Starter relay | Easy | Yes |
| Rapid clicking | Weak battery | Easy | Yes |
| Slow cranking | Starter motor | Medium | Sometimes |
| Cranks but won’t start | Fuel or spark | Medium | Yes |
| Starts then dies | Fuel system | Medium | Sometimes |
| FI warning light | ECU or sensor | Hard | Dealer |
Honda CBR 125 Battery Voltage Guide
Your digital multimeter numbers tell a clear story about internal chemical health. Use this reference guide to evaluate your battery state.
Testing your battery takes less than two minutes. Regular checks prevent you from getting stranded far away from home on a cold night.
| Voltage | Battery Condition | Recommended Action |
| 12.8V to 13.0V | Excellent | Continue testing |
| 12.5V to 12.7V | Good | Perform load test |
| 12.2V to 12.4V | Weak | Recharge |
| Below 12V | Poor | Replace soon |
| Below 10V while cranking | Failed | Replace immediately |
Diagnose the Problem by Symptom
Different system failures create unique noises and visual signs. Match your exact motorcycle behavior to this quick diagnostic guide map.
Isolating the symptom keeps your focus on the actual broken system. It stops you from wasting hours checking working parts.
| Symptom | Likely Cause | First Check |
| One click | Starter relay | Battery |
| Rapid clicking | Weak battery | Voltage |
| No crank | Safety switch | Clutch and side stand |
| Cranks only | Fuel delivery | Fuel pump |
| Hard starting | Spark plug | Ignition |
| Starts then stalls | Injector | Fuel pressure |
Preventive Maintenance Schedule
Keeping up with simple routine service intervals prevents starting failures. Follow this schedule to maintain high commuter machine reliability.
A well maintained bike starts reliably in every weather condition. Spend a little time now to save massive repair shop bills later.
| Component | Recommended Interval |
| Battery inspection | Monthly |
| Battery terminals | Every 6 months |
| Spark plug | 8,000 to 12,000 miles |
| Air filter | 8,000 miles |
| Fuel injector cleaning | 12,000 to 15,000 miles |
| Charging system test | Yearly |
| Electrical inspection | Annual |
Essential Tools Every Honda CBR 125 Owner Should Have
You do not need a massive professional garage setup to fix your lightweight sport motorcycle. A few basic tools allow you to solve almost any starting problem at home.
Recommended Diagnostic Tools
- Digital multimeter for voltage checks
- Battery charger with smart maintenance mode
- Battery load tester for real amp analysis
- Spark tester to verify ignition coil health
- Compression tester for engine mechanical checks
- Fuel pressure gauge with correct hose adapters
- OBD scanner tool for reading FI computer codes
- Electrical contact cleaner spray to remove corrosion
- Socket set with deep spark plug sockets
- Torque wrench for accurate engine bolt installation
Common Owner Mistakes
Many riders waste significant amounts of money by making simple assumptions during a no-start situation. Avoid these classic troubleshooting traps.
Replacing Parts Before Testing
Buying a brand new starter motor without testing voltage is a bad idea. Nine out of ten times, the root problem is just a dead battery.
Ignoring Battery Load Tests
A battery can show twelve point six volts on a screen while resting. However, internal cell damage causes it to collapse under a real starting load.
Forgetting Safety Switches
Riders often tear fairings apart looking for complex wiring faults. They completely forget their bike is simply in gear with the side stand down.
Ignoring FI Warning Lights
The flashing red light on your dashboard is trying to help you. Ignoring its specific code means you are troubleshooting completely blind.
Using Old Fuel
Trying to start a motorcycle using six month old gasoline will foul your plug. Always drain stale fuel before attempting a fresh start.
Skipping Ground Wire Inspection
Power must return to the battery to complete the circuit. A loose engine ground bolt stops the starter just as fast as a broken live wire.
USA Motorcycle Expert Advice
Listening to experienced motorcycle mechanics can save you days of diagnostic frustration. Professional techniques focus on logic rather than luck.
Why Battery Testing Always Comes First
Electrical components require stable voltage to communicate correctly. A weak power supply causes sensors to send false failure signals to the main computer.
Real Workshop Story
A busy Monday morning brought a frustrated rider into our shop area. He felt completely certain his main engine computer had failed on his commuter. The dashboard display panel lit up normally when he turned his key. Our team connected a professional load tester to the battery posts. The voltage collapsed instantly under the starter button load, exposing a broken internal plate cell. A fresh battery restored normal starting function immediately before lunch.
How to Prevent Honda CBR 125 Starting Problems
Preventive habits keep your lightweight motorcycle ready to commute at a moment’s notice. Consistency beats emergency repairs every time.
Keep the Battery Charged
Connect a smart trickle charger if you plan to leave the motorcycle parked for more than seven days. This maintains fresh chemical health inside.
Replace Spark Plugs on Schedule
Do not wait for your engine to start misfiring before changing the plug. Fresh electrodes require much less electrical voltage to fire cleanly.
Use Fresh Fuel
Buy your fuel from busy gas stations to ensure high quality. Add a quality fuel stabilizer liquid if the bike must sit during winter.
Inspect Wiring Regularly
Look for shiny rub marks on the black wire insulation wrap. Catching a chafed wire early prevents a major short circuit on the road.
Clean Electrical Connections
Unplug main sensor junctions once a year. Spray them with dedicated electronic contact cleaner to flush out road salt and dirt deposits.
Follow Honda’s Service Schedule
Keep a small notebook tracking your maintenance milestones. Changing air filters and checking valve clearances ensures your motor stays easy to start.
When Should You Visit a Honda Dealer?
Some technical problems require advanced diagnostic computers and specialized factory tools. Know your mechanical limits to prevent making damage worse.
Persistent FI Warning Light
If the fuel injection light stays on after replacing basic sensors, stop. Dealers have proprietary scan tools that read deep live engine data streams.
ECU Communication Problems
When your engine computer refuses to link with standard OBD tools, special factory test boxes are needed. This test verifies internal circuit board health.
Fuel Pump Replacement
Changing the high pressure internal fuel pump assembly requires working inside the open gas tank. This job is best left to trained shop safety experts.
Wiring Harness Damage
If a mouse chews through the main central wire bundle, do not patch it. A complete factory harness replacement ensures total long-term highway safety.
Low Compression
If your pressure test shows values below ninety pounds, your engine needs internal repair. This requires rebuilding the piston rings or sealing valves.
Honda CBR 125 Compared With Similar Honda Motorcycles
Honda utilizes similar engineering choices across its light entry-level motorcycle lineup. This makes troubleshooting methods highly transferable between models.
Honda CBR125R vs Honda CB125F
The CBR125R uses a liquid-cooling system with a small front radiator assembly. The CB125F utilizes a simpler air-cooled engine layout. Both share very similar fuel injection components, making pump and injector diagnostic steps identical.
Honda CBR125R vs Honda CBF125
The older CBF125 model uses a simpler chassis design but shares the core PGM-FI electronic logic. If your CBF125 suffers a starting failure, you check the same safety switches and battery voltage drops as the CBR.
Honda CBR125R vs Honda SP125
The SP125 is designed primarily for global commuter markets with an integrated ACG starter generator system. It lacks a traditional heavy starter motor armature. However, it still relies on identical battery health and spark plug gaps.
Common Starting Problems Across Honda 125cc Motorcycles
Across this entire lightweight engine family, weak batteries remain the absolute number one cause of starting complaints. Safety switch corrosion from rainy weather follows closely as the second most common failure point.
Frequently Asked Questions
Why is my Honda CBR 125 not starting?
Your motorcycle likely lacks sufficient battery power, clean fuel delivery, or strong ignition spark. Check your red kill switch and battery terminal bolts first.
Why does my Honda CBR 125 click but not start?
A rapid clicking sound means your battery is flat and cannot support the starter motor load. A single loud click points to a faulty starter relay or motor.
Why does my Honda CBR 125 crank but won’t start?
If the engine spins fast but fails to fire, it lacks fuel or spark. Verify your fuel pump is priming and check your spark plug tip condition.
Can a weak battery power the lights but stop the engine from starting?
Yes, running your dashboard lights requires very little power. Spinning the heavy internal engine components requires massive current that a weak battery cannot provide.
What does the FI warning light mean?
The Fuel Injection warning light indicates the central computer has detected a sensor failure. You must read the blink code to identify the exact fault.
How do I know if the starter relay has failed?
If you hear a single click but the starter motor does not spin, test the relay. Safely bridge the two main copper posts to see if the starter activates.
Why won’t my Honda CBR 125 start after winter storage?
Old gasoline has likely gummed up your fuel injector nozzle tip. Your battery has also naturally discharged its electrical energy over the cold winter months.
How much does it cost to repair a Honda CBR 125 that won’t start?
A loose bolt costs zero dollars to fix at home using your basic hand tools. A complete fuel pump replacement at a dealership can run several hundred dollars.
Final Recommendation
Fixing a starting problem requires a calm, systematic approach. I always advise starting with your battery health before buying any replacement components. Use your digital multimeter to verify the real numbers under load. Clean your terminal connectors and verify your safety switches sit in their correct positions. Taking these basic steps solves the vast majority of motorcycle garage issues. Stay patient, trust the diagnostic process, and keep your machine maintained on schedule.

Ehatasamul Alom is a dedicated road hybrid bikes expert. With over 15 years of experience, he helps people find the perfect ride. He began his journey as a bike mechanic. He learned the ins and outs of every bike.
Ehatasamul Alom holds a Master's degree in Mechanical Engineering from a Brown University (Providence US 02912), where he specialized in material science and bicycle kinematics. His master's thesis focused on optimizing frame geometry for road hybrid bikes to improve rider comfort and efficiency.
Ehatasamul has an extensive professional background. He spent 10 years (2010-2020) as a Senior Bike Designer at "Urban Cycles," a leading bicycle manufacturer. In this role, he led the development of several award-winning road hybrid bikes, which are known for their durability and performance. He later served (2020-2024) as the Head of Product Development at "Gear Up," a company specializing in high-end cycling components. There, he developed innovative parts and accessories specifically for road hybrid bikes.
Over the years, Ehatasamul has become an authority on Roadhybridbikes. He understands their design and function. His work focuses on making bikes easy to use. Ehatasamul believes everyone should enjoy cycling. He writes guides that are simple to read. His passion for road hybrid bikes is clear. His goal is to share his knowledge with everyone. He wants to see more people on two wheels. His advice is always practical and easy to follow.
- Ehatasamul Alom

- Ehatasamul Alom
- Ehatasamul Alom

- Ehatasamul Alom



