
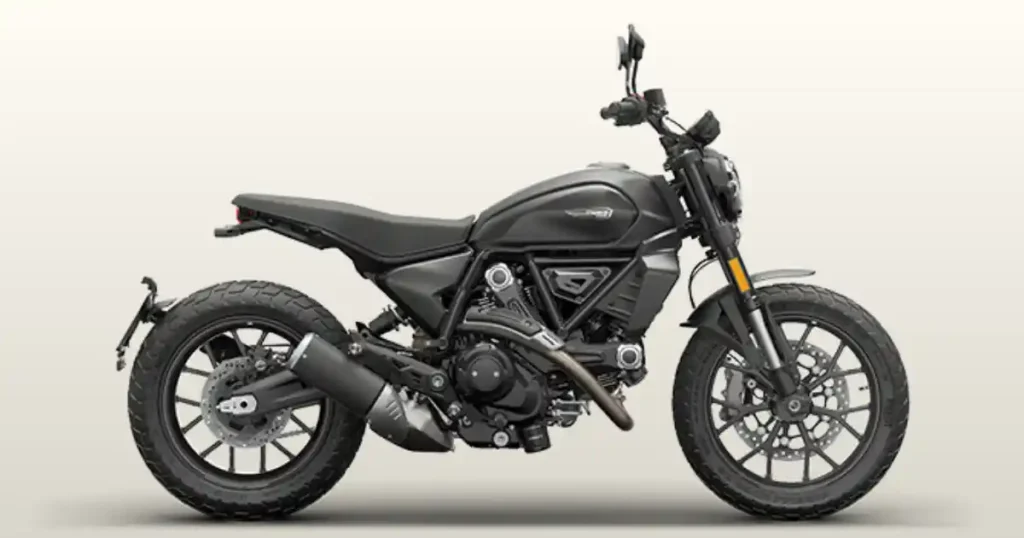
I stood in my garage last week in Austin, ready to hit the sunny hill country. I hit the black button, but my bike just let out a sad, slow click. A ducati scrambler not starting cuts deep when you can hear the open road calling your name. As an old bike builder, I know how these lively twin engines think when they act stubborn. Do not worry, because this sudden stall is usually just a tiny electrical hitch. Let us track down the small fault right now and get you back on the asphalt today.
First Things to Check When Your Ducati Scrambler Won’t Start
Nothing spoils a sunny day like hitting the starter button and hearing absolute silence. A few months ago in Portland, Oregon, a fellow rider sat stranded outside a small coffee shop, convinced that his premium Italian machine had a total engine failure. He was ready to call a flatbed tow truck and spend hundreds of dollars. I walked over, popped off the seat, and tightened a loose battery ground cable with a basic hand tool. The sweet sound of the L-twin engine filled the air just a moment later. Dealing with a ducati scrambler not starting can feel very frustrating, but the fix is often small, simple, and totally free if you know where to look.
What Happens When You Press the Starter?
No response at all
You push the button and nothing happens. The dash might stay completely dark or look quite normal. This sign means power is not moving from the battery to the starter system at all.
Single clicking sound
A single loud click usually means your starter relay is working well. The sound tells you that power reaches the relay, but the starter motor itself cannot spin due to low voltage or an internal jam.
Rapid clicking noise
This machine-gun clicking sound is a classic sign of a weak battery. The relay has enough power to close, but the moment it sends juice to the starter, the voltage drops and the relay drops open again.
Engine cranks slowly
Your engine turns over but sounds tired and sluggish. The slow speed indicates your battery is mostly drained, or there is bad corrosion inside the thick main power cables.
Engine cranks but won’t start
The starter spins the engine fast and strong, but the bike just will not fire up. You have plenty of cranking power, so the main fault lies within fuel delivery, spark quality, or vital engine sensors.
Starts and immediately stalls
The bike fires up for a brief second or two and then dies out. This issue points directly to a lack of continuous fuel flow, a major vacuum leak, or an issue with the key safety chip system.
Dashboard lights stay on but starter doesn’t engage
Your screen looks bright and healthy, yet the start button feels totally dead. The safety switch loop is likely open, meaning the bike thinks the side stand is down or the clutch is out.
Immobilizer warning appears
A small yellow light or key icon flashes on your round dash screen. The internal computer does not recognize the electronic chip inside your key, so it locks out the ignition system for safety.
Five-Minute Pre-Start Inspection
Check battery voltage
Pop the seat off and place a small digital meter on the two metal posts. A healthy unit must show more than twelve volts when the motorcycle is just resting with the key turned off.
Verify fuel level
Open the gas cap and look right inside the tank. Do not just trust the low fuel light on your dash, as sensors can fail and leave you high and dry.
Confirm kill switch position
Look closely at your right handlebar control pod. It sounds silly, but many riders accidentally bump the red toggle switch into the off position while parking or cleaning the controls.
Ensure the bike is in neutral
Shift the transmission all the way down into first gear and then click it up half a notch. Check that the green N light glows bright on your digital instrument cluster.
Pull the clutch lever fully
Squeeze the left handlebar lever all the way back against the grip. This action bypasses the safety switch and lets the power flow even if the bike is in gear.
Check the side stand
Kick the side stand completely up into its riding position. If the stand is down and the bike is in gear, the engine safety logic kills the starter system instantly.
Inspect battery terminals
Give the red and black wires a firm wiggle with your fingers. The connections must be rock solid with zero white powder or fuzzy blue crust built up around the metal.
Listen for the fuel pump priming
Turn the ignition key to the on position and keep your ears close to the gas tank. You should hear a distinct high-pitched whirring sound for two seconds as the system builds pressure.
Stop Troubleshooting If You Notice
Smoke from wiring
If you see wisps of white or grey smoke rising from under the seat or tank, turn the key off. Electrical shorts can melt a wiring harness in seconds and cause massive damage.
Strong burning smell
A sharp scent of melting plastic or burning insulation means a wire is getting dangerously hot. Disconnect the negative battery lead right away to stop the flow of electrical current.
Fuel leaking onto hot engine parts
Stop cranking if you smell raw gas or see wet spots puddling underneath the throttle bodies. A stray spark could ignite the fuel and start a dangerous garage fire.
Grinding starter motor noise
A harsh metal-mashing sound means the starter gears are not meshing right with the flywheel. Continued cranking will strip the teeth and require an expensive engine tear-down.
Blown main fuse repeatedly
If a new fuse pops the exact moment you turn on the key, you have a hard short circuit. Putting larger fuses in will cause the wires to overheat and catch fire.
Loud internal engine noises
Heavy knocking or banging sounds while the starter turns mean mechanical failure inside the pistons or valves. Stop trying to start the bike to prevent destroying the entire motor.
How the Ducati Scrambler Starting System Works
Main Starting System Components
Your motorcycle uses a network of parts to change a key turn into a running engine. The process begins at the lead-acid battery, which stores pure chemical energy. When you flip the key, power wakes up the Engine Control Unit, also known as the ECU. This smart computer checks the immobilizer system to make sure your specific key is valid. If the key matches, the ECU waits for good news from the safety circuit. This loop includes the side stand switch, the clutch switch, and the neutral switch.
Once safety is confirmed, pressing the handlebar button sends a tiny signal to the starter relay. This heavy-duty switch passes large amounts of current down to the starter solenoid and starter motor. As the motor spins the crankshaft, the crankshaft position sensor tells the ECU exactly when to act. The ECU then turns on the electric fuel pump inside the tank, forces fuel through the fuel injectors, and sends voltage to the ignition coils. Finally, the spark plugs ignite the fuel mist, and the stator and regulator/rectifier take over to keep the battery charged.
Starting Sequence Explained
The exact moment you switch the bike on, electricity floods the main brain of the bike. The dash lights up, and the security antenna reads the unique code hidden inside the plastic key head. If the code is correct, the safety circuit checks if the bike is safe to start. Next, you will hear a soft buzz as the fuel pump primes the lines. When you push the starter button, a magnetic coil inside the relay snaps shut. This action allows hundreds of amps to rush straight into the starter motor, turning the heavy metal engine parts. The computer detects this movement and commands the coils to fire a spark while the injectors spray fuel. The engine catches fire, spins on its own power, and the starter system disengages.
Most Common Reasons a Ducati Scrambler Is Not Starting
Weak or Dead Battery
Common Symptoms
A weak battery is the top reason for a ducati scrambler not starting. You will often notice a slow, dim dashboard screen or a loud, fast clicking sound when you press the start button. Sometimes the lights look fine, but they completely vanish the second you touch the starter.
Battery Voltage Test
Set your digital multimeter to the DC voltage mode. Place the red probe on the positive terminal and the black probe on the negative side. A perfect battery reads 12.6 to 13.0 volts. Anything under 12.2 volts means the battery is mostly flat.
Battery Load Test
Resting voltage can lie to you. Keep your meter hooks attached to the battery and press the starter button. Watch the numbers closely as the engine tries to crank. If the voltage drops down below 10 volts during this test, the battery lacks the muscle to turn the motor.
When to Replace the Battery
Most modern motorcycle batteries last between three and five years. If your battery fails a standard load test after being hooked to a smart charger overnight, the internal plates are sulfated. It is time to buy a fresh, high-quality replacement.
Loose or Corroded Battery Terminals
Inspect Ground Cable
The thick black ground wire fastens directly to the metal engine case or frame. Vibration from the bumpy road can back this bolt out over time. A loose ground stops electricity from returning to the battery, causing strange, intermittent electrical issues.
Cleaning Battery Connections
Remove both cables, starting with the negative one first for safety. Use a stiff wire brush to scrub away any white crust or dull oxidation from the lead posts. Spray the clean metal with specialized contact cleaner and re-tighten the bolts firmly with a wrench.
Starter Relay Failure
One Loud Click
When you push the start button and hear just one heavy click from under the seat, your starter relay is likely sticking. The internal copper contacts can become burnt or pitted over time, which prevents the main current from reaching the starter motor.
Relay Testing Procedure
Locate the relay and bridge the two large brass posts with an insulated screwdriver tip. If the starter motor spins up immediately when you bridge these posts, the relay is bad. Be careful, as this test will create a few bright sparks.
Faulty Starter Motor
Slow Cranking
An old starter motor drags heavily, pulling massive amounts of current while barely turning the engine over. This happens when the internal bushings wear out, causing the central armature to rub against the outer magnets.
Internal Wear
Inside the motor, small carbon brushes ride against a spinning copper commutator. Over many miles, these brushes wear down to tiny nubs and lose their spring tension. Once connection is lost, the starter motor develops dead spots and will refuse to spin.
Immobilizer or Key Recognition Problems
Immobilizer Warning Light
The Ducati security system uses a small loop antenna around the ignition barrel. If this antenna cracks or the key chip fails, a warning light stays illuminated on the dash. The bike will crank endlessly but will never spark.
Spare Key Test
Grab your secondary black key or the special active key that came with your bike. Try starting the engine with this spare unit. If the bike fires right up, the transponder chip inside your main key is dead or damaged.
Fuel Pump Failure
Missing Priming Sound
When you flip the run switch, you must hear a two-second whirring sound from the fuel tank. If there is absolute silence, your pump is not getting power, or the internal electric motor has seized up completely from sitting.
Fuel Pressure Testing
Hook a mechanical pressure gauge to the fuel line outlet under the tank. Turn the key on to run the pump. A healthy Ducati system needs to pump out around 43 pounds per square inch of steady pressure to feed the injectors.
Dirty Fuel Injectors
Injector Blockage
Modern gasoline blends can leave sticky varnish behind when they sit in a hot fuel rail. This old residue clogs the microscopic holes inside the injector nozzle, turning a fine mist into a weak, useless dribble.
Cleaning Options
For mild clogs, pour a dedicated fuel system cleaner into a fresh tank of premium gas. If the injectors are completely plugged up, you must pop them out and send them to a shop for deep ultrasonic cleaning.
Worn Spark Plugs
Weak Spark
Spark plugs live in a harsh environment. Over time, the metal electrodes erode away, making the gap between them too wide. A weak battery cannot push high voltage across a wide gap, resulting in no combustion.
Fouled Plugs
If you crank the engine a lot without it starting, the plugs get soaked in raw fuel. This wet coating shorts out the electrical current, forcing the spark to travel down the porcelain insulator instead of jumping the gap.
Ignition Coil Problems
Coil Resistance Test
The stick coils sit directly on top of the spark plugs. Use your multimeter to check the resistance of both the primary and secondary wire windings. If the numbers do not match Ducati specs, the coil has an internal short.
Spark Quality
Pull a coil out, insert a spare spark plug, and ground the plug threads against the engine cylinder head. Crank the motor and watch the tip. You want to see a bright, snappy blue spark, not a dull orange flash.
Side Stand or Clutch Switch Failure
Safety Switch Diagnosis
These tiny plastic switches live in wet, dirty areas. If dirt jams the plunger pin open, the computer assumes the side stand is down. Spray the switch body with electronic cleaner and click it manually to check for smooth movement.
Charging System Failure
Bad Stator
The stator lives inside the engine cover and makes alternating current as the motor spins. If the insulation melts, the stator shorts out. You will notice the battery dying slowly over a single long afternoon ride.
Failed Regulator/Rectifier
This aluminum cooling fin block changes alternating current into smooth direct current. If it dies, it will either stop charging the battery completely or send dangerous high voltage that fries your expensive light bulbs and digital dashboard.
ECU or Sensor Malfunctions
Crankshaft Position Sensor
This little magnetic sensor counts the teeth on the spinning flywheel. If it fails, the ECU has no idea where the pistons are located. The computer will completely shut off the fuel and spark systems for engine safety.
ECU Fault Codes
When the engine brain detects an electrical error, it saves a specific numeric fault code. You can plug a pocket OBD diagnostic tool into the data port under your seat to read these codes and pinpoint the exact issue.
Ducati Scrambler Cranks but Won’t Start
Test Spark
Remove one of the spark plug leads and insert a dedicated gap tester tool. Connect the ground clip to a clean, bare metal part of the engine frame. Crank the motor over while watching the window on the tool. A strong ignition system will jump a large gap with a crisp, snapping blue line. If you see nothing at all, your problem lies back up the line in the coils, the fuses, or the main crank sensor.
Check Fuel Pump Operation
Put your ear right against the metal side of the fuel tank and cycle the key from off to on. Listen for the smooth, steady whirring sound of the electric motor building pressure. If you hear a harsh groaning sound or nothing at all, check the fuel pump fuse in the fuse box. If the fuse is completely intact, use a test light to see if twelve volts is actually reaching the wire plug at the bottom of the tank.
Inspect Fuel Injectors
Unplug the electrical wire connector from the fuel injector body. Hook a small diagnostic light bulb, known as a noid light, into the wire harness plug. Crank the engine and watch the tiny bulb. It should flash fast and bright, showing that the ECU is sending the proper ground pulses to open the injector. If it flashes well but the engine stays dry, the injector body itself is physically jammed with old fuel varnish.
Verify Air Intake
Pop off the seat and remove the plastic body panels to expose the main air box lid. Pull the paper element filter out and look inside the plastic tubes. Check for mouse nests, stored nuts, or dirty rags that might block the air flow. An engine needs a massive volume of clean air to mix with the fuel. A completely choked intake will flood the cylinders with wet gas and kill the spark.
Perform Compression Test
Thread a professional mechanical compression gauge tight into the empty spark plug hole on the cylinder head. Hold the handlebar throttle wide open and crank the engine until the needle stops rising. A healthy Scrambler motor should show between 115 and 130 pounds per square inch of pressure. If the reading is extremely low, your engine has worn piston rings, a blown head gasket, or tight valves.
Scan ECU Error Codes
Locate the red or black diagnostic plug tucked neatly under the passenger seat area. Attach a compatible OBD adapter cable and link it to a handheld code reader tool. Turn the bike key on and check for any stored error codes like P0335 for a crank sensor fault. Reading these digital trouble codes saves hours of blind guesswork and prevents you from buying parts you do not need.
Ducati Scrambler Starts Then Dies
Fuel Pressure Loss
The motorcycle may fire up on the small amount of fuel left in the lines, then die as pressure drops. This drop happens when the internal pressure regulator inside the gas tank cracks or leaks. The pump runs fine, but the fuel loops right back into the tank instead of rushing down to the injectors under high pressure.
Dirty Injectors
A partially clogged injector can flow enough fuel to let the motor idle for a brief moment. The second you twist the throttle, the engine leans out and dies. The tiny fuel droplets are too large to burn fast, which chokes the engine out from a lack of clean, atomized fuel mist.
Vacuum Leak
Unmetered air entering the motor behind the throttle bodies causes a lean stall. Inspect the rubber intake boots for small cracks or loose metal hose clamps. If extra air sneaks into the combustion chamber, the computer cannot adjust fast enough, causing the engine to sputter and die out right after starting.
Idle Air Control Issues
The ECU uses a small stepper motor to control how much air bypasses the closed throttle plates at idle. If this valve gets gummed up with thick black carbon deposits, it sticks shut. The engine will start up while you hold the throttle open but dies the instant you let go of the handlebar grip.
ECU Sensor Problems
Engine sensors can fail as they heat up. If the engine coolant temperature sensor or intake air temp sensor sends wild, incorrect data to the ECU, the computer will deliver the wrong fuel mix. The bike starts on a default cold map but dies as the computer tries to adjust to the bad sensor data.
Ducati Scrambler Won’t Start After Sitting
Battery Self-Discharge
Lead-acid batteries lose about one percent of their charge every day they sit on a shelf. After two months of winter storage, a battery will lack the power to spin the starter motor. Always connect a dedicated smart battery tender if you plan to leave your bike parked for more than two weeks.
Stale Fuel
Modern pump gas begins to degrade and lose its volatile compounds in as little as thirty days. The fuel turns into a dull, stale liquid that resists catching fire from a spark. If your bike sat all winter with untreated gas, you must drain the tank and pour in fresh premium fuel.
Injector Deposits
When fuel evaporates inside the warm injector tips, it leaves behind a sticky lacquer coating. This crust blocks the tiny fuel spray patterns completely. Adding a high-quality fuel stabilizer to your last tank of the season prevents this varnish from forming while the bike sits in your garage.
Corroded Battery Terminals
Damp garage air speeds up the growth of lead sulfate oxidation on the battery connections. This fuzzy green or white crust creates high electrical resistance. Power cannot bridge the dirty gap, leaving you with a dead dash when you flip the key after a long storage period.
Moisture in Electrical Connectors
Temperature changes cause ambient moisture to condense inside open electrical plugs. This water shorts out low-voltage sensor signals to the ECU. Disconnect the main plugs every spring, spray them with water-displacing contact cleaner, and apply a light coat of dielectric grease to protect the metal pins.
Ducati Scrambler Won’t Start After Rain
Wet Ignition Coils
Heavy rain or washing your bike with a high-pressure hose can force water deep into the spark plug wells. The water creates an easy path for the high-voltage spark to short out directly to the aluminum cylinder head. The engine will misfire badly or refuse to start until the area dries out.
Water Around Spark Plug Wells
The Scrambler engine has small drain holes designed to let water escape from the spark plug cavities. Road grit and mud can easily plug these tiny channels up over time. Use a thin piece of wire or a blast of compressed air to clear the holes so trapped water can drain away freely.
Damp Electrical Connectors
Water can seep past old rubber seals on the main wiring harness plugs. This dampness messes up the tiny voltage signals from the crank sensor or the side stand switch. If your bike refuses to run after a heavy storm, blow out the main harness plugs with clean compressed air.
Handlebar Switch Moisture
The starter button and kill switch housings are prone to trapping water during downpours. The trapped moisture bridges the metal contacts inside the switch, tricking the bike into thinking you are holding the kill switch down. Disassemble the plastic pods and spray them with standard water-displacing lubricant.
Step-by-Step Ducati Scrambler No-Start Diagnosis
Step 1 – Measure Battery Voltage
Set your digital meter to DC volts and touch the probes to the battery posts. You need to see at least 12.6 volts on a healthy battery. If the reading is lower, hook the bike up to a modern automatic charger before you spend time checking other systems.
Step 2 – Perform a Load Test
Keep your digital meter leads attached to the clean battery posts. Watch the screen while you hold the starter button down for five full seconds. If the voltage drops down below 10 volts during this active cranking test, the battery is dead and must be replaced.
Step 3 – Inspect Battery Connections
Grab the main thick battery cables and give them a strong pull. Check for any wobble or loose bolts at the terminal ends. Use a wire brush to scrub off any hidden corrosion, as clean metal-to-metal contact is required to pass high current to the starter.
Step 4 – Check the Main Fuse
Locate the main fuse box tucked under your seat cushion. Pull the thirty-amp main fuse out and hold it up to a bright light. Inspect the tiny metal element inside the clear plastic casing. If the wire loop is broken or burnt black, drop a fresh spare fuse in.
Step 5 – Verify Immobilizer Operation
Turn the ignition key on and look closely at the round dashboard screen. Ensure that the red or yellow security warning light turns off after a few brief seconds. If the light flashes rapidly, the bike does not recognize your key and will lock out the ignition.
Step 6 – Listen for Fuel Pump Priming
Flip the handlebar kill switch to the run position. Listen closely for a smooth, high-pitched two-second whirring sound coming from inside the fuel tank. No sound means you need to check the fuel pump relay, the pump fuse, or the wire harness plug at the tank base.
Step 7 – Test Ignition Spark
Pull a spark plug out, attach its wire coil, and hold the threaded base firmly against a bare engine bolt. Crank the motor over and look for a bright blue spark jumping the gap. If you see no spark, check the crank sensor and ignition fuses.
Step 8 – Perform Compression Test
Screw a reliable compression gauge into the cylinder head. Twist the throttle wide open and crank the engine over until the needle stops climbing. If the gauge shows less than 100 psi, your engine has mechanical damage that requires deep internal repair work.
Step 9 – Read ECU Diagnostic Codes
Plug a handheld OBD scanner into the factory diagnostic port under the passenger seat. Read any saved fault codes to see what the engine computer is complaining about. Clear the active codes, try to start the bike again, and see which error codes return immediately.
Ducati Scrambler Starting Symptoms and Likely Causes
Understanding how specific symptoms line up with mechanical faults saves time and keeps money in your wallet. Use this basic guide to identify your starting issue.
Symptoms, Causes, and First Checks
| Symptom | Most Likely Cause | DIY Difficulty | Home Repair |
| No response | Dead Battery | Easy | Yes |
| One click | Starter Relay | Easy | Yes |
| Rapid clicking | Weak Battery | Easy | Yes |
| Slow cranking | Starter Motor | Medium | Sometimes |
| Cranks but won’t start | Fuel or Spark | Medium | Yes |
| Starts then stalls | Fuel Delivery | Medium | Sometimes |
| Immobilizer warning | Key Recognition | Medium | Sometimes |
Ducati Scrambler Battery Voltage Reference
A simple digital multimeter is the single best tool you can buy for electrical diagnosis. Use these clear voltage numbers to check the health of your battery.
Battery Health Guide
| Voltage | Battery Condition | Recommended Action |
| 12.8–13.0V | Excellent | Continue diagnosis |
| 12.5–12.7V | Good | Perform load test |
| 12.2–12.4V | Weak | Recharge battery |
| Under 12V | Poor | Replace soon |
| Under 10V while cranking | Failed | Replace immediately |
Diagnose Your Ducati Scrambler Faster
Skip the confusion by targeting the most probable fault using this quick-reference table based on common field failures.
Quick Diagnostic Chart
| Problem | Likely Cause | First Check |
| Dashboard dead | Battery | Voltage |
| Single click | Starter relay | Battery terminals |
| Engine cranks | Fuel delivery | Fuel pump |
| No spark | Ignition system | Spark plugs |
| Immobilizer light | Key | Spare key |
| Starts then dies | Injector | Fuel pressure |
Ducati Scrambler Preventive Maintenance Schedule
Keeping up with a regular maintenance calendar prevents unexpected breakdowns during your weekend road trips.
Maintenance Schedule
| Component | Recommended Interval |
| Battery inspection | Monthly |
| Battery terminals | Every 6 months |
| Spark plugs | Ducati service interval |
| Air filter | Major service |
| Fuel injectors | 12,000–15,000 miles |
| Charging system | Every year |
| Electrical connectors | Annual inspection |
Essential Tools Every Ducati Scrambler Owner Should Have
Recommended Diagnostic Equipment
- Digital multimeter: Measures exact DC voltage, circuit resistance, and wire continuity.
- Battery charger: An automatic smart tender keeps the battery fresh during winter.
- Battery load tester: Checks if the battery can handle heavy starting amps.
- Spark tester: Lets you safely look at ignition spark quality during cranking.
- Compression tester: Measures internal engine mechanical health and cylinder sealing.
- Fuel pressure gauge: Confirms the fuel pump is making enough inline pressure.
- OBD diagnostic scanner: Reads stored trouble codes directly from the Ducati ECU.
- Contact cleaner: Removes grease, dirt, and corrosion from sensitive wire plugs.
- Metric socket set: Essential for removing body panels, seats, and battery bolts.
- Torque wrench: Ensures all critical fasteners are tightened to factory specifications.
Common Mistakes Owners Make
Skipping Battery Load Testing
Many owners assume a battery is perfect just because it reads twelve volts on a simple meter. They spend hundreds of dollars replacing starter motors or fuel pumps when the old battery was simply dropping to five volts under a heavy cranking load.
Ignoring Loose Ground Connections
Riders often clean the positive battery post but forget to check where the heavy black wire bolts to the engine case. A loose engine ground limits current flow, causing erratic electrical gremlins that mimic a failed ECU.
Replacing the Starter Too Soon
When an engine cranks slowly, people blame the starter motor right away. Most of the time, the real issue is a weak battery or bad cable resistance. Starter motors are tough and rarely fail before the five-year mark.
Forgetting the Side Stand Switch
It is easy to panic when the bike will not crank. Always check that the side stand is fully up and the bike is in true neutral before you start tearing into the electrical system or pulling body panels off.
Ignoring ECU Warning Lights
Riders sometimes try to force a bike to start while the engine check light or key icon is flashing on the screen. The computer is trying to tell you exactly what is wrong, so listen to it before cranking the starter raw.
Using Old Fuel After Storage
Trying to run an engine on stale six-month-old fuel will foul your new spark plugs and gum up the fine injector tips. Always drain old gas before trying to fire up a bike that sat all winter long.
USA Motorcycle Expert Advice
“Most Ducati Scrambler no-start complaints come down to weak batteries, charging system faults, or poor electrical connections not failed ECUs. Test voltage under load before replacing expensive components.” — Michael Thompson, European Motorcycle Technician, California
Why Battery Testing Always Comes First
Professional bike mechanics always begin an electrical diagnosis at the battery posts. Modern digital engine brains are highly sensitive to voltage drops. If the system voltage drops below 10.5 volts during cranking, the ECU will protect itself by turning off the ignition coils and fuel injectors completely, even if the starter motor is still spinning the engine over.
Real Workshop Story
A rider brought his Scrambler into a busy California shop on a frantic Friday afternoon. He was totally convinced his engine brain had fried because the bike refused to start. His home voltage meter showed a decent twelve point four volts at rest. The shop tech hooked up a real load tester and pressed the starter button. The battery voltage crashed down to six volts instantly. A fresh battery solved the problem in ten minutes flat, saving the owner from buying an expensive new ECU.
How to Prevent Ducati Scrambler Starting Problems
Keep the Battery Fully Charged
Plug your bike into a modern smart maintenance charger whenever you plan to leave it parked for more than a few days. These smart devices monitor the voltage and keep the battery topped off safely without overcharging the internal cells.
Ride the Bike Regularly
Short ten-minute trips around the block do not give the charging system enough time to replenish the battery power used to start the engine. Take your bike out for a long thirty-mile highway ride at least once every week to keep everything fresh.
Use Fresh Premium Fuel
Always fill your tank with top-tier premium gasoline from high-volume fuel stations. If you store the motorcycle for the winter season, add a quality fuel stabilizer and run the engine for five minutes to coat the internal lines.
Inspect Electrical Connections
Twice a year, pull the seat and check the main power wires. Ensure the bolts are tight and free of white oxidation. Spraying the open junctions with a dedicated electrical protectant spray blocks out road moisture and stops rust.
Test the Charging System Annually
Start your engine and hold the meter probes against the battery posts. Rev the motor up to three thousand RPM. You should see the meter rise to 13.8 or 14.5 volts, showing that the stator is working correctly.
Follow Ducati’s Service Schedule
Never skip the factory maintenance intervals for spark plug changes and valve clearance inspections. Tight valves can cause low engine compression, making the motorcycle very difficult to start when the engine block is completely cold.
When Should You Visit a Ducati Dealer?
Persistent Immobilizer Faults
If your dash keeps displaying the security key icon and the spare key fails to fix the issue, you need a dealer. They have the factory software required to program new keys and link the security antenna to the main computer.
ECU Communication Errors
When a high-end diagnostic scanner cannot connect to the bike’s engine brain, you likely have a internal computer failure or a broken main data wire. A factory technician can run deep diagnostic tests to track down the break.
Fuel Pump Replacement
Replacing the internal fuel pump requires working with delicate plastic locking tabs and high-pressure fuel lines inside the gas tank. If you are not comfortable handling raw fuel systems, let a trained professional do the job safely.
Wiring Harness Damage
If mice have chewed through your main wire loom or a hot wire has melted a section of the bundle, fixing it requires expert skill. A dealer can pin out the harness or replace the entire loom to prevent future electrical shorts.
Low Compression Diagnosis
When a compression test reveals low cylinder pressure, the engine needs to be torn down. Inspecting valves, piston rings, and cylinder walls requires highly specialized engine tools and precise metric measuring gauges.
Ducati Scrambler Compared with Similar Retro Motorcycles
Ducati Scrambler vs Triumph Scrambler 900
The British Triumph uses a robust Keihin fuel injection system that is less sensitive to small voltage drops than the Ducati setup. However, the Triumph starter relay is prone to water entry, whereas the Ducati keeps its relays tucked up high and dry under the seat.
Ducati Scrambler vs BMW R nineT
The premium BMW utilizes a massive twin-cylinder boxer engine that requires huge amounts of battery power to crank over. While the BMW starter motor fails more often due to engine heat, its main charging system is much stronger than the basic Ducati stator layout.
Ducati Scrambler vs Yamaha XSR700
The Japanese Yamaha is famous for bulletproof electrical systems that handle rain and long storage periods with ease. The Ducati offers a more emotional, raw riding experience but requires much more frequent battery and electrical terminal maintenance to stay reliable.
Common Starting Problems Across Modern Retro Motorcycles
All modern retro bikes rely heavily on good battery health and clean safety switches. Whether you ride a Ducati, a Triumph, or a Yamaha, a sticky side stand switch or a loose ground wire will leave you stranded on the side of the road every single time.
Frequently Asked Questions
Why is my Ducati Scrambler not starting?
The most common cause is a weak or dead battery. Other frequent culprits include loose battery terminal bolts, a bumped handlebar kill switch, or a faulty side stand safety sensor that cuts off the starter power circuit.
Why does my Ducati Scrambler click but not start?
A rapid clicking sound means your battery has enough power to trigger the starter relay, but lacks the amperage required to spin the starter motor. Clean your terminals and charge the battery fully to fix this issue.
Why does my Ducati Scrambler crank but won’t fire?
If the starter spins the motor strong but it will not run, focus on the fuel pump operation or spark plug condition. Ensure you can hear the fuel pump whirring for two seconds when you turn the key on.
Can a weak battery light the dashboard but stop the engine from starting?
Yes, a weak battery can easily illuminate the low-draw digital dash screen. However, turning over a large L-twin engine requires hundreds of amps, which a weak or degraded battery cannot deliver.
What does the immobilizer warning light mean?
This warning means the security system does not recognize the electronic chip inside your ignition key. Try using your secondary spare key, or inspect the antenna ring around the ignition key slot for physical damage.
How do I know if my starter relay has failed?
If you hear a single loud click when pushing the button but the motor stays dead, the relay contacts may be burnt. You can test this by bridging the two large relay posts with an insulated tool tip.
Why won’t my Ducati Scrambler start after winter storage?
The fuel inside the tank has likely turned stale, or the battery has self-discharged from sitting on a cold shelf. Always store your bike with fresh fuel stabilizer and keep it hooked to a smart battery tender.
How much does it cost to repair a Ducati Scrambler that won’t start?
A loose wire or dirty switch costs nothing to clean at home. A fresh battery runs around one hundred dollars, while a broken starter motor or fuel pump can cost several hundred dollars at a professional shop.
Final Recommendation
As an experienced motorcycle technician who has spent years working on these beautiful machines, I have seen count-less starting issues come down to basic maintenance errors. Do not rush out to buy an expensive new ECU or starter motor the moment your bike acts up. Grab a simple digital multimeter, follow the step-by-step diagnostic sequence, and always test your battery under a full cranking load first. Taking care of your electrical connections and keeping your battery on a smart tender will ensure your Scrambler fires up perfectly every single time you hit the road.

Ehatasamul Alom is a dedicated road hybrid bikes expert. With over 15 years of experience, he helps people find the perfect ride. He began his journey as a bike mechanic. He learned the ins and outs of every bike.
Ehatasamul Alom holds a Master's degree in Mechanical Engineering from a Brown University (Providence US 02912), where he specialized in material science and bicycle kinematics. His master's thesis focused on optimizing frame geometry for road hybrid bikes to improve rider comfort and efficiency.
Ehatasamul has an extensive professional background. He spent 10 years (2010-2020) as a Senior Bike Designer at "Urban Cycles," a leading bicycle manufacturer. In this role, he led the development of several award-winning road hybrid bikes, which are known for their durability and performance. He later served (2020-2024) as the Head of Product Development at "Gear Up," a company specializing in high-end cycling components. There, he developed innovative parts and accessories specifically for road hybrid bikes.
Over the years, Ehatasamul has become an authority on Roadhybridbikes. He understands their design and function. His work focuses on making bikes easy to use. Ehatasamul believes everyone should enjoy cycling. He writes guides that are simple to read. His passion for road hybrid bikes is clear. His goal is to share his knowledge with everyone. He wants to see more people on two wheels. His advice is always practical and easy to follow.
- Ehatasamul Alom

- Ehatasamul Alom
- Ehatasamul Alom

- Ehatasamul Alom



