
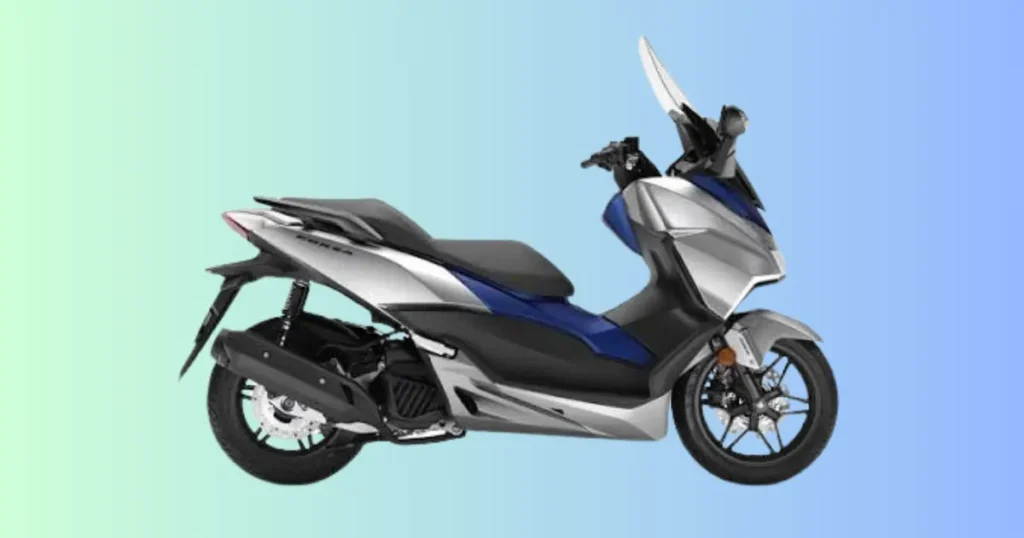
Staring at a dead scooter when you need to get to work is incredibly frustrating. Last October, a rider in Boston, Massachusetts, rolled his Honda Forza 125 out of the garage, hit the starter, and got nothing but silence. He assumed the starter motor was dead and braced himself for a massive repair bill. It turns out, a weak battery in his Smart Key fob was the actual culprit. A simple coin-cell replacement fixed it in two minutes.
Finding the root cause of a honda forza 125 not starting issue requires a systematic approach. Before you panic or spend money on expensive replacement parts, take a breath. Most starting issues on this maxi scooter trace back to simple, easily fixable components. This guide will walk you through the exact diagnostic steps to get your eSP+ engine purring again.
Honda Forza 125 Not Starting? Check These Things First
When a modern fuel-injected scooter refuses to fire up, your first instinct might be to fear the worst. However, safety interlocks and electronic systems frequently cut power as a protective measure. Taking five minutes to run through a basic physical checklist can save you hours of unnecessary tool work.
What Happens When You Try to Start the Scooter?
The exact behavior of your Forza when you turn the ignition knob provides the most important clue for diagnostics:
- Nothing happens: Total blackout usually means a completely dead battery, a blown main fuse, or a disconnected ground wire.
- One click only: A single loud click indicates that your starter relay is working, but the starter motor cannot spin, or battery voltage drops too low under load.
- Rapid clicking noise: This classic symptom points directly to a weak battery that has enough juice to click the relay but not enough to turn the engine.
- Engine cranks but won’t fire: If the starter motor spins the engine fast and freely but it never catches, the problem lies in fuel delivery or ignition spark.
- Engine starts then stalls: This indicates that initial ignition is working, but the Programmed Fuel Injection (PGM-FI) system cannot maintain fuel pressure or air-fuel ratios.
- Slow cranking: The engine drags sluggishly, suggesting high mechanical resistance, cold oil, or a battery on its last legs.
- Smart Key warning appears: The indicator light flashes on the dash, showing that the Smart Control Unit cannot read your key fob.
- FI warning light stays on: The Electronic Control Unit (ECU) has detected a faulty sensor or an electrical glitch in the fuel system.
- Dashboard powers up but engine won’t start: The screen looks healthy, but a safety switch (like the side stand or brake) is blocking the starter signal.
Five-Minute Quick Inspection
Before grabbing your toolkit, perform these rapid safety and baseline checks on your scooter:
- Check the Smart Key battery: Press the button on your fob; a weak or dim LED indicates it is time for a new CR2032 cell.
- Confirm the scooter has fuel: Open the tank lid and physically verify there is fresh gasoline inside, as fuel gauges can occasionally stick.
- Verify battery voltage: Turn on the ignition and look for bright, stable dashboard lights without any flickering.
- Ensure the side stand is fully raised: The safety switch on the side stand will instantly cut the ignition circuit if it is down even slightly.
- Squeeze the brake lever firmly: The Honda starting circuit requires a solid brake switch signal; try pulling both levers hard if one fails.
- Listen for the fuel pump priming: Turn the switch to “On” and listen closely near the floorboard for a distinct two-second humming sound.
- Inspect battery terminals: Remove the plastic cover and ensure the positive and negative screws are tight and free of white corrosion.
- Look for warning lights on the dashboard: Take note of whether the key icon or the amber engine light remains illuminated.
Warning Signs You Should Never Ignore
Some symptoms indicate severe electrical or mechanical faults. If you notice any of these signs, stop cranking immediately to prevent permanent damage:
- Burning electrical smell: Indicates an active short circuit or a melting wiring harness. Disconnect the battery negative terminal right away.
- Fuel leak: Puddles or a strong raw gas smell indicate a split fuel line or loose injector connection, creating a major fire risk.
- Smoke around wiring: Stop immediately; this means a wire is carrying excessive current without a fuse blowing.
- Grinding starter noise: Suggests the starter motor bendix or starter clutch gears are stripped and destroying themselves.
- Repeated blown fuse: Replacing a fuse only to have it pop again instantly means you have a direct short to ground somewhere in the circuit.
- Smart Key communication error: Shows that the security system is actively locked, which will prevent the fuel injector from firing.
- FI warning light flashing: The ECU flashes specific fault codes to warn you of critical sensor failures.
How the Honda Forza 125 Starting System Works
The Honda Forza 125 relies on an interconnected web of digital security and fuel-injection logic. Unlike older carbureted scooters that just need a spark and fuel flow, this maxi scooter checks several digital parameters before it allows the engine to crank.
Main Starting System Components
To troubleshoot effectively, you need to understand the structural pieces that form the starting loop:
- Battery: The electrical heart of the scooter, providing 12-volt direct current to all digital modules and the starter motor.
- Smart Key system: The handheld fob that transmits an encrypted radio frequency code to authorize scooter usage.
- Smart Control Unit: The onboard module dedicated to receiving, verifying, and decoding the Smart Key signal.
- Starter relay: A high-current heavy switch that uses a small electrical signal from your brake lever to bridge high battery current directly to the starter.
- Starter motor: An electric motor that physically spins the crankshaft to initiate the internal combustion cycle.
- Starter solenoid: An electromagnetic switch often integrated into or linked with the starter to engage the drive mechanism.
- Electronic Control Unit (ECU): The main computer brain that manages engine timing, fuel injection amounts, and safety protocols.
- Fuel pump: An electric pump inside the fuel tank that pressurizes the lines so fuel can be cleanly atomized.
- Fuel injector: An electronically controlled valve that sprays a fine mist of gasoline into the intake tract.
- Ignition coil: A transformer that steps up low battery voltage to thousands of volts needed to create a strong spark.
- Spark plug: The terminal component inside the cylinder head that ignites the compressed air-fuel mixture.
- Crankshaft position sensor: Tells the ECU exactly where the piston is, ensuring the spark and fuel spray happen at the perfect microsecond.
- Side stand switch: A safety plunger switch that opens the circuit and kills the engine if the stand is down while trying to ride.
- Brake switch: Located inside the handlebar levers, this ensures the rider is actively holding the brakes before the engine can crank.
- Main fuse: A protective link (usually 30 Amps) that shields the main electrical harness from catastrophic current spikes.
Step-by-Step Startup Sequence
When you sit on your Forza 125 and start the engine, the scooter completes a rapid, automated sequence:
[Smart Key Authenticates] -> [ECU Wakes Up] -> [Fuel Pump Primes]
                                                   |
[Starter Motor Cranks] <- [Starter Relay Activates] <- [Safety Switches Checked]
         |
[Injector Sprays Fuel] -> [Spark Ignites Mixture] -> [Engine Starts]
If any single step in this sequence fails to complete or reports an error, the ECU immediately Halts the process.
Most Common Reasons a Honda Forza 125 Won’t Start
When your scooter refuses to cooperate, the problem usually stems from a failure in one of five core areas. Let’s break down each potential failure point with clear symptoms and diagnostic instructions.
Weak or Dead Battery
A weak battery is responsible for roughly 70% of all scooter starting problems. Modern maxi scooters place heavy constant demands on their batteries due to ambient security systems and clock modules.
Typical Symptoms
The dash lights might turn on, but they will dim drastically or turn off completely the instant you press the starter button. You will often hear a rapid clicking sound from the rear bodywork.
Battery Voltage Test
Connect a digital multimeter to the battery terminals. A completely healthy, fully charged battery must read between 12.8V and 13.0V when the scooter is turned completely off.
Battery Load Test
Voltage alone can be deceptive. A damaged battery can show 12.6V at rest but collapse to 9V the second you apply a load. Hook up a load tester or monitor your multimeter while pressing the starter button; if the voltage drops below 10.5V during cranking, the battery is dead.
When Replacement Is Necessary
If your battery cannot hold a charge above 12.4V after 24 hours on a smart charger, or if it has been deeply discharged below 10V multiple times, the internal lead plates are sulfated. You must replace it with a fresh, sealed AGM or gel battery.
Smart Key Battery Failure
The convenience of Honda’s keyless system comes with a minor catch: if the key fob battery dies, your scooter becomes a heavy paperweight.
Signs the Smart Key Battery Is Dead
The scooter will not acknowledge your presence when you approach. The indicator ring around the main ignition dial will stay unlit, and a key-shaped warning icon may flash slowly on the dashboard cluster.
Emergency Starting Procedure
If you are stranded with a dead key fob battery, you can use the EM mode provided by Honda. Remove the plastic access panel near the seat lock, plug in the blue emergency connector tool, and enter your scooter’s unique 9-digit key ID code using the ignition dial sequences.
Replacing the Smart Key Battery
Pry the two halves of the key fob plastic case apart using a coin wrapped in a soft cloth. Slide out the old CR2032 lithium battery and install a fresh one with the positive (+) side facing up, then snap the case back together securely.
Loose or Corroded Battery Terminals
Even a brand-new battery cannot do its job if electricity cannot flow freely through the primary connections.
Symptoms
The scooter may have intermittent electrical power. Sometimes it starts perfectly; other times, hitting a bump or turning the handlebars kills all dashboard power instantly due to shifting wires.
Cleaning the Connections
Loosen the negative terminal screw first, then the positive screw. Use a wire brush or fine sandpaper to scrub away the white, powdery copper sulfate oxidation until the metal shines. Reinstall the cables tightly and coat them with dielectric grease to block out moisture.
Faulty Starter Relay
The starter relay functions as a heavy-duty bridge, allowing low-amperage handle switches to handle massive starting currents safely.
Clicking Without Cranking
If you squeeze the brake lever and press the starter button, hearing a single distinct “click” from under the plastic panels while the engine remains completely still, the relay internal contacts are likely burnt or pitted.
Relay Testing
Locate the relay near the battery. Use a multimeter to verify that 12 volts are reaching the trigger wire when you press the button. You can bridge the two heavy copper terminals briefly with an insulated screwdriver; if the starter motor spins, your relay is broken.
Starter Motor Failure
The starter motor must overcome high internal engine compression to get the crankshaft spinning up to starting speeds.
Slow Cranking
If the battery tests perfectly but the starter motor turns the engine over with an agonizingly slow, labored sound, the motor internal carbon brushes are worn out or oil has leaked past its internal seals.
Starter Motor Inspection
Lightly tap the starter motor body with the wooden handle of a screwdriver while pressing the starter button. If it suddenly springs to life, the internal brushes are sticking or have flat spots. The starter must be removed, cleaned, or replaced.
Fuel Pump Failure
Your Honda Forza relies on high fuel pressure to atomize gasoline through its fuel injector. Without a functioning pump, no fuel reaches the combustion chamber.
No Priming Sound
When you turn the ignition knob to the “On” position, you should hear a clear, smooth buzzing sound for two seconds from the lower chassis. Complete silence indicates an electrical failure or a locked pump motor.
Fuel Pressure Testing
Tee a professional fuel pressure gauge into the fuel supply line leading to the injector body. Turn the key on; a healthy Honda fuel pump must instantly build and hold roughly 43 PSI (300 kPa) of pressure.
Dirty Fuel Injector
Over time, microscopic deposits in gasoline can gum up the incredibly tiny nozzle openings on your fuel injector.
Fuel Delivery Problems
The scooter will crank normally and have a strong spark, but the spark plug will remain completely bone dry after extended cranking. The engine may splutter occasionally but fail to catch.
Injector Cleaning
Remove the fuel injector from the intake manifold. You can apply 12V power to the injector pins briefly using a test lead while forcing aerosol electronic cleaner through the body to clear out varnish and carbon blockades.
Fouled Spark Plug
The spark plug lives in a harsh environment and is directly responsible for lighting the compressed air and fuel mixture.
Carbon Deposits
If you primarily take short trips where the engine never reaches full operating temperature, dry black carbon will coat the plug tip. This carbon conducts electricity away, preventing a spark from jumping the gap.
Fuel Fouling
If you repeatedly crank the engine without it starting, the plug tip becomes soaked in wet gasoline. A wet plug cannot fire; it must be removed, dried thoroughly, and cleaned with a wire brush.
Service Interval
Honda recommends inspecting the spark plug every 4,000 miles (6,000 km) and replacing it completely every 8,000 miles (12,000 km). Always use the exact NGK model specified in your owner’s manual.
Ignition Coil Problems
The ignition coil must transform low-voltage battery current into an intense pulse capable of jumping the spark plug gap under high compression.
Weak Spark
A failing coil will produce a faint, yellow spark rather than a crisp, bright blue snap. This weak spark may fire in open air but fail completely once inside the pressurized environment of the engine cylinder.
Coil Testing
Use a digital multimeter set to ohms to measure the resistance of both the primary and secondary windings. Compare your readings against factory specifications; an open circuit or zero resistance means the internal copper wire insulation has melted.
ECU or FI System Fault
The Electronic Control Unit monitors multiple engine parameters to ensure safe operation. If it detects a critical fault, it enters a protective shutdown mode.
FI Warning Light
If the amber Engine/FI light stays illuminated or flashes a specific pattern when you attempt to start, the ECU has detected a live error code from a sensor.
Reading Error Codes
You can read these codes without a scanner by shorting the correct pins on the red DLC diagnostic connector under the battery cover. Count the long and short flashes of the FI light to determine which sensor (such as the map or coolant sensor) is faulty.
Side Stand or Brake Switch Failure
These safety switches are designed to ensure you cannot accidentally start the scooter while it is parked on its stand or without holding the brakes.
Safety Interlock Issues
Because these switches live underneath the scooter and inside the handlebars, they are constantly exposed to road grime, mud, and rain water, leading to internal corrosion.
Inspection Steps
Spray electrical contact cleaner directly into the side stand pivot switch while working the mechanism up and down. For the brake switches, check if your rear brake light illuminates when you pull the lever; if the light stays dark, the switch is broken and blocking the starter.
Damaged Wiring Harness
Scooters feature tight packaging, meaning wires must route through tight spaces around the frame and steering head.
Loose Connectors
Vibration over thousands of miles can gradually back plastic multi-pins out of their locking sockets, breaking critical signal connections.
Broken Ground Wire
The main ground wire connects the battery negative terminal directly to the bare metal engine case. If this connection rusts or breaks, the starter motor loses its electrical return path and will not function.
Honda Forza 125 Cranks but Won’t Start
If your starter motor spins the engine with plenty of speed but the motor refuses to run, you can rule out the battery, starter motor, and starter relay. Your diagnostic focus must shift entirely to the three basic requirements of internal combustion: fuel, spark, and cylinder compression.
Check for Spark
Remove the spark plug from the cylinder head using a spark plug socket. Reattach the rubber spark plug cap to the plug, hold the metal threaded base of the plug firmly against a bare, unpainted metal bolt on the engine case, and press the starter button. Look closely at the electrode gap; you should see a bright, snappy blue spark. If you see a weak yellow spark or no spark at all, check for a cracked plug ceramic body, a loose plug cap, or a bad ignition coil.
Listen for Fuel Pump Priming
Turn your ignition dial from off to on several times in a quiet room. Listen for the characteristic two-second whirring sound coming from under your feet. If you hear nothing, check the fuel pump fuse in the main fuse box. If the fuse is completely intact, use a multimeter to check for 12 volts at the fuel pump electrical plug when you turn the key on. No voltage means a bad relay or wiring fault; correct voltage means the pump motor itself is dead.
Verify Injector Operation
If your pump primes and you have a strong spark, you must confirm that fuel is actually entering the cylinder. Remove the spark plug after cranking the engine for five seconds and smell the tip. It should smell distinctly of fresh gasoline, and the electrode should be damp. If it is dry, the injector is not opening. Check the injector wiring plug for damage or use a test light to verify that the ECU is sending the pulse signals.
Inspect the Air Filter
Engines require a precise balance of air and fuel. Remove the plastic air box cover on the left side of the scooter and pull out the pleated paper air filter element. If the filter is choked with heavy dust, mud, or blocked by a rodent nest, the engine cannot draw enough air to fire up. Try cranking the engine briefly with the filter removed; if it starts immediately, install a new air filter.
Measure Fuel Pressure
A fuel pump can spin and make normal noises while failing to generate enough pressure to operate the fuel injector. Attach a fuel pressure gauge to the line. If the pressure reads below 35 PSI, the fuel injector will spray large droplets instead of a fine, easily ignitable mist. This low pressure usually indicates a clogged internal fuel filter screen or a worn-out pump impeller.
Perform a Compression Test
An engine needs mechanical compression to squeeze the air-fuel mixture before ignition. Thread a compression gauge into the spark plug hole, hold the throttle wide open, and crank the engine for five seconds. A healthy Honda Forza 125 engine should show a reading between 150 and 180 PSI. If the reading drops below 100 PSI, the engine has stuck piston rings, a blown head gasket, or burnt valves.
Honda Forza 125 Starts Then Dies
This frustrating symptom indicates that the starting system works, but the engine cannot maintain a stable combustion cycle once it transitions out of its initial startup phase.
Fuel Pressure Loss
The fuel pump may have enough residual pressure to spark the engine for a split second, but a failing pump motor or a leaking internal line can cause that pressure to collapse instantly under continuous demand. Watch your fuel pressure gauge carefully as the engine starts; if the needle drops to zero the moment the engine fires, the pump cannot handle a continuous electrical load.
Dirty Injector
A partially clogged injector might flow just enough fuel to let the engine sputter to life on the ECU’s rich cold-start map. However, as soon as the ECU leans out the fuel mixture for normal idling, the restricted fuel flow causes the engine to starve and stall out immediately.
Idle Air Control Problems
Modern scooters use an electronic valve or a bypass passage to regulate how much air enters the engine when your hand is off the throttle grip. If this passage is choked with oily carbon deposits from the crankcase breather, the engine will instantly suffocate and die the second you release the starter button. Clean the throttle body thoroughly with specialized carburetor cleaner.
Vacuum Leak
Any unmetered air that sneaks into the engine behind the throttle body will lean out the air-fuel mixture drastically. Inspect the rubber intake manifold boot carefully for fine cracks, splits, or loose hose clamps. Spraying a tiny bit of brake cleaner around the intake manifold while cranking can help locate leaks; if the engine revs up momentarily, you have found your leak.
Faulty ECU Sensor
The ECU relies heavily on data from the Engine Coolant Temperature (ECT) sensor and the Manifold Absolute Pressure (MAP) sensor to calculate fueling. If the ECT sensor is broken and tells the ECU that the engine is already boiling hot on a freezing morning, the computer will not supply enough fuel, causing the engine to stall out immediately.
Honda Forza 125 Won’t Start After Sitting
Leaving a scooter parked for several months without proper storage preparation can turn fresh gasoline into a gummy varnish that wreaks havoc on fuel system components.
Weak Battery
Batteries naturally discharge over time when left sitting, a process accelerated by the constant power drawn by the Forza’s Smart Key clock and security systems. A battery left sitting for three months will regularly drop below 11 volts, which damages the internal plates permanently. Always attach a smart battery tender if you plan to store the scooter for more than two weeks.
Old Fuel
Modern ethanol-blended gasoline begins to degrade and oxidize in as little as 30 days. The highly volatile components evaporate, leaving behind a stale, low-octane liquid that resists ignition. Ethanol also absorbs water moisture from the ambient air, leading to phase separation where a layer of water settles directly at the bottom of your fuel tank.
Fuel Pump Sticking
When old fuel sits inside the fuel pump body, it turns into a sticky lacquer. This residue acts like glue, binding the tiny internal pump impellers and preventing the electric motor from spinning when you turn the key. Sometimes, draining the tank and adding fresh fuel with a concentrated system cleaner can dissolve this varnish and free the pump.
Injector Deposits
The microscopic pintle valve inside a fuel injector can easily become completely sealed shut by dried fuel lacquer during seasonal storage. Even if the pump builds perfect pressure, the stuck internal valve prevents any fuel from spraying out. The injector must be removed and cleaned using an ultrasonic bath or a dedicated manual pulse cleaner.
Rodent Damage
Scooters stored in barns, sheds, or outdoor carports are prime targets for mice and rats looking for a warm nesting spot. Rodents love to chew on the soy-based insulation used on modern Honda wiring harnesses. Inspect the wiring around the ECU, ignition coil, and stator lines carefully for chewed copper strands or frayed insulation.
Honda Forza 125 Won’t Start After Rain
Water is an excellent electrical conductor. Riding through heavy rain storms or leaving your scooter uncovered outside can allow moisture to find its way into sensitive electrical connections.
Wet Spark Plug Cap
The spark plug boot sits low down on the cylinder head, right in the direct path of water sprayed up by the front tire. If the rubber seal on the spark plug cap is cracked or degraded, water will seep inside. This provides an easy path for the high-voltage spark to jump directly to the aluminum engine block instead of jumping the plug electrode gap. Remove the cap, dry it with compressed air, and apply a thick layer of dielectric silicone grease inside.
Water Around ECU Connectors
While Honda seals its main electronic modules carefully, high-pressure water from pressure washers or driving rain can occasionally breach the plastic seals on the multi-pin ECU plug. This water shorts out the delicate 5-volt sensor signals, confusing the computer and causing a total starting lockout. Disconnect the plug, spray it with electrical contact cleaner to displace the water, and let it dry completely.
Moisture in Switches
Water can collect inside the handlebar switch housings, bridging the open contacts inside your starter button or brake switches. This can cause the scooter to think you aren’t pulling the brake lever, or it can cause the starter to stay engaged continuously. Disassembling the handlebar pods and spraying them with a water-displacing lubricant like WD-40 will quickly resolve this issue.
Corroded Relay
If water gets past the rubber protective boots on the starter relay terminals, it accelerates rust and copper oxidation. This corrosion creates high electrical resistance, blocking the high amperage required by the starter motor. Clean the terminals with a wire brush and ensure the rubber covers are seated correctly over the connections.
Step-by-Step Honda Forza 125 No-Start Diagnosis
To diagnose a starting problem accurately without wasting time or money, you need to follow a structured testing pathway. This systematic process isolates variables one by one until you locate the exact component failure.
Step 1 – Check the Smart Key
Stand next to the scooter with your key fob. Press the button on the fob and verify the light is bright green. Turn the ignition knob; if the dash illuminates and the key indicator light goes out, your security handshake is successful. Proceed to Step 2.
Step 2 – Measure Battery Voltage
Set your digital multimeter to the DC Voltage scale. Place the red probe on the positive battery terminal and the black probe on the negative terminal. A healthy battery must read 12.6V or higher. If it reads lower, charge it fully before moving forward.
Step 3 – Perform a Load Test
Keep your multimeter probes connected to the battery terminals. Watch the screen closely while you squeeze the brake lever and press the starter button. If the displayed voltage drops below 10.5V while the engine is trying to crank, your battery lacks capacity and must be replaced.
Step 4 – Inspect Battery Connections
Visually examine the red and black battery cables. Grab them with your hand and try to wiggle them; they must be completely immovable. If you notice any white crusty powder or loose screws, remove, clean, and retighten them.
Step 5 – Check Main Fuse
Locate the main fuse box next to the battery. Pull out the green 30-amp main fuse and inspect the internal metal element. If the thin metal bridge inside the plastic housing is broken or melted, replace it with a spare fuse of the exact same amperage rating.
Step 6 – Listen for Fuel Pump Priming
Turn the ignition switch on and listen closely near the floorboard area. You should hear a clear, smooth two-second whirring sound. If you hear absolute silence, check the dedicated 10-amp fuel pump fuse and check for power at the pump harness connector.
Step 7 – Inspect Spark Plug
Remove the spark plug from the engine cylinder head. Inspect the color of the electrode tip; a healthy plug should have a light tan or grey appearance. If it is covered in wet black oil, raw wet gasoline, or heavy carbon deposits, clean or replace it.
Step 8 – Test Starter Relay
If you hear a single click but no cranking, locate the starter relay. Use a voltmeter to verify that 12V arrives at the thin trigger wire when the starter button is pressed. If power is present but the heavy battery lines don’t bridge, the relay internal contacts are bad.
Step 9 – Scan ECU Fault Codes
If your dashboard FI engine warning light is flashing or stays illuminated, connect a diagnostic jumper wire or scanner to the red DLC plug. Read the recorded fault flashes to identify if a broken sensor is causing the ECU starting lockout.
Honda Forza 125 No-Start Diagnosis Table
This diagnostic chart lets you quickly match specific physical symptoms with their most likely root causes, repair difficulty levels, and whether the job can be safely completed at home.
Before pulling panels off, check your symptoms against this table to plan your repair approach.
| Symptom | Most Likely Cause | DIY Difficulty | Home Repair |
| No dashboard response | Completely Dead Battery or Dead Smart Key | Easy | Yes |
| Rapid clicking noise | Weak Battery Voltage Drop | Easy | Yes |
| One single loud click | Faulty Starter Relay Contacts | Easy | Yes |
| Cranks quickly but won’t start | Faulty Spark Plug or Fuel System Blockage | Medium | Yes |
| Starts for a second then dies | Low Fuel Pressure or Idle Air Passage Clog | Medium | Sometimes |
| FI warning light stays on | Damaged Engine Sensor or ECU Fault Code | Medium | No |
| Smart Key warning light flashing | Key Fob Battery Low or Out of Range | Easy | Yes |
| No fuel pump priming hum | Blown Fuel Pump Fuse or Dead Pump Motor | Medium | Sometimes |
Battery Voltage Reference Table
A digital multimeter is the single most valuable tool for diagnosing starting problems. Use this reference chart to determine the health and charge state of your scooter’s battery based on voltage readings.
Always measure your battery voltage after the scooter has been sitting turned off for at least one hour.
| Voltage | Battery Condition | Recommended Action |
| 12.8V–13.0V | Excellent Full Charge | Battery is healthy; continue diagnosing other components |
| 12.5V–12.7V | Good State of Charge | Perform a load test to check true cranking capacity |
| 12.2V–12.4V | Weak / Partially Discharged | Hook up to a smart battery charger for 12–24 hours |
| Below 12.0V | Poor / Deeply Discharged | Charge and test; prepare to replace the battery soon |
| Below 10.5V during cranking | Failed Internal Cell | Replace the battery immediately with a fresh AGM unit |
Smart Key Warning Messages Explained
The advanced Honda Smart Key system uses a dashboard indicator light to communicate security statuses and system errors. Understanding these signals helps prevent unnecessary component replacements.
Pay close attention to how the key-shaped icon behaves when you approach and operate the scooter.
| Warning Light Behavior | Likely Cause | Recommended Fix |
| Key icon flashes slowly | Key fob battery voltage is dropping low | Replace the internal CR2032 battery immediately |
| No indicator ring response | Fob is turned off or completely out of range | Press fob button until LED turns green; move closer |
| Key light stays on continuously | Active security system communication error | Check the Smart Control Unit fuse and wiring harness |
| Flashes 5 times when turned on | Registration mode error or invalid key code | Re-register the key fob using your emergency ID code |
Diagnose the Problem by Symptom
Narrowing down your troubleshooting focus based on specific system behaviors prevents you from wasting time testing healthy parts. Use this quick reference path to find the right starting point.
Match your scooter’s current behavior to the paths below to locate the most relevant testing procedures.
| Observed Symptom | Primary Suspect System | First Practical Check |
| Single click, no crank | Starter Relay / Starter Motor | Test relay output voltage with a multimeter |
| Rapid clicks, dash dims | Weak Battery Capacity | Perform a load test during a cranking attempt |
| Flickering key icon | Smart Key Security | Install a brand-new name-brand CR2032 cell |
| Steady amber engine light | Fuel Injection / ECU Sensors | Scan for active trouble codes via the DLC plug |
| Fast cranking, dry plug | Fuel Delivery Malfunction | Listen for the 2-second pump priming hum |
| Fast cranking, wet plug | Ignition / Spark Failure | Ground spark plug body to check for blue spark |
Essential Tools Every Honda Forza 125 Owner Should Have
You do not need a professional motorcycle workshop to diagnose and fix most starting issues. Keeping a few basic, affordable diagnostic tools in your home garage will pay for itself on the very first repair.
Recommended Tools
- Digital multimeter: Essential for testing battery voltage, checking circuit continuity, and tracking down broken wires.
- Smart battery charger: A dedicated motorcycle charger/tender to safely recharge and maintain your sealed AGM battery.
- Battery load tester: Applies a simulated starter load to reveal if a battery has internal cell damage.
- Inline spark tester: Connects between the plug and cap to safely visually verify ignition spark while cranking.
- Fuel pressure gauge: Measures system pressure to confirm your fuel pump is working at full capacity.
- Engine compression tester: Threads into the cylinder head to check the mechanical health of your valves and piston rings.
- Honda-compatible diagnostic tool: Plugs into the red DLC link to instantly read and clear active ECU error codes.
- Electrical contact cleaner: An aerosol spray that dissolves oil, dirt, and corrosion inside plastic electrical plugs.
- Basic socket set: Metric sockets (8mm to 14mm) to remove body panels, battery brackets, and engine components.
- Spare Smart Key battery: Keep a fresh, sealed CR2032 lithium coin cell stored safely under your seat or in your riding jacket.
- LED Flashlight: Essential for lighting up dark areas deep inside the scooter frame and bodywork panels.
Common Mistakes Owners Make
When a scooter won’t start, throwing new parts at the problem without proper testing is an expensive, frustrating way to handle repairs. Avoid these common diagnostic pitfalls.
Ignoring the Smart Key Battery
Many owners assume that because their dashboard lights up, the key fob battery must be fine. A weak key fob battery can allow the dashboard to wake up but lack the signal strength to authorize the ECU to run the starter circuit, leading to an immediate starting lockout.
Replacing the Starter Too Early
The starter motor is a durable, heavy-duty component that rarely fails early. Replacing it simply because the scooter only makes a clicking sound is a huge waste of money; that click almost always indicates a dead battery or a faulty five-dollar relay instead.
Forgetting Battery Load Testing
A flat battery can easily show a perfect 12.6 volts on a simple multimeter when sitting completely idle. Assuming the battery is healthy based on that idle reading is a classic mistake. You must always check the voltage under an active cranking load to see its true health.
Ignoring FI Warning Lights
The amber Fuel Injection warning light is your scooter’s way of telling you exactly what is wrong. Ignoring a flashing light and continuously cranking the starter will only drain your battery and risk overheating your starter motor starter clutch assembly.
Using Stale Fuel
Trying to start a scooter that has been sitting for six months on old, untreated pump gas will quickly foul your spark plug. Always drain old fuel from the tank and lines and refill with fresh high-octane gasoline before attempting a restart.
Skipping Ground Connection Checks
Owners often spend hours checking positive hot wires while completely ignoring the negative ground path. A loose, rusty, or green oxidized main ground bolt on the engine case will stop an electrical system in its tracks just as fast as a cut wire.
Expert Advice From a U.S. Motorcycle Technician
Understanding how these systems fail in the real world requires thousands of hours of hands-on shop experience. Professional diagnostic mechanics handle these exact issues daily.
“Many modern scooters arrive at our shop with no-start complaints where the owner suspects a failed fuel pump or a dead fuel injector. In reality, about eight out of ten times, the issue is a weak battery or a Smart Key communication breakdown. Always test your electrical system basics before spending money on expensive mechanical components.” — Michael Reynolds, Motorcycle Diagnostic Technician, Florida
Why the Battery and Smart Key Should Be Tested First
Modern electronic control units are highly sensitive to voltage drops. If the system voltage drops below a specific digital threshold during cranking, the ECU simply refuses to trigger the ignition coil or fire the fuel injector as a safety measure. You might have enough power to turn the engine over slowly, but the computer brain will remain completely offline until it sees stable voltage.
Real Workshop Example
On a busy Monday morning, a rider towed his Honda Forza 125 into the shop, fully convinced that his fuel injection system had suffered a terminal mechanical failure. The scooter cranked normally, but it wouldn’t fire. The technician connected a diagnostic scanner and checked the system live data.
The Smart Key battery was putting out barely 2.4 volts instead of its normal 3.0 volts. The key could wake the dash up, but it couldn’t complete the security handshake with the ECU. The technician installed a fresh coin-cell battery into the fob, cycled the ignition key, and the scooter started instantly on the very first crank.
How to Prevent Honda Forza 125 Starting Problems
The absolute best way to handle a scooter that won’t start is to prevent the issue from happening in the first place. Simple routine maintenance ensures your commuter remains reliable.
Keep the Battery Fully Charged
If you use your Forza 125 for short commutes under three miles, your charging system doesn’t have enough time to replace the energy used to start the engine. Attach a smart trickle charger to the battery once a month overnight to keep the lead plates in optimal condition.
Replace the Smart Key Battery Every Few Years
Do not wait for your key fob to die completely and leave you stranded on the side of the road. Make it a habit to replace the internal CR2032 battery every 12 to 18 months as cheap preventive insurance.
Ride Regularly
Scooters do not like to sit idle. Mechanical seals dry out, fuel degrades, and electrical contacts oxidize. Riding your scooter for at least 20 minutes once a week gets the oil hot, clears out carbon deposits, and keeps your charging system working perfectly.
Use Fresh Fuel
Always buy high-quality fuel from busy, reputable gas stations to avoid water contamination. If you know the scooter will sit parked for more than three weeks, add a high-quality fuel stabilizer to the tank and run the engine for five minutes to distribute it through the lines.
Replace Spark Plugs on Schedule
A worn spark plug requires significantly more electrical voltage to create a spark, placing extra stress on your ignition coil. Replace your spark plug strictly according to Honda’s service intervals to maintain easy, crisp starting.
Clean Battery Connections
Every time you change your engine oil, remove the battery cover panel and inspect the terminals. Clean off any trace of corrosion with a wire brush and apply a thin layer of protective grease to seal out ambient moisture.
Protect Electrical Connectors
When washing your scooter, avoid blasting high-pressure water directly at the handlebars, dashboard, or under-seat side panels. Use a gentle hose mist and spray exposed safety switches with a water-repellent protective lubricant.
Follow Honda Service Intervals
Keep up with your valve clearance adjustments and oil changes. Tight intake or exhaust valves will cause low compression, making the engine incredibly difficult to start when cold, even if your electrical and fuel systems are working perfectly.
When to Visit a Honda Dealer
While basic troubleshooting can handle most starting issues, certain complex problems require specialized tools, factory diagnostic software, and professional mechanical training.
Persistent FI Warning Light
If the Fuel Injection light remains illuminated after you have checked your basic connections and replaced your spark plug, the system has an active component fault. A dealer can plug in the proprietary Honda diagnostic system to read the live sensor data streams.
Smart Key Communication Failure
If your scooter loses its registration pairing with your key fobs completely, or if the Smart Control Unit fails mechanically, you will need specialized factory programming tools to code new keys and pair them to the onboard security computer.
ECU Communication Errors
A completely fried or corrupted Electronic Control Unit cannot process sensor data or trigger engine starts. Diagnosing a dead ECU requires back-probing complex pinouts on the wiring harness with an oscilloscope, a job best left to master technicians.
Fuel Injector Problems
If a fuel injector has internal mechanical damage or a shorted internal solenoid winding, it must be replaced. This requires opening up the pressurized fuel delivery rail safely without damaging delicate plastic clips.
Wiring Harness Damage
If a rodent has chewed deeply into the main wiring loom, or if a wire has rubbed raw against the frame and created a hidden short circuit, tracking down the break requires stripping down the scooter’s plastic bodywork completely.
Internal Engine Problems
Low cylinder compression caused by worn piston rings, damaged cylinder walls, or burnt valves requires a complete top-end engine teardown and mechanical rebuild.
Honda Forza 125 Starting Problems Compared With Similar Maxi Scooters
Honda shares its advanced engineering across several popular scooter models. Understanding how the Forza compares to its stablemates highlights shared components and troubleshooting steps.
Honda Forza 125 vs Honda PCX 125
Both of these premium scooters utilize highly efficient liquid-cooled eSP+ engines and share almost identical PGM-FI fuel injection systems and Smart Key security systems. However, the Forza 125 features a more complex electrical harness to power its premium features, such as the electronically adjustable front windscreen and larger multi-function dash display, creating a few more potential fuse failure points.
Honda Forza 125 vs Honda ADV350
The larger adventure-styled ADV350 uses a significantly larger battery to crank over its higher-displacement engine. While the starting logic and safety interlocks operate exactly the same way, the ADV350 places higher peak current demands on its starter relay, making relay terminal pitting slightly more common over time compared to the smaller Forza 125.
Honda Forza 125 vs Honda SH125i
The step-through SH125i shares the core 125cc eSP+ engine architecture with the Forza. The primary diagnostic difference lies in component accessibility. The SH125i places its battery and main fuses under the floorboard, making them more exposed to water splashes from deep puddles, whereas the Forza stores its battery higher up in the rear bodywork, keeping it better shielded from wet road spray.
Common Starting Problems Across Honda Maxi Scooters
Across all modern Honda maxi scooters utilizing keyless systems, the top two non-start complaints reported to workshops are identical: a dead key fob battery or a corroded side stand safety switch plunger. Honda uses high-quality components, but these two parts are highly exposed to daily wear and tear and road weather grime.
Frequently Asked Questions
Why is my Honda Forza 125 not starting even though the battery is charged?
If your battery is healthy, the starting lockout is likely caused by an unengaged safety switch. Ensure your side stand is raised completely and squeeze your brake levers firmly. If the brake light switch fails to activate, the starting circuit will remain safely cut off.
Why does my Honda Forza 125 only make a clicking sound?
A rapid clicking sound means your battery doesn’t have enough power to turn the starter motor. A single loud click means your starter relay is triggering, but the starter motor is jammed or the high-amp battery connection screws are loose or corroded.
Can a dead Smart Key battery stop the scooter from starting?
Yes, a dead key fob battery prevents the Smart Control Unit from verifying ownership. The scooter will lock the ignition dial and refuse to wake up the ECU, meaning the starter will not crank and the fuel pump will not prime.
Why won’t my Honda Forza 125 start after sitting for several weeks?
Gasoline breaks down and loses its volatile qualities over a few weeks, and the scooter’s security modules draw a constant small current that drains the battery. The battery voltage drops too low, or stale fuel gums up the tiny fuel injector nozzle.
What does the FI warning light mean?
The Fuel Injection warning light indicates that the ECU has detected an electrical fault or an implausible reading from one of its engine sensors. The computer enters a protective safe mode and records a specific diagnostic error code.
How do I know if the starter relay has failed?
If you have verified that your battery is fully charged and healthy, but you only hear a single click when hitting the starter button while the starter motor remains completely still, the internal contacts of the relay are likely burnt out.
Why does my Honda Forza 125 crank but never start?
If the engine spins quickly but will not run, the issue is not electrical cranking power. The engine is missing either ignition spark (bad plug or coil) or fuel delivery (clogged injector, dry tank, or a dead fuel pump).
How much does it cost to repair a Honda Forza 125 that won’t start?
If the problem is a dead Smart Key battery, the fix costs under five dollars for a new coin cell. A dead main battery runs roughly $50 to $100. If the fuel pump or starter motor requires complete mechanical replacement, professional dealer repairs can run between $200 and $400.
Final Recommendation
When your Honda Forza 125 refuses to start, do not panic or rush to buy expensive replacement parts. Over my years of working on these high-tech maxi scooters, I have found that almost all starting issues trace back to basic battery health, loose terminal connections, or a simple weak Smart Key fob cell. Invest in a digital multimeter, check your safety switches first, and follow a systematic diagnostic process. Taking your time to test instead of guessing will save you massive amounts of time, money, and workshop frustration.

Ehatasamul Alom is a dedicated road hybrid bikes expert. With over 15 years of experience, he helps people find the perfect ride. He began his journey as a bike mechanic. He learned the ins and outs of every bike.
Ehatasamul Alom holds a Master's degree in Mechanical Engineering from a Brown University (Providence US 02912), where he specialized in material science and bicycle kinematics. His master's thesis focused on optimizing frame geometry for road hybrid bikes to improve rider comfort and efficiency.
Ehatasamul has an extensive professional background. He spent 10 years (2010-2020) as a Senior Bike Designer at "Urban Cycles," a leading bicycle manufacturer. In this role, he led the development of several award-winning road hybrid bikes, which are known for their durability and performance. He later served (2020-2024) as the Head of Product Development at "Gear Up," a company specializing in high-end cycling components. There, he developed innovative parts and accessories specifically for road hybrid bikes.
Over the years, Ehatasamul has become an authority on Roadhybridbikes. He understands their design and function. His work focuses on making bikes easy to use. Ehatasamul believes everyone should enjoy cycling. He writes guides that are simple to read. His passion for road hybrid bikes is clear. His goal is to share his knowledge with everyone. He wants to see more people on two wheels. His advice is always practical and easy to follow.
- Ehatasamul Alom

- Ehatasamul Alom
- Ehatasamul Alom

- Ehatasamul Alom



