
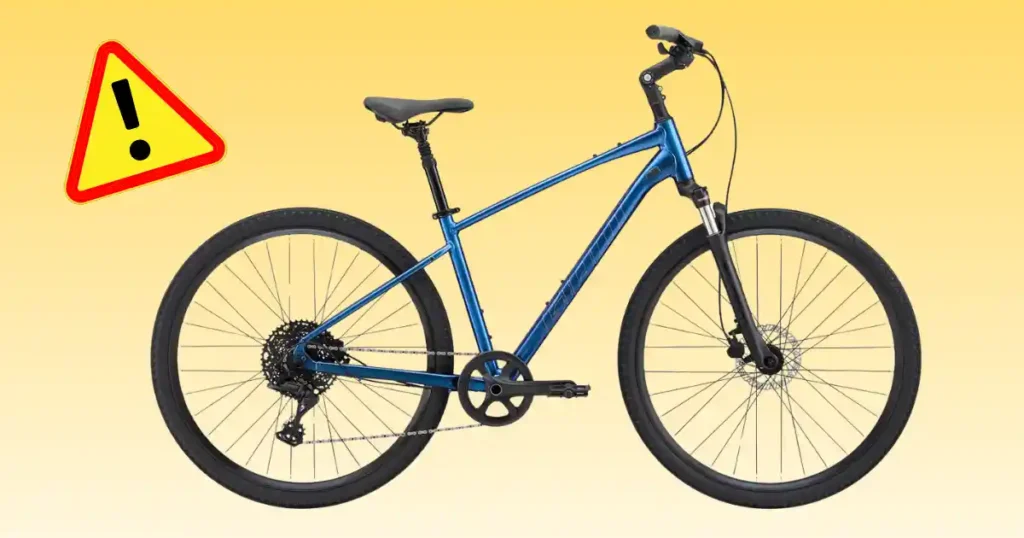
Standing next to a bicycle that will not move is a pure test of patience. Last week in Minneapolis, a commuter brought me a bike that refused to roll past the driveway. Your Giant Cypress 1 does not have an ignition switch, so “not starting” usually means something is stopping the bike from moving normally. Start with the easy checks: wheels, brakes, chain, crank, and shifting. Most importantly, do not start turning random bolts just because they are sitting there looking suspicious.
What Does “Giant Cypress 1 Not Starting” Mean?
The phrase can describe several different problems. Identifying the exact symptom first makes the rest of the diagnosis much easier.
The Cypress 1 will not move at all
- Locked or heavily rubbing brakes
- Jammed drivetrain
- Wheel problem
- Chain problem
- Crank problem
- Serious mechanical damage
The pedals turn but the bike does not move
- Freehub/freewheel engagement issue
- Chain engagement failure
- Rear drivetrain slip
- Cassette lock ring loose
- Rear wheel axle displacement
The pedals will not turn
- Chain jam in the frame
- Brake caliper lockup
- Bottom bracket seize
- Crankset bind
- Foreign object caught in drivetrain
The bike moves but feels extremely hard to pedal
- Brake pad drag on the rotor
- Low tire pressure
- Wheel bearing resistance
- Dry or rusty chain condition
- Drivetrain friction buildup
The gears are not working
- microSHIFT Advent shifter cable tension drop
- Rear derailleur hanger misalignment
- Cable tension slack or friction
- Incorrect chain position on teeth
- Cassette cog wear or damage
The current Cypress 1 uses a microSHIFT Advent 1×10 drivetrain, with no front derailleur.
Quick Checks Before Repairing Your Giant Cypress 1
Before reaching for tools, spend two minutes simply looking at the bike. A quick spin of the wheel or crank can reveal more than ten random adjustments.
Put the bicycle somewhere safe
- Choose a stable floor space
- Set up good lighting
- Use a repair stand if available
- Keep fingers away from moving parts
Look at the bike from both sides
- Check the rear wheel seating
- Inspect the chain alignment
- Examine the rear derailleur cage
- Check the brake rotor clearance
- Look at the crank arms
- Inspect both pedals
- Examine tire seating on rims
Ask what happened just before it stopped
- Did it happen after shifting?
- Did it happen after braking hard?
- Did it occur after hitting a pothole?
- Did it start after transporting the bike?
- Did it happen after sitting for months?
- Did you hear a loud click or crunch?
Do not change several adjustments at once
Isolating mechanical faults requires a strict process. Adjust one bolt or tension setting, then test the result immediately. Changing multiple cable tensions and limit screws at the same time creates new problems.
Check the Cypress 1 Brakes First
A brake that is stuck or badly rubbing can make a perfectly good bicycle feel completely dead. The Cypress 1 uses Tektro hydraulic disc brakes with 160 mm front and rear rotors in the published specification.
Spin the front wheel
- Listen for rotor rubbing against pads
- Feel for wheel resistance or drag
- Watch for wheel wobble or truing issues
- Listen for strange scraping sounds
Spin the rear wheel
- Inspect the rear brake rotor surface
- Check the hydraulic caliper alignment
- Verify rear wheel alignment in dropouts
- Feel for drag or friction
Check whether a brake caliper is sticking
Normal brakes allow the wheel to spin freely for several rotations when spun by hand. A sticking hydraulic caliper keeps one or both pads pressed against the steel disc rotor. This drag creates massive resistance that makes pedaling feel impossible.
Do not ride with a brake that is clearly malfunctioning
- Lever feels unusually soft or spongy
- Brake caliper does not release the rotor
- Rotor is badly bent or warped
- Brake fluid is leaking from hose fittings
- Wheel is difficult to turn by hand
Check the Chain and Drivetrain
The chain is one of the first places to look when a bicycle suddenly refuses to move. On the Cypress 1 specification researched here, Giant lists a KMC X10 chain, microSHIFT Advent cassette, and ProWheel RPL 40T crankset.
Is the chain still on the drivetrain?
- Inspect front chainring tooth engagement
- Check cassette cog alignment
- Inspect rear derailleur pulley wheel routing
- Check the chainstay frame clearance area
Look for a jammed chain
- Chain caught between cassette and spokes
- Twisted chain link binding in cage
- Road debris caught in links
- Derailleur cage twisted out of plane
- Incorrect chain position across teeth
Check for a broken chain
- Open chain link lying off sprockets
- Missing chain pin or master link
- Severely bent outer chain link plate
- Chain hanging limp from drivetrain
Check whether the chain is unusually dirty
Dirt alone usually does not make a bike completely stop, but severe contamination can increase friction. Gritty paste on chain links strips away lubrication and binds up pulley wheels.
Check the Crank and Bottom Bracket
If the chain looks normal but the pedals refuse to turn, move your attention toward the crank and bottom bracket.
Turn the crank by hand
- Feel for smooth rotation without tight spots
- Listen for internal bearing grinding
- Check for stiff spots in rotation
- Feel for sudden mechanical lockup
- Wiggle crank arms to check side-to-side movement
Check the pedals
- Verify pedal axle is tight in crank arm
- Spin pedal body to detect bearing drag
- Check for foreign objects wedged in body
- Inspect pedal spindle for bends
Could the bottom bracket be the problem?
The published Cypress 1 specification lists a sealed cartridge bottom bracket.
- It houses bearings that let crank arms rotate smoothly inside the frame shell
- Bearing failure causes loud creaking, lateral play, or total spindle seizure
- Replacing a failed sealed cartridge requires specialized pullers and shop tools
Grinding vs complete lockup
Grinding sounds point to worn ball bearings or grit inside the cartridge shell. Complete lockup means a bearing race has shattered or seized solid. Grinding allows slow riding to a shop, but a locked spindle demands immediate service.
Check the Rear Wheel and Freehub
This section directly targets the important symptom: “I can pedal, but the Cypress 1 does not move.”
What the freehub does
- Pedaling drives the cassette cogs
- Cassette drives the rear wheel hub body
- Freehub allows the wheel to coast forward freely
Test rear-wheel engagement
- Lift the rear wheel safely off the ground
- Turn the crank forward by hand
- Watch if the cassette spins smoothly
- Watch if the rear wheel rotates with cassette
Signs of a freehub problem
- Pedals spin freely without driving the wheel
- Intermittent engagement where power slips under force
- Rapid clicking without normal forward drive
- Sudden loss of propulsion while pedaling forward
When freehub repair is a bike-shop job
Internal hub pawls and springs require thin grease and microscopic tolerances. Servicing a freehub body calls for specialized cone wrenches, chain whips, and lockring tools.
Check the Cypress 1 Gears and Rear Derailleur
The Cypress 1 uses microSHIFT Advent 1×10 shifting, so there is only one chainring at the front. That simplifies diagnosis compared with a multi-chainring setup.
Test each gear slowly
- Watch for delayed shifting between cogs
- Listen for chain skipping across teeth
- Watch for chain falling off small or large cogs
- Listen for persistent clicking under load
- Note any inability to reach top or bottom gears
Inspect the rear derailleur
- Look for a bent derailleur body or hanger
- Inspect cage alignment parallel to cogs
- Check for loose mounting bolts on frame dropout
- Verify chain is routed correctly over pulleys
Check the shift cable
- Test tension along down tube guide paths
- Inspect cable housing ends for splits
- Check wire for fraying near clamp bolt
- Look for inner wire rust or corrosion
Do not immediately adjust the derailleur limit screws
Turning high and low limit screws without understanding their job is a common trap. Limit screws define absolute inner and outer boundaries for cage movement. If shifting breaks suddenly, cable tension or hanger alignment is usually to blame.
Check the Wheels, Tires, and Axles
Sometimes the drivetrain is innocent. The wheel is the troublemaker.
Check front-wheel rotation
- Spin wheel by hand freely
- Listen for bearing or brake noise
- Look for brake pad rub on disc
Check rear-wheel rotation
- Spin wheel while observing clearance
- Check rotor alignment through caliper slot
- Check cassette wobble on axle spindle
- Verify axle nuts or quick release skewers sit tight
Look/Check tire pressure
- Low pressure increases rolling resistance dramatically
- A completely flat tire makes pedaling feel impossible
- Low pressure is a pneumatic fault, not a broken drivetrain
Look for tire damage
- Inspect sidewall cuts or torn casing threads
- Look for rubber bulges along bead lines
- Check for embedded glass, wire, or thorns
- Inspect tread cap for severe wear patches
- Scan tire surface for visible punctures
Common Giant Cypress 1 Problems by Symptom
When diagnosing mechanical faults, matching exact symptoms to likely components saves time. The reference table below details common issues, initial checks, and repair difficulty levels.
| Symptom | Likely Area | First Check | Difficulty |
| Pedals will not turn | Brake/drivetrain/crank | Spin wheel and crank | Easy |
| Pedals turn but bike does not move | Freehub/drivetrain | Watch rear wheel | Medium |
| Chain keeps falling off | Drivetrain | Inspect derailleur | Medium |
| Rear wheel barely spins | Brake/wheel | Check rotor rub | Easy |
| Gears do not shift | Shifter/cable/derailleur | Test each gear | Easy–Medium |
| Grinding while pedaling | Bearings/drivetrain | Rotate crank | Medium |
| Bike stopped after crash | Multiple areas | Inspect frame/wheels | Professional |
Giant Cypress 1 Not Starting After Sitting for Months
A bike that spent the winter in a garage can have a very different personality in spring. A little dust is normal; seized or damaged parts are not.
Check the chain
- Surface rust binding outer link plates
- Dry links squeaking under tension
- Stiff links sticking at pulley wheels
- Heavy dirt caked in roller bushings
Check the brake system
- Rotor condition for surface oxidation
- Caliper movement and piston retract functionality
- Lever feel for spongy hydraulic lines
Look at the tires
- Pressure loss from natural air permeation
- Cracks along rubber sidewall rubber
- Drying of casing rubber compound
- Hidden punctures holding low air
Check the drivetrain
- Smooth crank rotation through bottom bracket
- Cassette cog rust or grit build up
- Derailleur pivot action and spring return
- Chain movement across whole gear range
A realistic garage scenario
It is Saturday morning. The coffee is hot, the tires are pumped, and the Cypress 1 suddenly decides it has other plans. You push down on the pedal, but the crank stays frozen solid. A brief check shows the chain rusted stiff overnight, binding hard inside the derailleur cage.
Giant Cypress 1 Not Starting After a Crash
A post-crash bicycle deserves a more careful inspection. Do not assume that a gear adjustment will fix everything.
Inspect the frame
- Cracks around tube junctions and welds
- Deep dents along down tube or stays
- Major scratches penetrating paint down to bare metal
- Unusual bends or twists along main triangle
The Cypress 1 uses an ALUXX-grade aluminum frame, so frame damage should be taken seriously.
Inspect the fork
- Steerer alignment inside head tube
- Structural damage along aluminum fork legs
- Loose headset bearings creating fore-aft play
- Steering resistance or binding when turning bars
Check the wheels
- Bent rim creating hop or wobble
- Loose wheel dropouts or axle fittings
- Rotor damage or severe warping
- Tire damage from sharp rim impacts
Check the derailleur
Impact forces routinely bend the soft aluminum derailleur hanger attached to the frame dropout. A bent hanger tilts the cage inward, driving the chain into wheel spokes.
When not to ride
- Visible frame structural cracks or creases
- Fork leg bends or steerer play
- Serious wheel wobbles contacting frame tubes
- Complete brake system failure or fluid leaks
- Loose or binding steering components
Tools Needed to Troubleshoot a Giant Cypress 1
You do not need a professional workshop to perform the first round of diagnosis. A few basic tools will handle most visual and simple mechanical checks.
Basic tools
- Floor pump with pressure gauge
- Digital or dial tire-pressure gauge
- Metric hex key set (4mm, 5mm, 6mm)
- Clean lint-free rags
- Bicycle-specific chain lubricant
- Bicycle repair stand or ceiling hoist
Useful advanced tools
- Click-type torque wrench (2-14 Nm range)
- Precision chain checker tool
- Cassette lockring tool and chain whip
- Professional housing and cable cutters
- Stainless steel rotor truing fork
Why the right tool matters
Metric hex sockets prevent rounded fastener heads on aluminum components. Torquing bolts to manufacturer standards protects delicate components from crushing. Using improvised pliers damages cables, strip threads, and ruins precision bike parts.
Easy Fixes You Can Try at Home
This section gives concrete action steps for simple home adjustments. Work carefully on a flat surface with good lighting.
Fix a dropped chain
- Stop pedaling immediately to prevent frame scratches
- Shift derailleur to smallest rear cog setting
- Position chain manually onto front 40T chainring teeth
- Rotate crank arm gently by hand forward
- Check rear derailleur cage for proper tension return
- Test shift performance through all rear cogs slowly
Fix simple brake rub
Lift the bike wheel off the ground and give it a firm spin. If you hear a rhythmic ticking or scraping sound, the steel disc rotor is rubbing against a hydraulic brake pad. Loosen the two mounting bolts holding the Tektro brake caliper to the frame just enough so the caliper can wiggle. Squeeze the handlebar brake lever firmly to center the caliper over the rotor, hold the lever down tightly, and torque both mounting bolts back down evenly.
Clean and lubricate the chain
- Clean drive chain thoroughly using degreaser and rag
- Apply bicycle-specific lubricant to inner chain rollers
- Wipe excess oil off outer link plates completely
- Avoid getting oil on disc rotors or brake pads
Inflate the tires correctly
Locate the recommended inflation range printed directly on your tire sidewalls. For the Cypress 1 stock tires, keep pressure within specified limits using a floor pump gauge. Check pressure weekly to protect rims from pinch flats.
When You Should Take the Cypress 1 to a Bike Shop
DIY repair is useful. Knowing when to stop is even more useful.
Take it to a professional if
- Frame shows structural cracks or sharp dents
- Fork legs show bent alignment or steerer play
- Hydraulic disc brakes require fluid bleeds or lever repair
- Wheel bearings feel rough, loose, or binding
- Freehub body pawls slip or fail internal drive tests
- Derailleur hanger requires precision alignment gauge truing
- You cannot identify the source of mechanical noise
Get help after a crash
- Steering feels stiff, loose, or misaligned
- Wheel alignment tracks crooked in frame dropouts
- Brake lever travel changes or loses power
- Visible structural damage appears on aluminum tubing
What to tell the mechanic
- Exact sequence of events leading to failure
- Time frame of when problem first started
- Current mechanical behavior during attempted use
- Sounds heard such as grinding, clicking, or pops
- Details of any recent crashes or transport history
- List of home repairs attempted recently
Expert Advice for Diagnosing a Bicycle That Will Not Move
Systematic troubleshooting requires logical process over guesswork.
Use a bicycle-repair expert as the authority
Calvin Jones, veteran bicycle mechanic and long-time Director of Education at Park Tool, built standard procedures for modern bicycle maintenance. His methodology focuses on step-by-step diagnostic checks before performing any repair work.
Expert Callout
Expert advice — Calvin Jones, bicycle mechanic and former Park Tool Director of Education:
Observe the exact symptom before grabbing a tool. Isolate the affected component by spinning components individually, make one small adjustment at a time, and test the outcome immediately. Never adjust limit screws or cable tension until you confirm the mechanical alignment is correct.
Older vs Newer Giant Cypress Models
Understanding component changes across model years prevents ordering wrong replacement parts or following incorrect repair steps. The table below outlines specification changes between builds.
| Component | Current Cypress 1 (MY26 Specification) | Older Cypress 1 (e.g., 2021 Model) |
| Frame Material | ALUXX-grade aluminum | ALUXX-grade aluminum |
| Front Suspension | NCX-D LO 700c air fork | SR Suntour NEX suspension fork |
| Drivetrain Type | 1×10 microSHIFT Advent | 3×7 or 3×8 Shimano Tourney/Altus |
| Rear Derailleur | microSHIFT Advent 10-speed | Shimano Tourney or Altus 7/8-speed |
| Shifters | microSHIFT Advent 10-speed trigger | Shimano REVOSHIFT twist shifters |
| Brakes | Tektro hydraulic disc (160mm rotors) | Linear-pull rim brakes or mechanical disc |
| Chain | KMC X10 | KMC Z7 |
Current Cypress 1 component setup
- ALUXX-grade aluminum frame frame tubing
- NCX-D LO 700c air fork front suspension
- microSHIFT Advent 1×10 trigger shifter unit
- microSHIFT Advent rear derailleur mechanism
- Tektro hydraulic disc brakes with 160mm rotors
- KMC X10 10-speed drive chain
- Sealed-cartridge bottom bracket unit
- 700×45c multi-surface tires
Older Cypress models can differ
- Shimano REVOSHIFT twist shifting setups
- Shimano Tourney rear derailleur mechanisms
- Direct-pull rim brake calipers or mechanical disc setups
- Shimano TZ500 7-speed screw-on freewheels
- KMC Z7 narrow drive chains
Why the model year matters
- Brake style determines whether you align hydraulic pads or replace rim brake shoes
- Drivetrain width dictates chain link sizes and cassette tool selection
- Derailleur index spacing must match exact shifter indexing pull ratios
- Repair instructions for mechanical disc brakes do not apply to hydraulic systems
- Replacement parts must match specific component generations
How to identify your Cypress 1
- Read model graphics printed on top tube and down tube
- Inspect brand names stamped on rear derailleur and brakes
- Check original purchase paperwork or store receipts
- Match frame serial number against Giant online records
Giant Cypress 1 Troubleshooting Checklist
Follow this simple checklist in order to spot issues quickly before heading out on the road.
60-second check
- Both wheels rotate freely by hand
- Tires inflated to recommended sidewall PSI
- Brakes release completely without drag
- Chain installed properly on chainring teeth
- Crank arm spins without bearing bind
- Rear wheel engages when pedaling forward
- Rear derailleur moves through gear range
- Gears shift cleanly across cassette
- No frame or component damage visible
Before riding again
- Test front and rear brakes at walking speed
- Test handlebar steering for smooth turning
- Test drivetrain under light pedaling force
- Listen for unusual creaks, grinding, or pops
- Check quick release or axle bolt tightness
- Take a short, slow test ride nearby
Frequently Asked Questions About Giant Cypress 1 Not Starting
Why is my Giant Cypress 1 not moving?
A bike usually stops moving due to a locked hydraulic brake caliper, dropped drive chain, jammed cassette cog, or damaged freehub mechanism. Spin each wheel by hand to find where the drag is coming from.
Why do the pedals turn but my Giant Cypress 1 does not move?
If pedaling spins the chain and rear cassette but the wheel stays still, the internal freehub pawls are failing to engage. Dirt or broken pawl springs prevent the cassette body from driving the rear wheel.
Why won’t the pedals turn on my Giant Cypress 1?
Stuck pedals happen when the chain jams between frame tubes, a hydraulic brake locks onto the rotor, or the bottom bracket bearing cartridge seizes completely.
Why is my Giant Cypress 1 hard to pedal?
Excessive pedaling resistance usually comes from brake pad drag, very low tire pressure, grit on the drive chain, or tight wheel hub bearings.
Why is my Giant Cypress 1 not changing gears?
Shifting fails when the microSHIFT Advent shifter cable loses tension, housing ends split, inner wire rusts, or the rear derailleur hanger gets bent in a impact.
Can I fix a Giant Cypress 1 myself?
Home mechanics can handle basic chain lubrication, tire inflation, surface cleaning, dropped chain resets, and minor brake caliper alignments. Complex hub rebuilds and hydraulic brake bleeding should go to a professional shop.
Should I ride my Giant Cypress 1 if it suddenly stops working?
Never ride a bike with mechanical faults. Locked wheels, slipping freehubs, or loose brake components can lead to sudden loss of control and severe crashes.
Final Pre-Ride Safety Checklist
Run through these final safety checks before every ride:
- Both wheels secure in frame dropouts
- Tires inflated to correct pressure
- Front and rear brakes working properly
- Chain installed and lubricated correctly
- Crank rotates smoothly without play
- Gears shift cleanly across cogs
- Rear wheel engages promptly when pedaling
- No visible damage on frame or fork
- No unusual grinding or clicking sounds
- Short test ride completed safely
Final Recommendation
Fixing a Giant Cypress 1 that refuses to move comes down to systematic mechanical diagnosis. In my years wrenching on urban commuter bikes, I have seen simple steps like realigning a Tektro brake caliper or untangling a dropped KMC chain solve issues that looked like total mechanical failure.
Always inspect the bike carefully, make one minor adjustment at a time, and test your work safely. If you encounter frame cracks, hydraulic leaks, or severe freehub slipping, bring your bike to a certified Giant dealer to keep your ride safe and reliable.

Ehatasamul Alom is a dedicated road hybrid bikes expert. With over 15 years of experience, he helps people find the perfect ride. He began his journey as a bike mechanic. He learned the ins and outs of every bike.
Ehatasamul Alom holds a Master's degree in Mechanical Engineering from a Brown University (Providence US 02912), where he specialized in material science and bicycle kinematics. His master's thesis focused on optimizing frame geometry for road hybrid bikes to improve rider comfort and efficiency.
Ehatasamul has an extensive professional background. He spent 10 years (2010-2020) as a Senior Bike Designer at "Urban Cycles," a leading bicycle manufacturer. In this role, he led the development of several award-winning road hybrid bikes, which are known for their durability and performance. He later served (2020-2024) as the Head of Product Development at "Gear Up," a company specializing in high-end cycling components. There, he developed innovative parts and accessories specifically for road hybrid bikes.
Over the years, Ehatasamul has become an authority on Roadhybridbikes. He understands their design and function. His work focuses on making bikes easy to use. Ehatasamul believes everyone should enjoy cycling. He writes guides that are simple to read. His passion for road hybrid bikes is clear. His goal is to share his knowledge with everyone. He wants to see more people on two wheels. His advice is always practical and easy to follow.
- Ehatasamul Alom

- Ehatasamul Alom
- Ehatasamul Alom

- Ehatasamul Alom



