
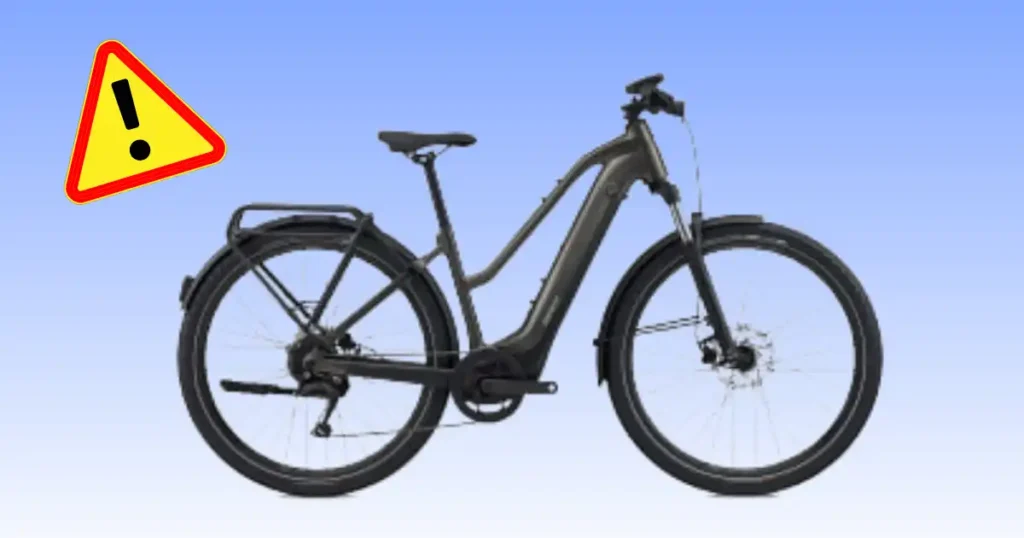
Nothing ruins a sunny morning commute in Portland faster than pressing the power button on your e-bike and getting zero response. I have spent years riding and fixing electric bikes, and I know how frustrating it feels when your ride stays dark. When a Giant Explore E+ 2 not starting issue happens, the fix is often quick and simple. A drained battery or a loose plug causes most starting trouble. Other times, the issue involves the motor, charger, or display. Let us walk through how to test your bike and get you back on the road fast.
When a Giant Explore E+ 2 will not start, the problem may be as simple as a low battery or a control button that is not responding. It can also be a charger, connection, display, motor, or safety issue. Start with the power system, then move to the bike’s mechanical parts.
What Does “Giant Explore E+ 2 Not Starting” Mean?
Before troubleshooting, identify exactly what “not starting” means. An e-bike can power on but still fail to provide motor assistance, which is a very different problem from a completely dead system.
The display will not turn on
When the screen remains dark, your electrical system lacks power.
Possible causes:
- Battery has little or no charge
- Power button/control problem
- Battery connection issue
- Fuse or electrical fault
- Wiring problem
- Damaged control unit
The display turns on but the motor does not assist
In this situation, your screen lights up, but pedaling feels heavy.
Possible causes:
- Assist mode problem
- Sensor issue
- Speed sensor issue
- Motor connection
- System fault
- Pedal-assist conditions not being met
The battery will not charge
A pack that refuses to take a charge keeps the entire bike offline.
Check:
- Charger
- Charging connection
- Battery status
- Power outlet
- Battery temperature/condition
The bike starts but immediately shuts down
This behavior usually indicates a power drop or a quick system check failure.
Possible causes:
- Battery connection
- Low battery
- Electrical fault
- Controller/system issue
- Loose connection
The motor works but the bike will not move
If you hear the motor hum, look at the physical parts of your bike.
Then move beyond the electrical system:
- Chain or belt
- Brakes
- Wheel
- Drivetrain
- Mechanical resistance
First 5-Minute Diagnostic Check
Do not start removing covers or disconnecting wires. Begin with simple observations.
Turn the bike on normally
Stand beside the bike and press the power button once firmly.
Check:
- Display response
- Indicator lights
- Error messages
- Battery level
- Assist mode
Check the battery
Look closely at how the battery sits in the frame.
Look for:
- Proper installation
- Charge level
- Visible damage
- Loose fit
- Signs of moisture
Check the charger
Before blaming the pack, test the charging setup.
- Is the charger connected correctly?
- Does the charger indicate normal operation?
- Is the wall outlet working?
- Is the charging port clean and dry?
Check the controls
Inspect your handlebar controls for dirt, water, or physical damage.
Depending on generation, the Explore E+ 2 may use different RideControl hardware. The 2022 GTS specification lists RideControl Charge, while a current 2026 model uses RideControl Go 2 and RideControl Ergo4.
Look for an error message
If numbers or lights flash on your display, record them right away.
Tell readers to:
- Write down the exact code
- Photograph the display
- Avoid guessing what an unfamiliar code means
- Check the correct model-year manual
Check the Giant Explore E+ 2 Battery
The battery is the first major area to investigate when the entire e-bike appears dead.
Confirm the battery has charge
Never rely on memory when it comes to battery levels.
Explain:
- Battery indicator versus actual battery condition
- Why a very low battery can prevent normal operation
- Why a bike that sat unused may need charging
Check battery installation
A loose battery cannot make solid electrical contact with the frame pins.
Look for:
- Proper seating
- Secure lock
- No obvious movement
- Clean contact area
Inspect the battery for damage
Cracks or drops can ruin the internal safety systems of your pack.
Stop using the battery if there is:
- Swelling
- Cracking
- Severe impact damage
- Burning smell
- Water intrusion
- Abnormal heat
Do not open the battery pack
Lithium-ion cells carry high energy and pose severe safety hazards if punctured or shorted.
Explain why lithium-ion e-bike batteries should not be opened or repaired casually at home.
Battery safety warning
If a battery is visibly damaged, hot, swollen, smoking, or producing a strong chemical smell, do not continue charging or riding it. Move away from the battery and seek appropriate professional/emergency guidance.
Check the Giant EnergyPak Charger
A bike can appear dead when the actual problem is the charger or charging connection.
Check the wall outlet
Plug a lamp or phone charger into the wall socket to confirm power flow.
- Test another outlet
- Check whether the outlet has power
- Avoid assuming the charger is defective immediately
Inspect the charger
Look at the power brick and all attached cables.
Look for:
- Damaged cable
- Bent connector
- Cracks
- Burn marks
- Unusual heat
Check the charging connection
Ensure the plug fits snugly into the bike frame or battery port.
- Correct connection
- Clean port
- Dry connector
- No debris
Understand charger versus battery problems
Diagnosing charging problems requires checking each link in the power chain step by step.
Explain the basic diagnostic logic:
Outlet → charger → charging connector → battery → e-bike control system
Never improvise with a random charger
Use the charger specified for the actual Giant EnergyPak system.
Check the RideControl Display and Power Controls
The Explore E+ family has used different control/display systems across generations, so the article should make readers identify their hardware first.
Older/current system differences
Giant has updated the electronics on the Explore E+ 2 over the years.
A Giant Explore E+ 2 GTS specification from 2022 lists:
- RideControl Charge controller
- RideControl Dash display
- EnergyPak Smart 500Wh battery
- SyncDrive Life motor in that particular specification.
A current 2026 Explore E+ 2 specification lists:
- RideControl Go 2
- RideControl Ergo4
- RideDash EVO 2.0
- EnergyPak Smart 625Wh
- SyncDrive Sport2 motor.
Check the power controls
Press each button on your handlebar pad to verify tactile feedback.
- Does the control respond?
- Are indicator lights visible?
- Does the display remain on?
- Does it shut off immediately?
Do not assume every button sequence is the same
This is important for SEO accuracy.
Tell readers to:
- Identify model year
- Identify controller
- Use the correct Giant manual
- Follow the official procedure for that system
Giant Explore E+ 2 Turns On but Has No Motor Assistance
This is a different problem from a completely dead bike.
Check the assist mode
Sometimes the bike is on, but the power mode sits at zero.
- Is assistance set to off?
- Is the correct riding mode selected?
- Does changing assist level produce any response?
Check whether the bike detects pedaling
The control unit needs to know you are turning the cranks before engaging the motor.
Explain the role of:
- Pedal-assist sensors
- Torque/speed sensing
- Motor control system
Check the speed sensor
A misaligned magnet on the rear wheel or spoke stops motor assistance.
Possible symptoms:
- Motor assistance cuts out
- Speed reading is incorrect
- Assist behaves inconsistently
Check for a system warning
Look for flashing LEDs or warning icons on your control unit.
- Note any displayed error
- Do not erase the warning before recording it
- Use the correct Giant service information
Check the SyncDrive Motor
The Explore E+ line uses Giant SyncDrive motor systems, but the exact motor varies by model year. For example, Giant’s 2022 Explore E+ 2 GTS specification lists a SyncDrive Life, 60Nm motor powered by Yamaha, while the current Explore E+ 2 uses SyncDrive Sport2, 75Nm.
Look for obvious motor damage
Check the motor shell at the center of the frame for impact marks.
Check:
- Impact marks
- Loose external connections
- Water exposure
- Unusual noises
Listen when assistance should engage
Pedal the bike in a safe area and listen carefully to the bottom bracket area.
Possible sounds:
- Normal motor hum
- Clicking
- Grinding
- Repeated attempts to engage
Do not open the motor housing
Opening the sealed motor case voids warranties and can ruin internal precision gears.
Explain why internal motor repair should be handled by qualified service personnel.
Motor problem versus battery problem
Use this quick guide to determine whether your fault lies in the electrical system or the drive motor.
| Symptom | More Likely Area |
| Entire system dead | Battery/control/power |
| Display works, no assistance | Sensor/motor/control |
| Battery won’t charge | Charger/battery/connection |
| Motor makes abnormal noise | Motor/mechanical |
| Bike rides normally without assist | E-system |
Check the Mechanical Parts If the E-System Works
Sometimes the electric system is perfectly healthy. The bicycle simply has a mechanical problem.
Check the brakes
Stuck brake pads can easily stop a rear wheel from turning.
Look for:
- Brake rub
- Stuck caliper
- Bent rotor
- Excessive resistance
Check the chain or drivetrain
Ensure your chain moves smoothly over the rear cassette teeth.
Depending on model:
- Chain
- Cassette
- Rear derailleur
- Crank
- Freehub
Check the wheels
Lift each end of the bike and spin the tires by hand.
- Spin freely
- Correct wheel installation
- No severe wobble
- No bearing noise
Check tire pressure
Soft tires create massive resistance and make the bike feel heavy or unpowered.
- Low pressure
- Flat tire
- Sidewall damage
- Puncture
Giant Explore E+ 2 Not Starting After Sitting for Months
Long storage can create both battery and mechanical issues. A bike can look perfect and still refuse to cooperate.
Check the battery
Lithium batteries slowly drain over time when left sitting in a shed.
- Charge status
- Battery condition
- Storage history
- Proper installation
Check the charger
Make sure the charger turns red or green when plugged into a dormant battery.
- Charger condition
- Connector
- Outlet
- Charging response
Check the drivetrain
Clean off rust or dust that accumulated during long seasonal storage.
- Chain condition
- Brake drag
- Tire pressure
- Wheel rotation
Check for corrosion or moisture
Look inside electrical ports for white powder, green buildup, or water drops.
Look at:
- Connectors
- Charging port
- Chain
- Brake components
- Exposed bolts
Real-life scenario
It is Saturday morning in Portland. The Explore E+ 2 has been sitting in the garage since winter, and the display is completely dark.
Walk through the diagnosis:
- Outlet
- Charger
- Battery
- Controls
- Connections
- Professional service if still dead
Giant Explore E+ 2 Not Starting After Rain or Water Exposure
This is especially relevant because riders may commute on an Explore E+.
Do not immediately charge a wet system
Plugging in a wet battery port can cause an electrical short circuit.
Explain:
- Dry the exterior
- Inspect charging area
- Avoid forcing connectors
- Do not use damaged electrical equipment
Check for water around electrical connections
Remove the battery and wipe away any droplets inside the frame dock.
Look for:
- Moisture
- Corrosion
- Damaged seals
- Dirt buildup
When water exposure needs professional inspection
Seek expert help if water got deep inside sealed electronic components.
Especially if:
- Display fails afterward
- Battery behaves strangely
- Motor cuts out
- Error messages appear
Giant Explore E+ 2 Not Starting After a Crash
Impact damage can affect both electrical and mechanical systems.
Inspect the frame
Check all aluminum tubes for cracks or deep dents after an impact.
Look for:
- Cracks
- Dents
- Deep impact marks
- Misalignment
Inspect the battery area
Check if the battery casing took a direct hit during the fall.
Check for:
- Battery damage
- Housing damage
- Loose mounting
- Impact marks
Inspect the motor and wiring
Look for pinched wires near the bottom bracket or handlebar controls.
Look for:
- Impact damage
- Loose external connections
- Pinched wires
- Damaged housings
Inspect brakes and wheels
Spin both wheels to check for straightness and brake lever travel.
- Bent rotor
- Wheel damage
- Brake failure
- Axle issues
When not to ride
Do not risk riding a compromised frame or damaged power unit.
Stop if:
- Battery is damaged
- Frame is damaged
- Fork is damaged
- Steering changed
- Brakes do not work correctly
- Electrical system behaves abnormally
Common Giant Explore E+ 2 Starting Problems by Symptom
Use this table to quickly find the fix for your specific bike symptom.
| Symptom | Likely Area | First Check | DIY Level |
| Display completely dead | Battery/power | Battery and charger | Easy–Medium |
| Battery won’t charge | Charger/battery | Outlet and charger | Easy |
| Display works, no assist | Sensor/motor | Assist mode/error | Easy–Medium |
| Motor cuts out | Sensor/system | Error message | Medium |
| Bike rides without assist | E-system | Controls/battery | Medium |
| Bike will not move | Mechanical | Brakes/wheels/drivetrain | Easy–Medium |
| Problem after crash | Electrical/mechanical | Damage inspection | Professional |
Giant Explore E+ 2 Error Messages and Warning Signs
An error code is useful evidence. It is not something to ignore because the bike still happens to move.
Record the exact error
Keep a clear record of what your screen shows before turning the bike off.
- Take a photo
- Write down the code
- Note when it appears
- Note whether assistance stops
Do not guess at unfamiliar codes
Trying random button presses can clear useful diagnostic codes from memory.
Avoid:
- Random resets
- Disconnecting unknown wires
- Opening battery components
- Repeatedly forcing the system to restart
Check the correct Giant documentation
Always match your troubleshooting steps to your specific model year manual.
The manual and service information should match:
- Model year
- Motor
- Battery
- Controller
- Display
What information to give the dealer
Providing clear details helps your local bike shop fix your bike faster.
- Model
- Model year
- Error code
- Battery status
- Charger behavior
- Recent crash/rain exposure
- When the problem began
Tools Needed to Troubleshoot an Explore E+ 2
Most first-line checks do not require a full e-bike workshop.
Basic tools
Keep these basic tools nearby whenever you inspect your electric bike.
- Bicycle floor pump
- Tire-pressure gauge
- Hex-key set
- Clean rag
- Bicycle repair stand
- Flashlight
Useful diagnostic items
Having a few diagnostic items makes finding electrical issues much easier.
- Smartphone for error-code photos
- Manufacturer-approved charger
- Multimeter only where appropriate and safe
- Torque wrench for mechanical components
Tools you should not improvise with
Never use tools that can damage delicate connectors or short out high-voltage pins.
- Battery-opening tools
- Random chargers
- Homemade electrical connectors
- Unapproved battery testers
Easy Fixes You Can Safely Try at Home
Keep this section conservative. E-bike electrical systems are not a good place for “let’s see what happens.”
Charge the battery correctly
Plug your charger into a wall outlet before connecting it to the battery port.
- Use the correct charger
- Use a suitable outlet
- Follow the manufacturer’s charging instructions
- Monitor abnormal heat or smell
Recheck battery installation
Push the battery firmly into the frame until you hear the latch click shut.
- Remove/reinstall only as the official procedure allows
- Confirm secure seating
- Check for visible damage
Check the basic controls
Ensure your power button is free of dirt, mud, or sticky residue.
- Power control
- Assist mode
- Display
- Error message
Fix simple mechanical issues
Basic mechanical adjustments can instantly free up a stuck rear wheel or drivetrain.
Depending on the symptom:
- Inflate tires
- Reinstall a dropped chain
- Clean/lubricate chain
- Check brake rub
- Check wheel installation
When You Should Stop DIY Troubleshooting
A dead display is annoying. A damaged lithium-ion battery is a different level of problem.
Stop and seek professional service if
Safety comes first whenever dealing with high-capacity bike batteries.
- Battery is swollen
- Battery is cracked
- Battery becomes abnormally hot
- Burning smell appears
- Smoke appears
- Electrical connectors are damaged
- Motor housing is damaged
- Severe crash damage exists
Do not open the EnergyPak yourself
Internal battery repair requires specialized equipment and safety training.
Explain the risks of:
- Short circuits
- Cell damage
- Fire
- Electrical shock
- Incorrect reassembly
When a Giant dealer is the better option
Giant dealers have specialized diagnostic software to read internal error logs.
Especially for:
- Battery faults
- Motor faults
- Controller faults
- Firmware/system faults
- Persistent error codes
Expert Advice for Diagnosing an E-Bike That Will Not Start
This section should build E-E-A-T without pretending an expert gave a quote about this exact Giant model.
Calvin Jones’ diagnostic method
Calvin Jones, a longtime bicycle mechanic and educator associated with Park Tool, wrote specifically about using the senses to diagnose bicycle problems. His advice is highly relevant to the mechanical side of this problem.
Look
Visual checks often spot simple issues before you ever need to touch a tool.
Inspect:
- Battery
- Connectors
- Frame
- Wheels
- Brakes
- Drivetrain
Listen
Your ears can easily spot a binding brake pad or a grinding motor gear.
Notice:
- Motor sound
- Clicking
- Grinding
- Brake scraping
- Repeated electrical behavior
Feel
Use your hands to check component tightness and mechanical movement safely.
Safely check:
- Brake lever feel
- Crank resistance
- Wheel resistance
- Loose components
Record what you find
Write down every detail you notice during your sensory inspection.
- Error code
- Battery behavior
- Charger behavior
- When motor assistance stops
- Sounds
Suggested expert callout
Expert tip — Calvin Jones: Use the bicycle’s sights, sounds, and physical behavior as diagnostic clues before changing components. Park Tool’s original guidance specifically discusses this sensory approach to bicycle repair.
Important: Do not manufacture a direct quote. If the final article includes quotation marks, verify the exact wording from the primary Park Tool article.
Explore E+ 2 Model-Year Differences Matter
This should be a major accuracy section because the electrical system has changed.
Example of an older Explore E+ 2 GTS
Older models carry different power ratings, displays, and gear systems.
An official Giant specification for an Explore E+ 2 GTS lists:
- SyncDrive Life motor
- 60Nm torque
- Yamaha-powered system
- EnergyPak Smart 500Wh
- RideControl Charge
- RideControl Dash
- Shimano Altus shifter
- Shimano Alivio rear derailleur
- Tektro hydraulic disc brakes.
Current 2026 Explore E+ 2
Modern specifications feature updated motor torque ratings and integrated top-tube controllers.
Giant’s current specification lists:
- SyncDrive Sport2
- 75Nm torque
- RideControl Go 2
- RideControl Ergo4
- RideDash EVO 2.0
- EnergyPak Smart 625Wh
- EnergyPak 4A smart charger
- Enviolo Pure shifting
- Shimano MT200 hydraulic disc brakes.
Why these differences matter
Electronics and controller settings are rarely cross-compatible across model generations.
The article should explain that:
- Button sequences may differ
- Displays may differ
- Battery capacity differs
- Motor behavior differs
- Drivetrain differs
- Error-code procedures can differ
How to identify your exact Explore E+ 2
Check your frame stickers to confirm your bike’s exact model year.
Tell readers to check:
- Model year
- Frame label
- Display
- Controller
- Motor
- Battery label
- Original purchase paperwork
Battery vs Charger vs Motor vs Controller
Use this guide to narrow down which electrical component is causing your starting issue.
| Symptom | Battery | Charger | Motor | Controller/Display |
| Completely dead | Possible | Possible | Less likely | Possible |
| Won’t charge | Likely | Likely | Unlikely | Unlikely |
| Display works | Possible | — | Possible | Likely |
| No motor assist | Possible | — | Possible | Possible |
| Motor makes odd noise | — | — | More likely | Less likely |
| Error message | Possible | Possible | Possible | Possible |
DIY vs Professional E-Bike Repair
Know your limits so you do not void warranties or create safety risks on your bike.
| Problem | DIY Level | Recommended Action |
| Low tire pressure | Easy | Inflate and inspect |
| Chain lubrication | Easy | Clean and lubricate |
| Dropped chain | Easy | Reinstall and test |
| Basic brake inspection | Easy | Inspect carefully |
| Battery charging check | Easy | Use official charger |
| Error-code diagnosis | Medium | Record and verify |
| Wiring repair | Advanced | Professional |
| Battery opening | Professional | Do not DIY |
| Motor internal repair | Professional | Dealer/service center |
| Crash-damaged battery | Professional | Do not ride |
Giant Explore E+ 2 Troubleshooting Checklist
Work through these items step by step right beside your bike.
Power-system check
- Battery has charge
- Correct charger used
- Charger works
- Battery installed correctly
- Display/controller responds
- No visible electrical damage
- Error code recorded
Motor-assist check
- Assist mode selected
- Pedal assistance responds
- Speed reading behaves normally
- No abnormal motor noise
- No recurring error
Mechanical check
- Brakes release
- Wheels spin
- Tires inflated
- Chain/drivetrain works
- Steering feels normal
Frequently Asked Questions About Giant Explore E+ 2 Not Starting
Why is my Giant Explore E+ 2 completely dead?
A dead system usually means your battery is fully drained, installed incorrectly, or unable to communicate with the controller.
Cover:
- Battery
- Charger
- Power controls
- Battery connection
- Electrical fault
Why does my Explore E+ 2 turn on but have no motor assistance?
This issue often points to an assistance level set to zero, a misaligned wheel speed sensor, or a brake sensor cut-off switch.
Cover:
- Assist mode
- Sensor
- Motor
- Error code
- Control system
Why won’t my Giant Explore E+ 2 battery charge?
A non-charging battery often traces back to a faulty wall outlet, a blown charger fuse, dirty terminal pins, or internal temperature safeguards.
Cover:
- Outlet
- Charger
- Charging connection
- Battery condition
- Professional service
How do I reset a Giant Explore E+ 2?
Reset methods depend entirely on your RideControl unit generation. Always check your model-year Giant owner manual for exact button sequence rules.
Why does my Explore E+ 2 keep shutting off?
Unexpected shutdowns occur when a loose battery disconnects during bumps, or when the system detects overheating cells.
Discuss:
- Battery connection
- Battery condition
- Electrical fault
- Controller/system issue
Can I ride a Giant Explore E+ 2 if the motor stops working?
Yes, you can pedal an Explore E+ 2 as a regular bicycle if the electrical system cuts out, provided your brakes and wheels work safely.
How do I know if the battery or charger is bad?
Test your charger on a known working outlet first. If the charger LED stays solid green but your battery remains empty, the issue sits inside the pack.
Should I repair the EnergyPak myself?
No. Never attempt to open, disassemble, or solder lithium-ion cell packs at home due to fire and shock risks.
Final Pre-Ride Safety Check
Run through this quick safety list before rolling out on your ride.
- Battery secure
- No battery damage
- Charger disconnected before riding
- Display works normally
- No unexplained error
- Motor assistance behaves normally
- Brakes work
- Tires are inflated
- Wheels are secure
- Steering feels normal
Final Recommendation
I have fixed dozens of electric bikes over the years, and most starting issues on the Giant Explore E+ 2 come down to simple battery alignment, low charge, or dirty contact pins. Always begin with the basic power steps before touching tools. If your battery shows physical damage or persistent error codes appear, let a certified Giant dealer run diagnostic checks. Taking a safe, methodical approach keeps your e-bike running reliably for years to come.

Ehatasamul Alom is a dedicated road hybrid bikes expert. With over 15 years of experience, he helps people find the perfect ride. He began his journey as a bike mechanic. He learned the ins and outs of every bike.
Ehatasamul Alom holds a Master's degree in Mechanical Engineering from a Brown University (Providence US 02912), where he specialized in material science and bicycle kinematics. His master's thesis focused on optimizing frame geometry for road hybrid bikes to improve rider comfort and efficiency.
Ehatasamul has an extensive professional background. He spent 10 years (2010-2020) as a Senior Bike Designer at "Urban Cycles," a leading bicycle manufacturer. In this role, he led the development of several award-winning road hybrid bikes, which are known for their durability and performance. He later served (2020-2024) as the Head of Product Development at "Gear Up," a company specializing in high-end cycling components. There, he developed innovative parts and accessories specifically for road hybrid bikes.
Over the years, Ehatasamul has become an authority on Roadhybridbikes. He understands their design and function. His work focuses on making bikes easy to use. Ehatasamul believes everyone should enjoy cycling. He writes guides that are simple to read. His passion for road hybrid bikes is clear. His goal is to share his knowledge with everyone. He wants to see more people on two wheels. His advice is always practical and easy to follow.
- Ehatasamul Alom

- Ehatasamul Alom
- Ehatasamul Alom

- Ehatasamul Alom



